This is an old revision of the document!
Table of Contents
Introduction
FS-FlightControl is a touch optimized instructor station for Lockheed Martin Prepar3D® 1.x, 2.x and 3.x as well as Microsoft Flight Simulator X including Steam Edition.
It is used by flight schools and flight simulation centers, but also provided at a greatly reduced price to the flight enthusiast community.
In case you should have any questions about FS-FlightControl, a new idea or you need a specific feature, please do not hesitate to contact us.
FS-FlightControl is very actively developed and therefore we really look forward to any comments or new ideas to make our product even better!
Installation
This section of the manual will guide you through the product installation of FS-FlightControl including setting up remote flight simulator access:
Product Setup
FS-FlightControl includes an easy to use setup system that will guide you through the product installation allowing you to change installation folder and other settings.
Welcome Screen
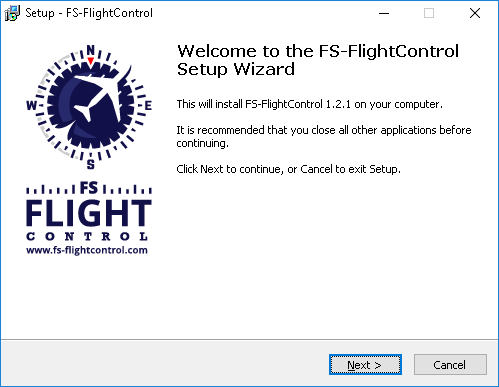
After you have selected the desired setup language this welcome screen is displayed.
License Agreement
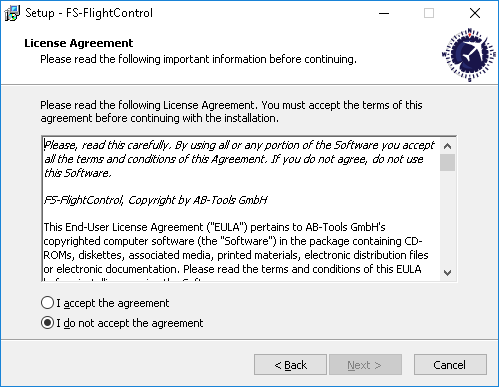
First you need to accept the license agreement by selecting I accept the agreement to proceed with the installation.
Select Destination Location
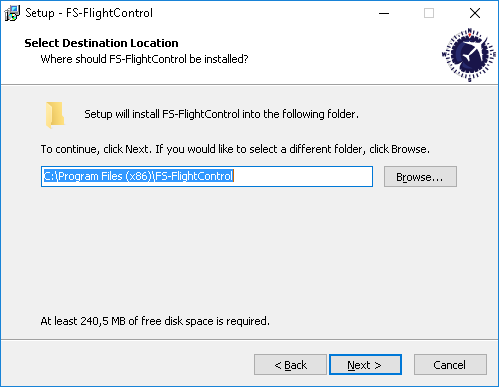
In this screen you can change the destination location of the installation.
Select Start Menu Folder
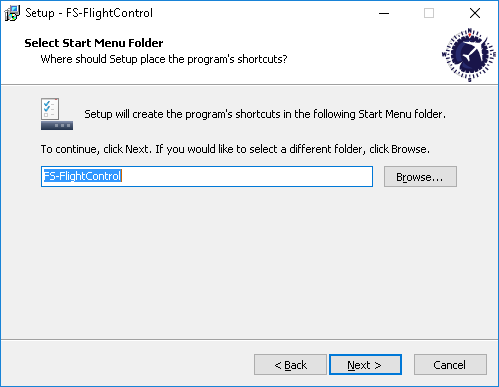
Here you can select where the product shortcut should be placed in the start menu.
Select Additional Tasks
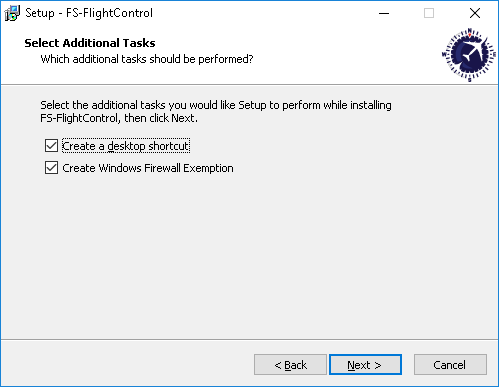
In this step you can choose if a Desktop icon should be created for FS-FlightControl.
Additionally there is an option to automatically create a Windows Firewall exemption for FS-FlightControl: It is highly recommended to keep this selected to avoid problems later on!
Ready to Install
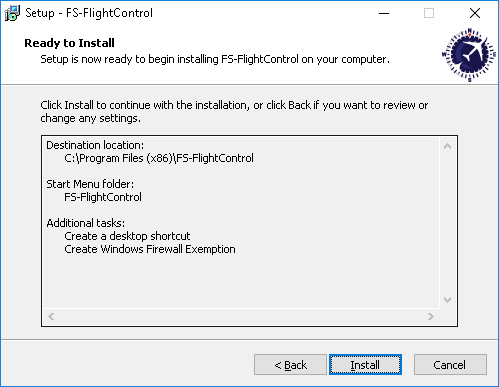
Now everything is ready to install.
Please click on the button Install to start the product installation.
Installing
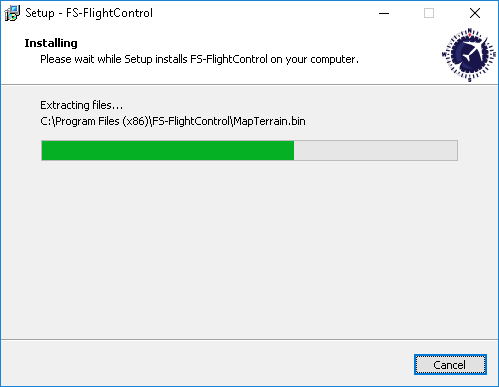
While the product files are copied this progress screen is displayed.
SimConnect End User License Agreement

If you do not have any SimConnect client libraries installed yet the setup will automatically install compatible SimConnect libraries.
In this case you get this SimConnect end user license agreement (EULA) displayed. Please Accept it to continue with the installation.
Finish Screen
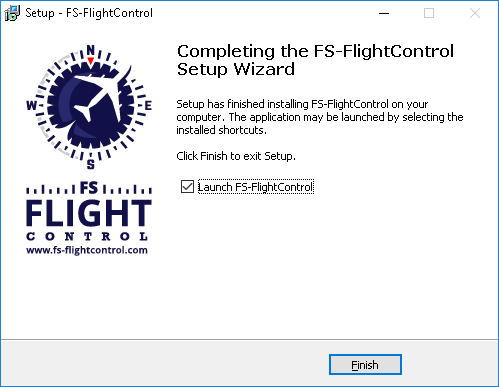
Now the FS-FlightControl installation has been finished!
If you keep the check box Launch FS-FlightControl selected the product will be started directly after you clicked on the button Finish.
SimConnect Network Wizard
If you want to use FS-FlightControl on a computer other than the computer Prepar3D or FSX is running on, the SimConnect Network Wizard will guide you through everything needed to enable FS-FlightControl to connect to the remote flight simulator computer.
 Note: This is only needed if FS-FlightControl is not executed on the same computer as Prepar3D or FSX.
You will find the SimConnect Network Wizard in a subfolder of FS-FlightControl in your Windows Documents or My Documents folder.
Please first copy all files of the SimConnect Network Wizard to your computer where Prepar3D or FSX is installed and then execute the SimConnectNetworkWizard.exe.
To make this process as easy as possible for you, we have prepared a YouTube video tutorial for that:
Welcome Screen
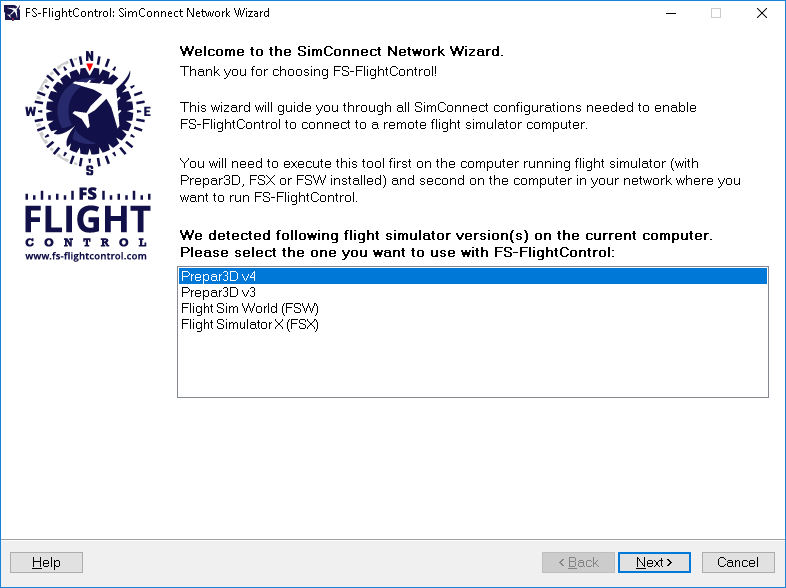
After you started the SimConnect Network Wizard this welcome screen will be displayed.
In case you have more than one compatible flight simulator software installed, please first select which one you would like to use together with FS-FlightControl.
Then please click on the button Next >.
Settings on Flight Simulator Computer
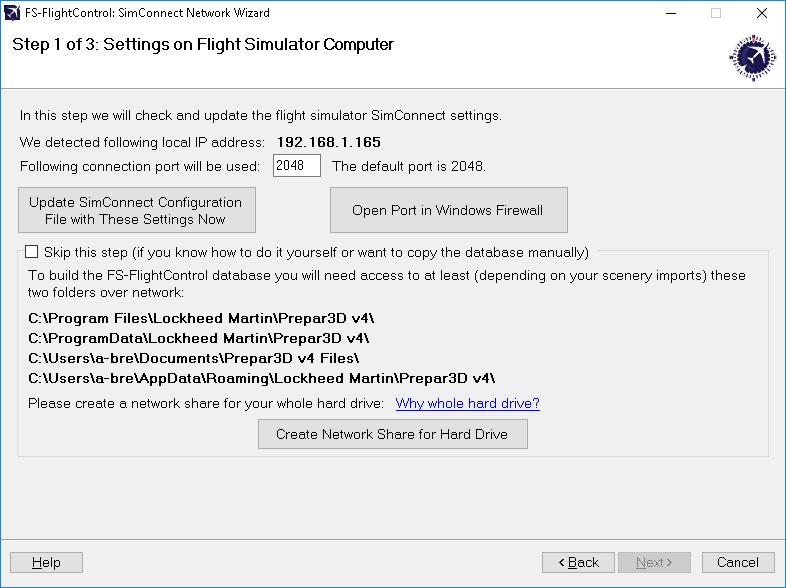
On the next screen, the first step in the setup process, all settings on the flight simulator computer are done.
First the local IP address that will be used to connect to the flight simulator computer is being automatically detected and shown. If there is more than one IP address detected the Select IP Address dialog is shown.
Next the port is shown which will be used for connection.
By default port 2048 is used and you normally don't need to change that. But if this port cannot be used on your system for whatever reason, you can change it here.
Now please press the button Update SimConnect Configuration File with These Settings Now to store the SimConnect network settings. In case a SimConnect configuration exists on the computer already, additional settings will be added if needed.
Additionally this port needs to be opened in the Windows Firewall. Therefore press the button Open Port in Windows Firewall even if the Windows Firewall is currently disabled. This will make sure everything still works if it gets enabled again later on for some reasons.
Select IP Address

In case there is more than one IP address detected, this dialog will pop-up asking you to choose the correct one.
Note: Only in rare cases there will be more than one IP address detected. So normally everything is done automatically and you do not need to select anything here. But if this dialog is shown and you do not know which is the correct one, try one and if FS-FlightControl cannot connect with that, just run the wizard again and change the IP address.
Create Network Share
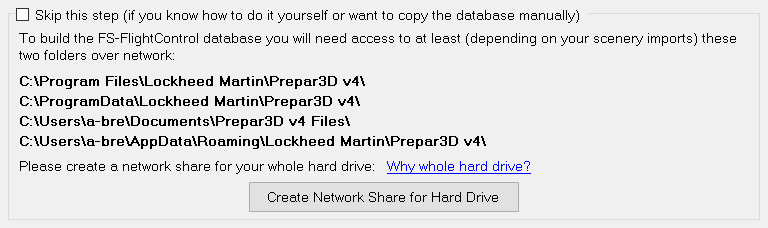
Beside accessing the flight simulator directly via SimConnect, you will also need to build the FS-FlightControl database that contains all the information about airports, navigation aids and so on. To be able to build that FS-FlightControl needs access some flight simulator directories.
Therefore you may create a hard drive network share in this wizard step as well by clicking on the button Create Network Share for Hard Drive.
You can also do that manually if you want and for this case there is an option to skip this part of the configuration although we recommend to let the wizard create the network share automatically.
Note: You may ask why we need to create a network share for the whole hard drive?
The reason is that due to the fact that depending on your scenery imports defined in your scenery config file it is likely that there is access needed to (many) more folders than just the two mentioned in the screen.
Change Computer
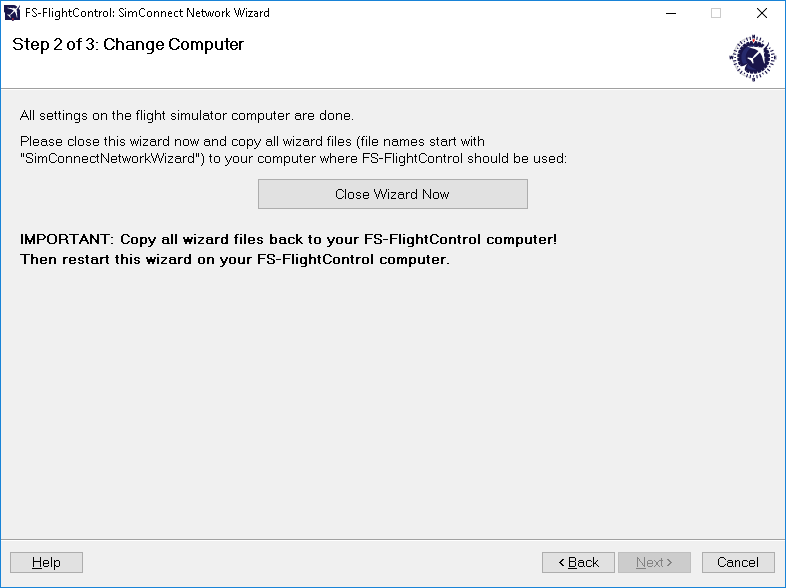
Now everything is done on the flight simulator computer and therefore it is time to go on with the computer that should run FS-FlightControl.
Therefore please close the wizard now, copy all wizard files (file names start with SimConnectNetworkWizard) to the computer that should run FS-FlightControl and start the wizard there again.
Note: It is important that you copy all wizard files to the other computer as they were changed and contain the connection information needed to setup the FS-FlightControl computer.
Settings on FS-FlightControl Computer
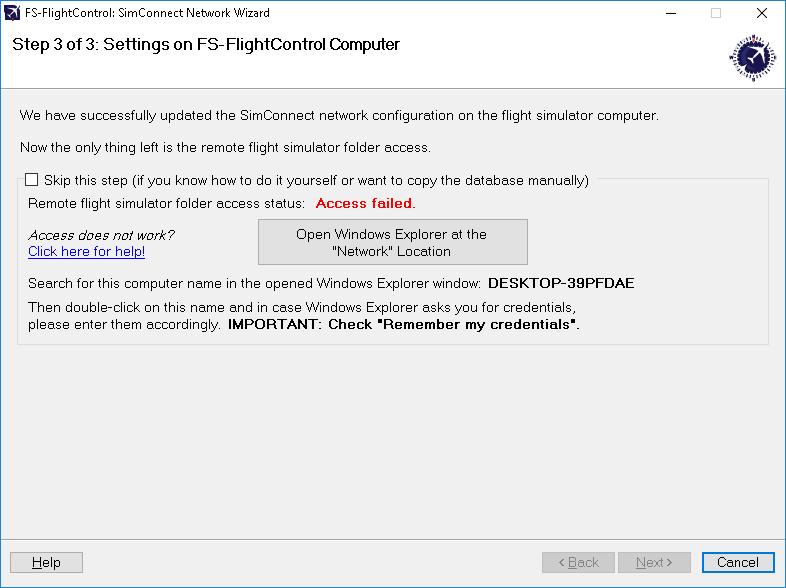
After you have started the wizard on your FS-FlightControl computer you should directly see this screen. Here the configuration on the FS-FlightControl computer will be applied.
Remote Folder Access
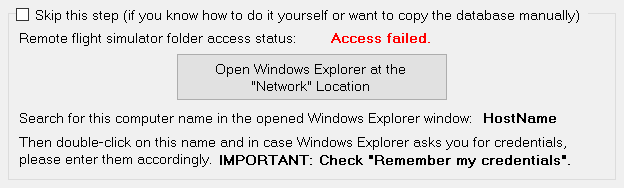
As written above already for building the FS-FlightControl database a folder access to your flight simulator computer is required. If you did not skip the corresponding Create Network Share procedure above, you can make sure now the remote access works.
To check that please click on the button Open Windows Explorer at the “Network” Location and look for the computer name as shown on this wizard page.
Then please double-click on this computer name to access it and in case Windows Explorer asks you for credentials, please enter them accordingly.
Note: It is important that you check the Remember my credentials checkbox as otherwise FS-FlightControl will not be able to access the remote folders.
After the remote folder access was verified the shown access status should change to Access successful. and you can click on the button Next >.
Remote Folder Access not Possible
If for some reason you cannot get the remote folder access to work, that is also no problem.
The access to the remote folder is only used to build the FS-FlightControl database once and is not needed anymore afterwards.
Therefore you can easily work around a folder access problem by just building the FS-FlightControl database on the computer where the flight simulator itself is installed.
Just install FS-FlightControl on your main flight simulator computer and start the database build there. In the Database Build dialog you will find a small link Open FS-FlightControl data directory in Explorer. Click on that after the build has been completed and just copy the file Database.bin to your other computer in the same FS-FlightControl data directory.
After that you should be able to start FS-FlightControl on your remote computer without the need of a folder access to your flight simulator computer.
Note: You do not need an additional computer license for FS-FlightControl just for building the database and copy it to your other computer. In this case one license for the computer where you really want to use FS-FlightControl is totally enough.
Finish Screen
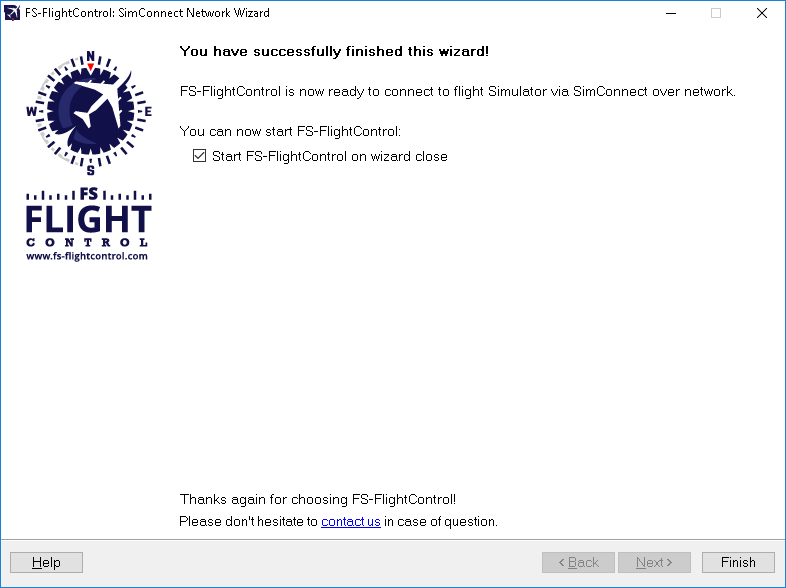
Now all SimConnect configurations are completed successfully and you are ready to start FS-FlightControl!
Database Build
All FS-FlightControl Steam products come with a pre-build database against the latest default simulator scenery.
Therefore no manual database build is needed as long as you do not use any additional scenery DLCs.
Database Build
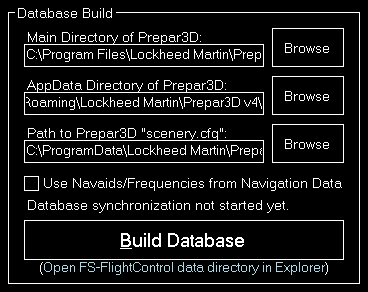
After you have installed additional scenery DLCs you should rebuild also the FS-FlightControl Steam product database.
All paths should be pre-selected automatically, so just hit the button Build Database to start the database build!
Dialogs
This manual section explains all dialogs that are used within FS-FlightControl and do not depend on a certain module:
License
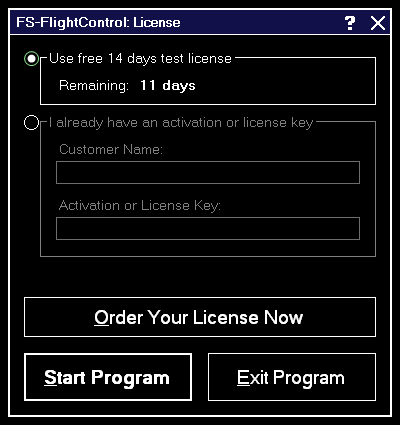
Use this dialog to enter your FS-FlightControl license information and activate the product or check how long your test license is still valid.
Test License

Here you can see how long your test license is still valid.
Note: You can even still start the program after the test license has expired, but then it will close automatically after 5 minutes.
License Data
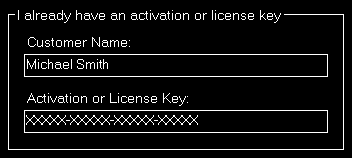
After your purchased your license, you can enter your activation data into this section.
Note: If you want to switch your license from one computer to another, just deactivate your license on the old computer in the Info module first.
Update Available
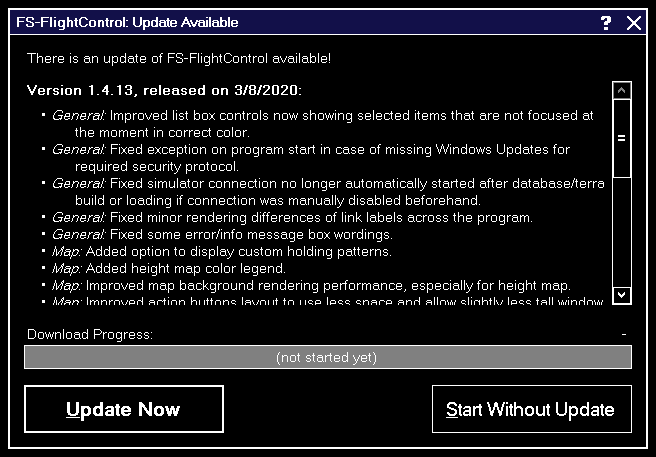
FS-FlightControl checks for program updates on every start automatically.
If there is an update available this dialog is shown with the list of changes.
It is recommended to always apply program update to benefit from new program features and corrections.
Navigation Data Update
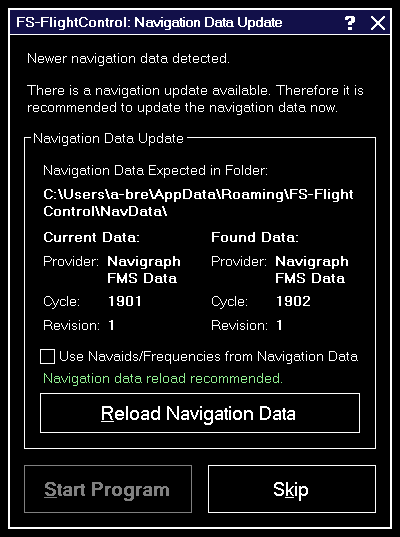
The navigation data update dialog informs you about a new AIRAC data cycle that you can import to FS-FlightControl to have up-to-date waypoints and airways.
Both Aerosoft with NavDataPro as well as Navigraph with FMS Data provide AIRAC data updates for FS-FlightControl.
Note: This separate navigation data update is only required for Prepar3D, FSX and FSW. For X-Plane please just start a new database build after you have updated the X-Plane internal navigation database.
Update Information

This section shows the current and new data provider as well as some information about the data cycles involved.
It is recommended that you reload the navigation data whenever an update is available to always work with the latest waypoints and airways in FS-FlightControl.
AIRAC Data Usage
In this section we want to provide you with some information about which part of the AIRAC data is currently imported and used by FS-FlightControl.
Currently only waypoints, airways as well as SID and STAR procedures are imported from the AIRAC data, but no airports and navaids. Also frequencies are not updated based on the AIRAC data.
The reason for this is that it just makes no sense if you see for example a new runway of an airport in FS-FlightControl, because this is imported from the AIRAC data, but this new runway just is not present in flight simulator itself.
Same goes for the frequencies: An ILS frequency will only work correctly if flight simulator knows about exactly this frequency. Therefore it is important that you see in FS-FlightControl the same frequency that also flight simulator uses - also if this might be outdated.
We recommend to keep the flight simulator data itself as up-to-date as possible. You can do so by getting new sceneries for airports and regions you are mainly flying. But there are also free tools to update frequencies in flight simulator, for example on this website.
Note: Please keep in mind that you always need to start a database rebuild in FS-FlightControl after you did changes to your flight simulator data.
Maximum Activation Count

This dialog is displayed when you tried to activate FS-FlightControl on more computers than you have purchased licenses for.
If you should try to move FS-FlightControl to a new computer, please deactivate the license on the old computer first: You can easily do so in the Info module.
After deactivation of the license on the old computer you can activate it again on a new one. If the deactivation on the old computer should not be possible for some reasons, please contact us.
In case you need more licenses, you can purchase them for a considerably reduced price. Just click on the button Buy Additional PC License in this dialog.
Choose Simulator
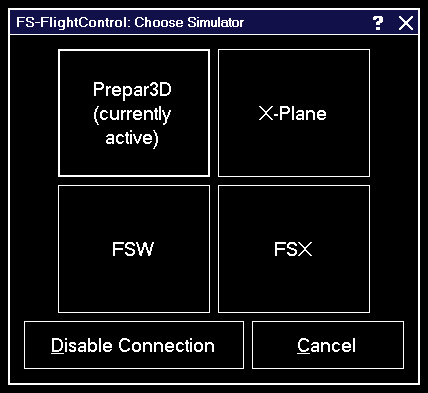
This dialog gives you the option to easily switch between the simulators that have been created in the Settings module.
You can also completely disable the simulator connection.
Touch Input Helper
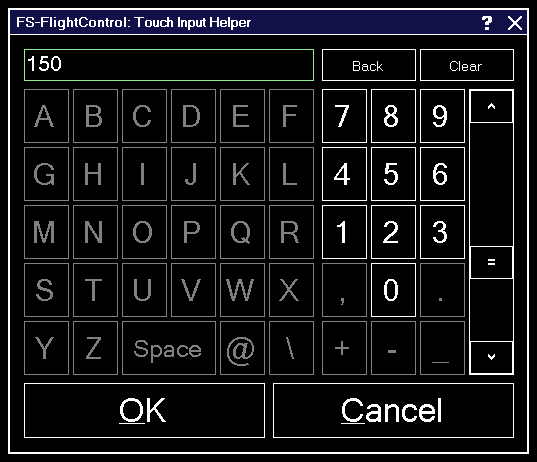
The touch input helper dialog enables you to easily work with FS-FlightControl also with a touch-enabled monitor or tablet device without any keyboard or mouse involved.
By default the touch input helper is enabled and will pop-up whenever you click or touch in an input field.
If you should not like or need this, you can easily disable it in the Settings module.
Note: While the Android or iOS app is connected the touch input helper gets activated automatically independent of your settings.
Touch Input Helper for Selection
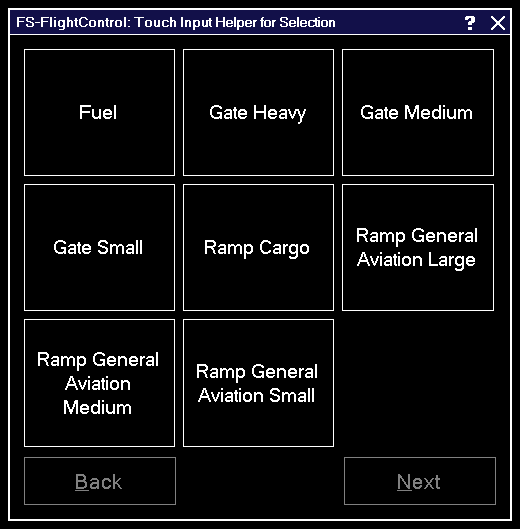
The touch input helper dialog for selection enables you to easily work with FS-FlightControl also with a touch-enabled monitor or tablet device without any keyboard or mouse involved.
If you would like to enable it, you can do so in the Settings module.
Note: While the Android or iOS app is connected the touch input helper for selection gets activated automatically independent of your settings.
Select Aircraft Profile
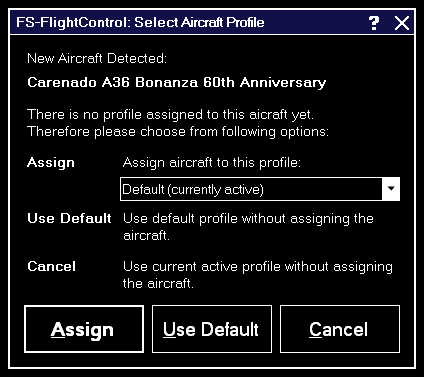
Assign an aircraft to an aircraft profile with this dialog after the current aircraft was changed in your flight simulator.
You can also choose to use the default or the current profile without assigning the aircraft.
Note: This dialog will only appear if you have enabled aircraft profiles in the Settings module.
Select Airport
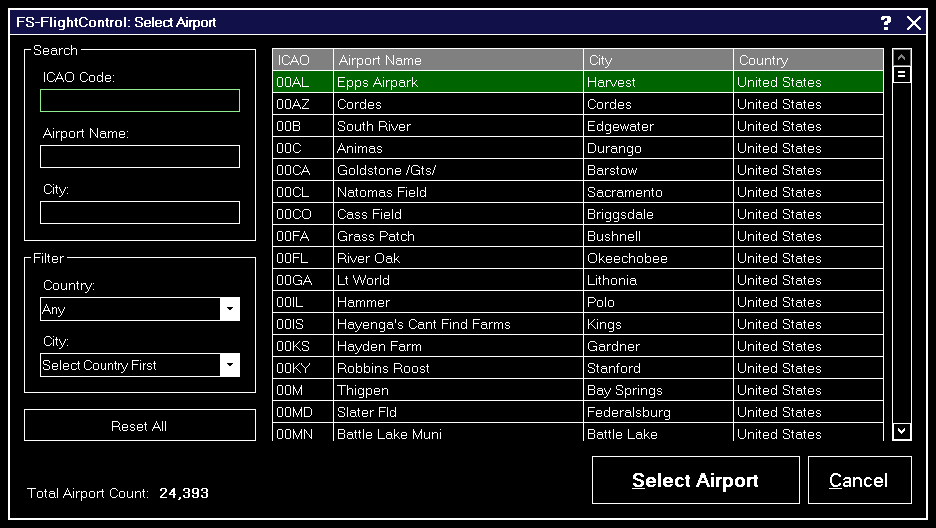
You can search for an airport by entering the ICAO code, airport name or city.
Alternatively you can also filter the list by selecting a country or city.
For your information the total count of all airports is displayed at the bottom.
Select Runway
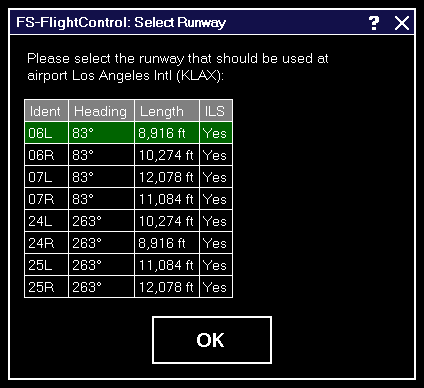
With this dialog you can select the runway that should be used.
Select Airway

If between two flight plan waypoints there is more than one airway this select airway dialog will be displayed giving you the option to choose one.
Select Procedure
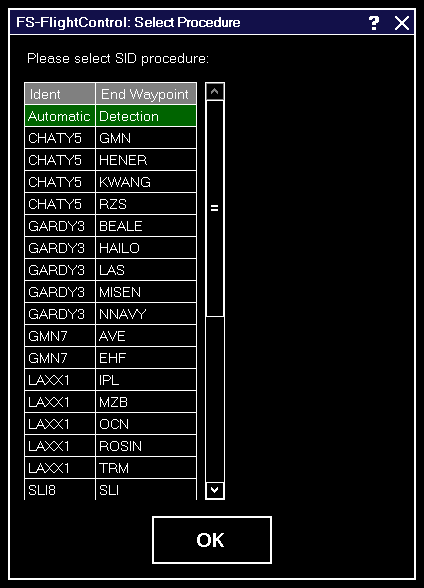
When an airway route using SIDs and STARs is calculated this dialog gives you the option to choose a specific SID or STAR.
Alternatively you can just leave it as Automatic Detection which will use the SID/STAR resulting in the shortest overall route distance.
Find Object
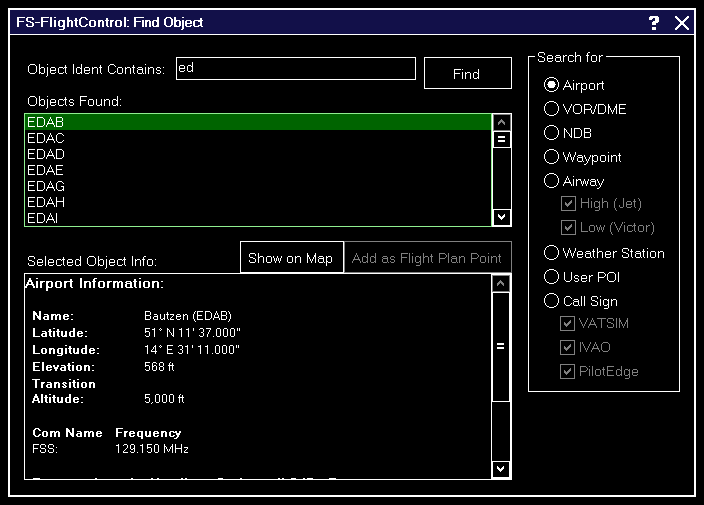
In this dialog you can search for a wide range of different objects on the map.
Just type in the first characters of the ident of the object you want to find and select what type of object you are searching for.
After clicking on the Find button a list of found objects matching your search criteria will be displayed.
When you click on one of them information about this object is displayed similar to the Map Information pop-up.
Then you can click on Show on Map to center the currently selected object on the map. You can even use the button Add as Flight Plan Point to directly add the selected object to your flight plan if this is possible for the object type.
Note: Generally all objects are found here also if the corresponding map layer is currently disabled. But this is not the case for the call sign search of the online networks: These can only be found if the corresponding layer is activated.
Real-Time Weather Information
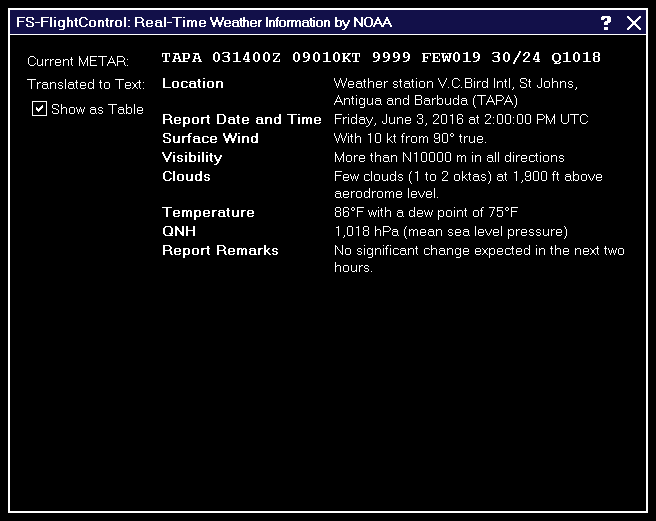
In this dialog the real-time METAR data of the selected airport or weather station is displayed.
Additionally the METAR data is decoded into readable text in which you can decide if it should be displayed as table or as continuous text.
Note: You can change the used real-time weather source in the Settings module.
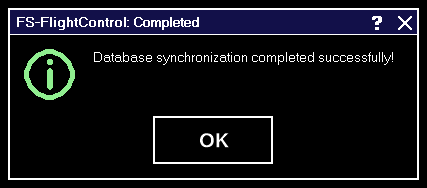
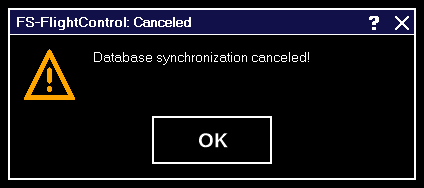
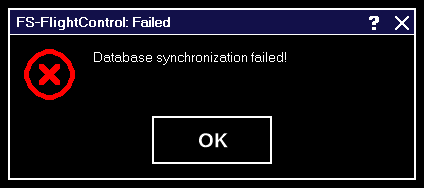
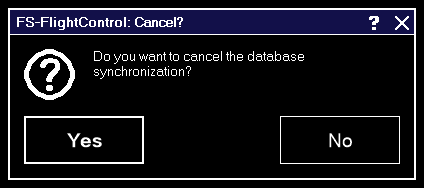
Please wait
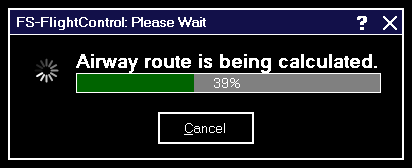
Whenever there is a process executed you need to wait for this dialog is displayed.
Note: A progress and also the option to cancel the process is not always available.
Other
In this section everything that does not fit anywhere else is located:
Title Bar
In the title bar of FS-FlightControl much information is displayed that is explained in the following.
Additionally some actions can be triggered from the title bar as well.
Product Name and Version

First the product name and the current product version is displayed.
License Status

Next on the left side you see your license status.
Loaded Aircraft

At first on the right side the name of the currently in flight simulator loaded aircraft is displayed.
Connection Status

Beside that the current connection status to the flight simulator is shown.
This can be either Connected in green, Connecting… in yellow or Disconnected in red.
If you click on the connection status the connection to flight simulator will be disabled resulting in the text Disabled being displayed in blue. Clicking on it once again will enable the connection again.
In case you have more than one simulator defined the Choose Simulator dialog will appear instead.
Window Action Icons
![]()
On the top right you can find several window action icons.
Their functionality is in the display order like this:
- Minimizes the FS-FlightControl window to the task bar.
- Maximizes the FS-FlightControl window. If it was already maximized clicking again on this icon will revert it to normal window state. Double-clicking on the title bar has the same effect than clicking on this icon.
- Detaches the currently loaded FS-FlightControl module to a separate window.
- Opens this online manual.
- Closes the FS-FlightControl program.
Main Menu Buttons

On the bottom of the FS-FlightControl window the main menu buttons are displayed.
All buttons in the first row and the buttons up to Settings in the second row as well as the About button will show the corresponding FS-FlightControl module.
The Freeze button will trigger an aircraft position freeze in flight simulator. This means that you can still control the aircraft (flight simulator is not paused), change parameters like pitch and bank angle as well as airspeed, but the aircraft will not leave its current position. This can be used, for example, after the aircraft was positioned on an approach to give the pilot a chance to get all aircraft parameters like airspeed under control before the real approach starts. If the aircraft position is currently frozen this button will be displayed in red.
In contrast the Pause button will completely pause the flight simulator. If the flight simulator is currently paused this button will be displayed in red.
Finally the Exit button will close the FS-FlightControl application.
Right down at the bottom right there are some small diagonal lines displayed. Click and hold in this area to resize the FS-FlightControl window to your needs.
Keyboard Shortcuts
All main menu buttons can also be access by keyboard shortcuts.
Just keep the keys CTRL and SHIFT pressed and then add one of the following keys for the corresponding module or action button:
| Key | Module or Action |
|---|---|
P | Position |
M | Map |
F | Flight Plan |
C | Conditions |
B | Pushback |
L | Fuel/Load |
V | View/Slew |
I | Failures |
A | Aircraft |
S | Statistics |
N | Network |
O | Motion |
T | Settings |
H | Info |
U | Pause |
E | Exit |
Aircraft Support
You may notice a sentence like this in some areas of FS-FlightControl:
All functions in this module are highly aircraft dependent.
They may work well with third party aircraft, too, but we can only guarantee that they work with all default aircraft of flight simulator.
This restriction arises due to the fact that several third party aircraft vendors do not stick to the default flight simulator access functions, but use their own proprietary techniques.
Obviously we therefore cannot make sure that every button in the program areas where this info is displayed work with all third party aircraft.
Note: This applies only to few areas of the program and does not mean they do not work with third party aircraft, we just cannot guarantee it.