This is an old revision of the document!
Table of Contents
Introduction
FS-FlightControl is a touch optimized instructor station for Lockheed Martin Prepar3D® 1.x, 2.x and 3.x as well as Microsoft Flight Simulator X including Steam Edition.
It is used by flight schools and flight simulation centers, but also provided at a greatly reduced price to the flight enthusiast community.
In case you should have any questions about FS-FlightControl, a new idea or you need a specific feature, please do not hesitate to contact us.
FS-FlightControl is very actively developed and therefore we really look forward to any comments or new ideas to make our product even better!
Installation
This section of the manual will guide you through the product installation of FS-FlightControl including setting up remote flight simulator access:
Product Setup
FS-FlightControl includes an easy to use setup system that will guide you through the product installation allowing you to change installation folder and other settings.
Welcome Screen
After you have selected the desired setup language this welcome screen is displayed.
License Agreement
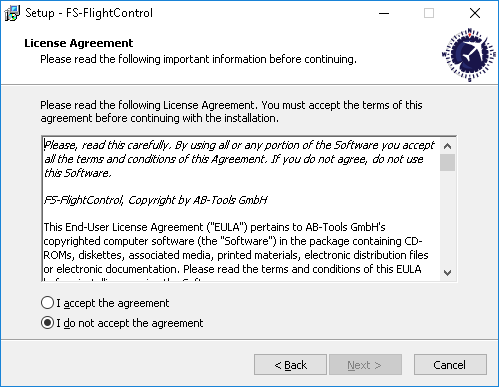
First you need to accept the license agreement by selecting I accept the agreement to proceed with the installation.
Select Destination Location
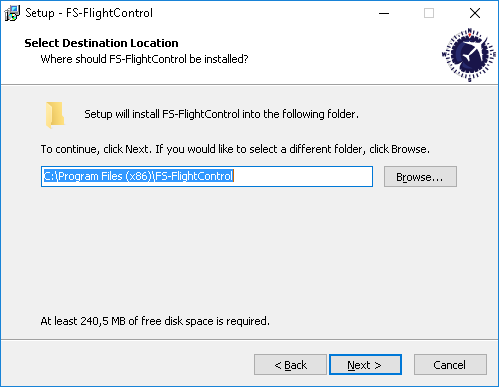
In this screen you can change the destination location of the installation.
Select Start Menu Folder
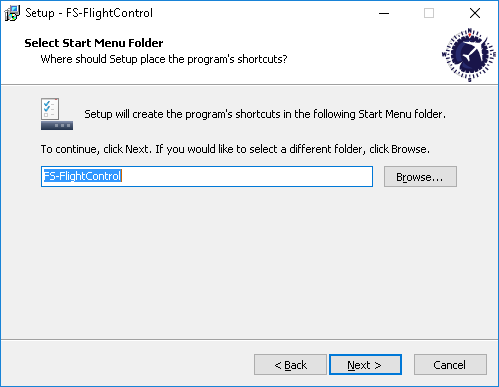
Here you can select where the product shortcut should be placed in the start menu.
Select Additional Tasks
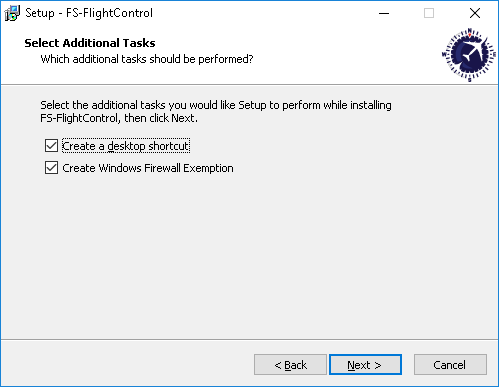
In this step you can choose if a Desktop icon should be created for FS-FlightControl.
Additionally there is an option to automatically create a Windows Firewall exemption for FS-FlightControl: It is highly recommended to keep this selected to avoid problems later on!
Ready to Install
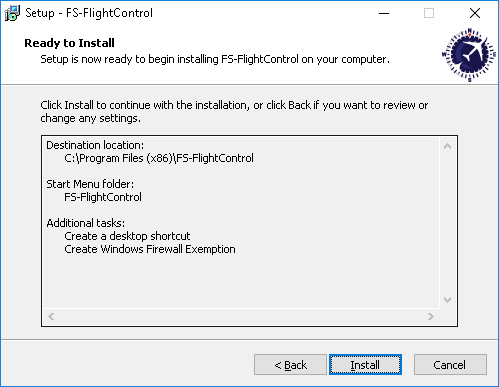
Now everything is ready to install.
Please click on the button Install to start the product installation.
Installing
While the product files are copied this progress screen is displayed.
SimConnect End User License Agreement

If you do not have any SimConnect client libraries installed yet the setup will automatically install compatible SimConnect libraries.
In this case you get this SimConnect end user license agreement (EULA) displayed. Please Accept it to continue with the installation.
Finish Screen
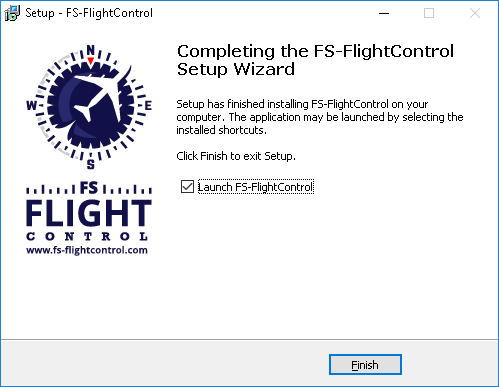
Now the FS-FlightControl installation has been finished!
If you keep the check box Launch FS-FlightControl selected the product will be started directly after you clicked on the button Finish.
SimConnect Network Wizard
If you want to use FS-FlightControl on a computer other than the computer Prepar3D or FSX is running on, the SimConnect Network Wizard will guide you through everything needed to enable FS-FlightControl to connect to the remote flight simulator computer.
 Note: This is only needed if FS-FlightControl is not executed on the same computer as Prepar3D or FSX.
You will find the SimConnect Network Wizard in a subfolder of FS-FlightControl in your Windows Documents or My Documents folder.
Please first copy all files of the SimConnect Network Wizard to your computer where Prepar3D or FSX is installed and then execute the SimConnectNetworkWizard.exe.
To make this process as easy as possible for you, we have prepared a YouTube video tutorial for that:
Welcome Screen
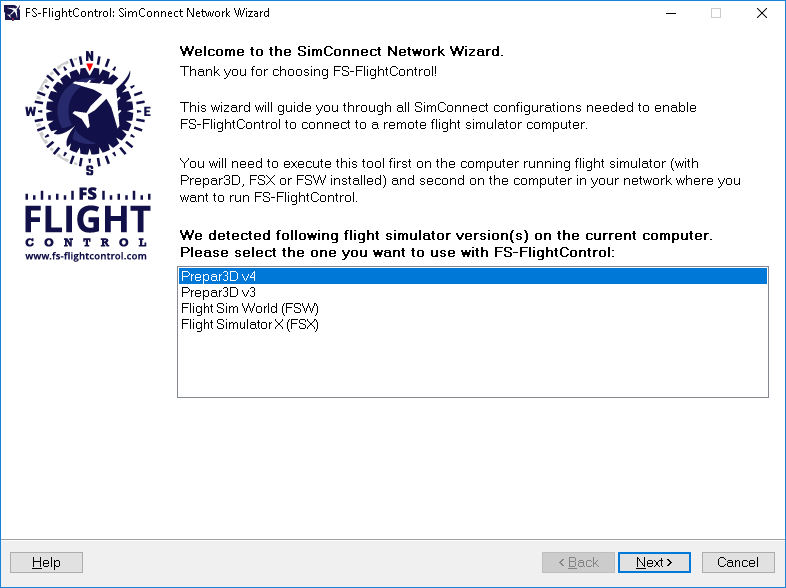
After you started the SimConnect Network Wizard this welcome screen will be displayed.
In case you have more than one compatible flight simulator software installed, please first select which one you would like to use together with FS-FlightControl.
Then please click on the button Next >.
Settings on Flight Simulator Computer
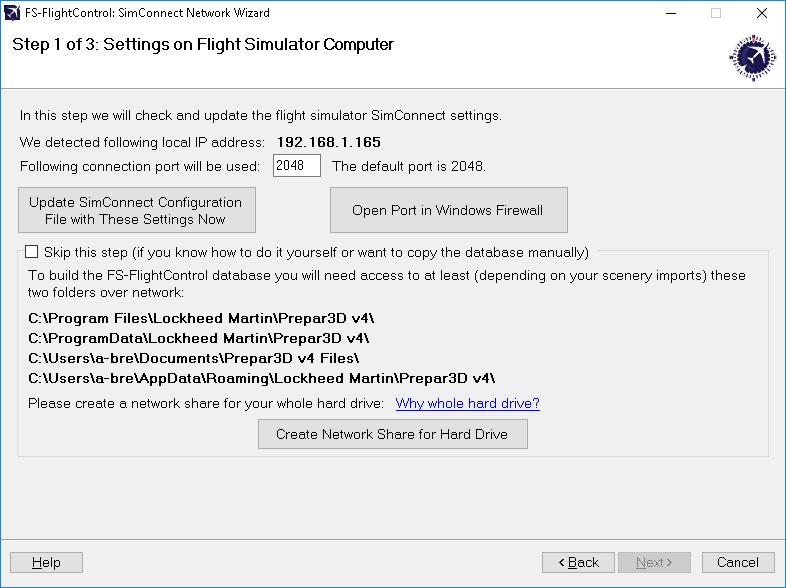
On the next screen, the first step in the setup process, all settings on the flight simulator computer are done.
First the local IP address that will be used to connect to the flight simulator computer is being automatically detected and shown. If there is more than one IP address detected the Select IP Address dialog is shown.
Next the port is shown which will be used for connection.
By default port 2048 is used and you normally don't need to change that. But if this port cannot be used on your system for whatever reason, you can change it here.
Now please press the button Update SimConnect Configuration File with These Settings Now to store the SimConnect network settings. In case a SimConnect configuration exists on the computer already, additional settings will be added if needed.
Additionally this port needs to be opened in the Windows Firewall. Therefore press the button Open Port in Windows Firewall even if the Windows Firewall is currently disabled. This will make sure everything still works if it gets enabled again later on for some reasons.
Select IP Address

In case there is more than one IP address detected, this dialog will pop-up asking you to choose the correct one.
Note: Only in rare cases there will be more than one IP address detected. So normally everything is done automatically and you do not need to select anything here. But if this dialog is shown and you do not know which is the correct one, try one and if FS-FlightControl cannot connect with that, just run the wizard again and change the IP address.
Create Network Share
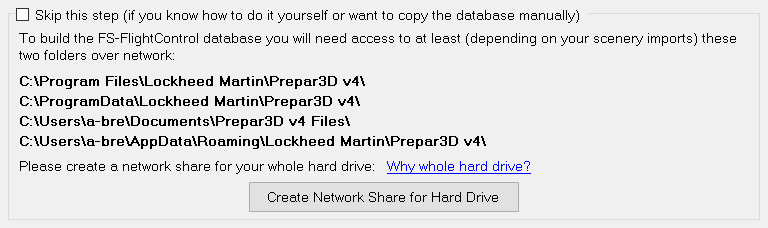
Beside accessing the flight simulator directly via SimConnect, you will also need to build the FS-FlightControl database that contains all the information about airports, navigation aids and so on. To be able to build that FS-FlightControl needs access some flight simulator directories.
Therefore you may create a hard drive network share in this wizard step as well by clicking on the button Create Network Share for Hard Drive.
You can also do that manually if you want and for this case there is an option to skip this part of the configuration although we recommend to let the wizard create the network share automatically.
Note: You may ask why we need to create a network share for the whole hard drive?
The reason is that due to the fact that depending on your scenery imports defined in your scenery config file it is likely that there is access needed to (many) more folders than just the two mentioned in the screen.
Change Computer
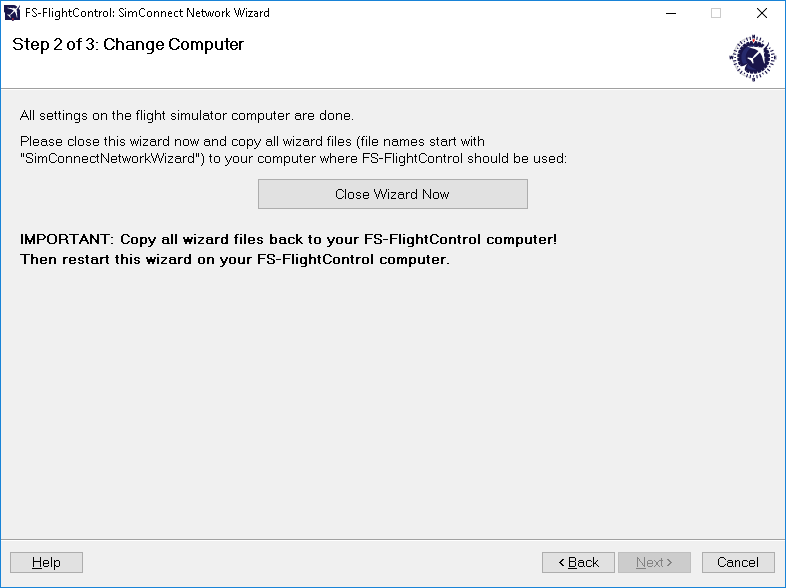
Now everything is done on the flight simulator computer and therefore it is time to go on with the computer that should run FS-FlightControl.
Therefore please close the wizard now, copy all wizard files (file names start with SimConnectNetworkWizard) to the computer that should run FS-FlightControl and start the wizard there again.
Note: It is important that you copy all wizard files to the other computer as they were changed and contain the connection information needed to setup the FS-FlightControl computer.
Settings on FS-FlightControl Computer
After you have started the wizard on your FS-FlightControl computer you should directly see this screen. Here the configuration on the FS-FlightControl computer will be applied.
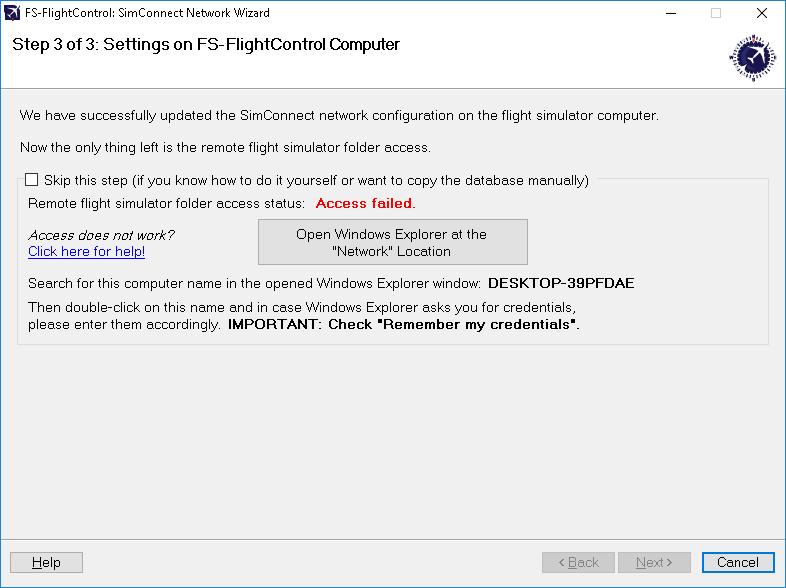
Remote Folder Access
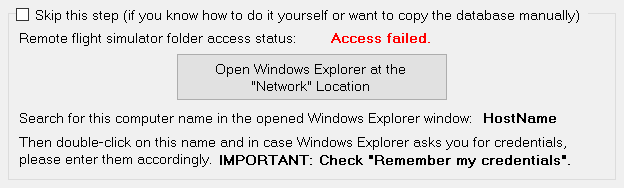
As written above already for building the FS-FlightControl database a folder access to your flight simulator computer is required. If you did not skip the corresponding Create Network Share procedure above, you can make sure now the remote access works.
To check that please click on the button Open Windows Explorer at the “Network” Location and look for the computer name as shown on this wizard page.
Then please double-click on this computer name to access it and in case Windows Explorer asks you for credentials, please enter them accordingly.
Note: It is important that you check the Remember my credentials checkbox as otherwise FS-FlightControl will not be able to access the remote folders.
After the remote folder access was verified the shown access status should change to Access successful. and you can click on the button Next >.
Remote Folder Access not Possible
If for some reason you cannot get the remote folder access to work, that is also no problem.
The access to the remote folder is only used to build the FS-FlightControl database once and is not needed anymore afterwards.
Therefore you can easily work around a folder access problem by just building the FS-FlightControl database on the computer where the flight simulator itself is installed.
Just install FS-FlightControl on your main flight simulator computer and start the database build there. In the Database Build dialog you will find a small link Open FS-FlightControl data directory in Explorer. Click on that after the build has been completed and just copy the file Database.bin to your other computer in the same FS-FlightControl data directory.
After that you should be able to start FS-FlightControl on your remote computer without the need of a folder access to your flight simulator computer.
Note: You do not need an additional computer license for FS-FlightControl just for building the database and copy it to your other computer. In this case one license for the computer where you really want to use FS-FlightControl is totally enough.
Finish Screen
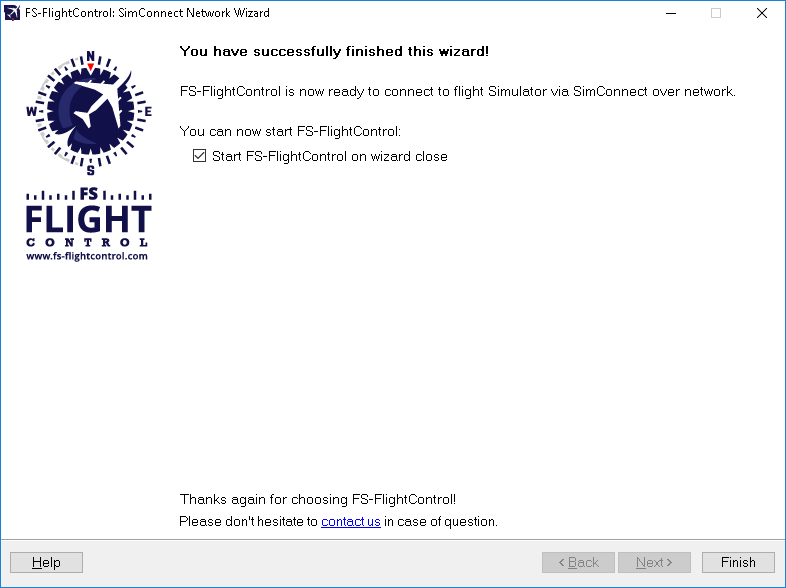
Now all SimConnect configurations are completed successfully and you are ready to start FS-FlightControl!
Database Build
All FS-FlightControl Steam products come with a pre-build database against the latest default simulator scenery.
Therefore no manual database build is needed as long as you do not use any additional scenery DLCs.
Database Build
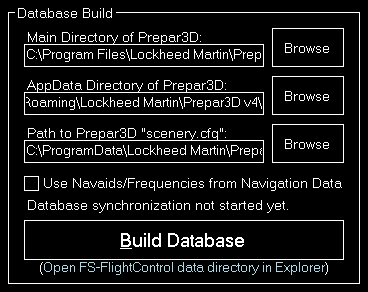
After you have installed additional scenery DLCs you should rebuild also the FS-FlightControl Steam product database.
All paths should be pre-selected automatically, so just hit the button Build Database to start the database build!
Products
All features or also called modules of FS-FlightControl are explained in this manual section:
Moving Map
Real-time moving map shows current aircraft position, taxiways, gates, navaids, airways optionally on street or height map.
General Control
Keep the left mouse button pressed to scroll around on the map. Of course, also the corresponding touch gesture is supported.
You can use your mouse wheel to zoom in and out. Again also the two finger multi-touch zoom gesture is supported.
If you keep the CTRL key pressed and then select an area, you can zoom to exactly this area.
Additional an important control action is the right click or long touch for touch screens: You can use that to trigger several actions on many elements on the map (see also Pop-Up Menu).
Control Elements
In the following all control elements will be explained individually.
General
The buttons on the left side of the map toggle the display of various map layer whereas the buttons on the right side can be used to perform different actions.

If a button is displayed in white this layer or action is currently inactive.

A orange color shows a partly active layer or action. This mean for example that the structure of a layer (like a runway) is displayed, but not a corresponding text (like the runway ident).
Note: Not all layers and actions have a partly active state.

And if the button is in green this layer or action is currently active.
Aircraft Layers
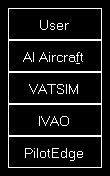
User toggles the display of the user aircraft. In partly active state only the aircraft itself is displayed and in full active state additionally the current altitude as flight level as well as the indicated airspeed and true heading direction separated with a T is displayed.
AI Aircraft toggle the display of AI aircraft generated by flight simulator. In partly active state only the AI aircraft themselves are displayed and in full active state additionally the AI aircraft type, the current altitude as flight level as well as the indicated airspeed and true heading direction separated with a T is displayed.
Note: Please keep in mind that flight simulator only simulates AI aircraft about 70-100 NM around the user aircraft. Therefore no AI aircraft will be displayed on the map outside of this area.
VATSIM toggle the display of pilot and ATC users of the VATSIM (Virtual Air Traffic Simulation) network. In partly active state only the VATSIM users themselves are displayed and in full active state additionally some textual information about the user next to it. Hovering with the mouse cursor over this button will show the time of the last update.
IVAO toggle the display of pilot and ATC users of the IVAO (International Virtual Aviation Organization) network. In partly active state only the IVAO users themselves are displayed and in full active state additionally some textual information about the user next to it. Hovering with the mouse cursor over this button will show the time of the last update.
PilotEdge toggle the display of pilot users of the PilotEdge network. In partly active state only the PilotEdge users themselves are displayed and in full active state additionally some textual information about the user next to it. Hovering with the mouse cursor over this button will show the time of the last update.
Note: VATSIM and IVAO cannot be combined with the button AI Aircraft, but PilotEdge can. For the latter AI Aircraft toggles the display of PilotEdge drone aircraft.
Object Layers
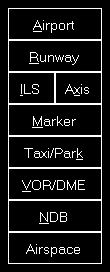
Airport toggles the display of the airport symbols. In partly active state only the airport symbols themselves are displayed and in full active state additionally the airport ICAO code.
Runway toggles the rendering of the runway surfaces. In partly active state only the runway surfaces themselves are displayed and in full active state additionally the runway idents on both sides of the runways.
ILS toggles the rendering of the ILS beams. In partly active state only the ILS beams themselves are displayed and in full active state additionally the ILS idents.
Axis toggles the rendering of the runway axes - a dotted line from the runway start. There is no partly active state available for this layer.
Marker toggles the display of the marker symbols. In partly active state only the marker symbols themselves are displayed and in full active state additionally the marker types (outer marker (OM), middle marker (MM), inner marker (IM), back course marker (BC)).
Taxi/Park toggles the display of the taxiway, apron and park area surfaces. In partly active state only the surfaces themselves are displayed and in full active state additionally the taxi point and parking names.
VOR/DME toggles the display of the VOR/DME symbols. In partly active state only the VOR/DME symbols themselves are displayed and in full active state additionally the VOR/DME idents.
NDB toggles the display of the NDB symbols. In partly active state only the NDB symbols themselves are displayed and in full active state additionally the NDB idents.
Airspace toggles the display of airspace boundaries. In partly active state only the airspace boundaries themselves are displayed and in full active state additionally the airspace names.
Airway and Waypoint Layers

Airway High toggles the display of high (jet) airways together with their connecting waypoints. In partly active state only the airways and waypoints themselves are displayed and in full active state additionally the airway names and waypoint idents.
Airway Low toggles the display of low (victor) airways together with their connecting waypoints. In partly active state only the airways and waypoints themselves are displayed and in full active state additionally the airway names and waypoint idents.
Waypoint toggles the display of all waypoints including waypoints not connected to any airways. In partly active state only the waypoints themselves are displayed and in full active state additionally the waypoint idents.
Other Layers
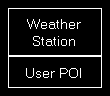
Weather Station toggles the display of weather stations. In partly active state only the weather stations themselves are displayed and in full active state additionally the weather station ICAO codes.
User POI toggles the display of user points of interest (POI). In partly active state only the points of interest themselves are displayed and in full active state additionally the points of interest names.
Background Types

If no background type is selected the map is displayed on a plain surface colored in black.
Street Map switches the map background to a street map.
Height Map switches the map background to a height map which displays the ground level elevation.
Find Object

Find Object shows the Find Object dialog.
Zoom Options

Auto Zoom enables or disables the automatic zoom based on the current aircraft altitude above ground.
Note: The automatic zoom feature can be configured on the Settings module.
Zoom + zooms in and Zoom - zooms out.
Aircraft Options
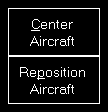
Center Aircraft centers the map on the current aircraft position.
Trace Aircraft enables or disables the drawing of an aircraft trace line.
Other Options

Weather Info toggles the display of a wind arrow in the top center of the map. In partly active state only the wind arrow itself is displayed and in full active state additionally the current wind speed and true direction separated with a T as well as the visibility range and temperature are displayed.
Measure allows you to quickly measure the distance between two points on the map. After this action is activated first click on the start and then on the end point. Now the distance between these two points together with the true heading from the first to the second point is displayed.
Compass Rose toggles the display of a compass rose around the aircraft.
Print Map allows you to print the current map view.
Note: You can define the used printer in the Settings module; same goes for the used color schema used for printing.
Pop-Up Menu
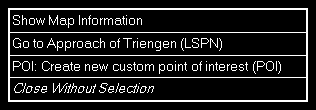
After you right-clicked (long touch) on any point of the map this pop-up menu will open.
Map Information

Using the menu item Show Map Information will open this pop-up window showing detailed information about all nearby facilities.
Create New Point of Interest (POI)
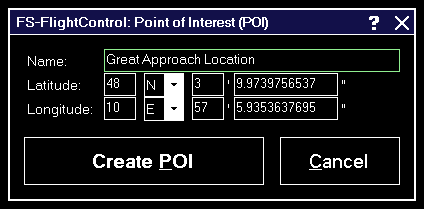
You can create a new point of interest (POI) at any map location.
Just enter a name for it here and if you want you can also change the exact location manually.
Show SIDs and STARs
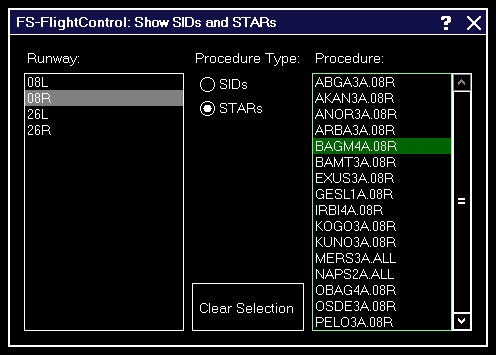
Show any Standard Instrument Departure (SID) or Standard Terminal Arrival Route (STAR) procedure on the map.
Therefore first select the corresponding runway, then the type of the procedure you want to see and finally the procedure itself.
Afterwards the procedure selected is immediately displayed on the map.
To remove the displayed procedure from the map again, use the button Clear Selection.
Footer Information
In the footer of the map some additional information can be displayed.
You can choose what is displayed there in the Settings module.
Cursor Position

In the bottom left of the map the current mouse cursor position can be displayed.
Frames per Second

In the bottom center of the map the current frames per second can be displayed.
Map Scale

In the bottom right of the map you can always see the current map scale.
Icons Legend
In the following all icons used on the map are explained.
NDB
![]()
This shows a NDB (Non-Directional Beacon).
VOR
![]()
This shows a VOR (VHF Omnidirectional Radio Range).
![]()
And this a VOR that includes a DME (Distance Measuring Equipment).
DME
![]()
This shows a DME only.
TACAN
![]()
This shows a TACAN (Tactical Air Navigation).
Settings
Map Colors
These color settings are related to the Moving Map module.
Colors and Text Settings
In this area you can highly customize the appearance of the map.
We decided to put this into the aircraft related settings. Although this seems not to be aircraft related at first sight, but this enables you to emphasis certain map parts based on the currently loaded aircraft: For example when using a small aircraft you might want to highlight more the small gates and do not care a lot about ILS, but when using a big jet the large gates are much more interesting. Same goes for other parts on the map which might be more interesting for certain aircraft types than others.

All colors and text sizes can be defined per map type.
Therefore please first select the map type.
Colors and Text Sizes for Map Type

Here all currently defined colors and text sizes are displayed for the selected map type.
The Structure Color is always the color of the item itself, like the runway surface of the runway, whereas Text Color the color of the corresponding text is, like the runway idents of the runway.
The Min. Zoom next to the Structure Color defines the minimum map zoom level needed that this structure (like the runway surface) is shown. Accordingly the second Min. Zoom next to the Text Color defines the minimum map zoom level needed that the corresponding text (like the runway idents) is shown.
Font Size, the last column, enables you to define the size of the displayed text.
Parking
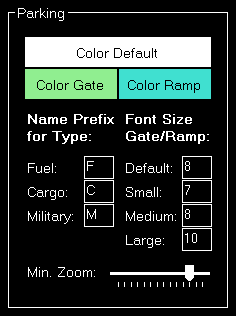
This area lets you define colors and text sizes for the different parking types like gates and ramps depending on their sizes.
Additionally you can define text prefixes to be used for a certain type like fuel, cargo or military.
Tooltip
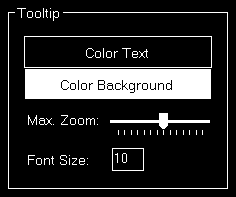
When hovering over certain map elements like an airport a tooltip is displayed shown the full name of the airport.
In this section you can define the appearance of this tooltip as well as the maximum map zoom level until that the tooltip should be displayed.
Map Display
These display settings are related to the Moving Map module.
Auto Zoom
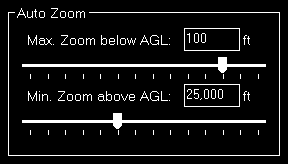
The Moving Map module also features an auto zoom function which will zoom the map in and out according to the current aircraft altitude.
You can configure this feature here by first entering the maximum zoom level (fully zoomed in) that should be reached if the aircraft is below the entered altitude above ground.
Then, for the upper end, you define the minimum zoom level (fully zoomed out) that should be reached above the entered altitude.
Between these two altitudes the zoom will be equally divided automatically.
Aircraft Display
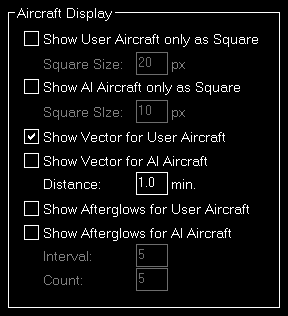
Here you can choose from certain options related to the display of the aircraft on the map.
First you can define if the user and/or AI aircraft are only shown as squares instead of an aircraft image. In this case you can also enter a size for the squares.
Furthermore you can enable or disable a distance vector being displayed in front of each user and/or AI aircraft. In this case you can enter the length of the vector in minutes.
Additionally so called afterglows - dots behind the aircraft - can be enabled or disabled for user and/or AI aircraft. In this case you can enter an interval as well as the number of dots that should be displayed.
Grid and Minimum Sector Altitude (MSA) Display

First you can define here the altitude that is added to the highest elevation in each sector when calculating the Minimum Sector Altitude (MSA).
Additionally you can choose when the map grid including the Minimum Sector Altitude (MSA) is displayed in the first place.
Display Options
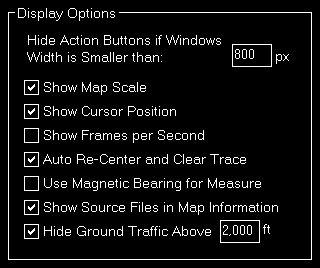
You can define several display options here.
First you can set a window width below that the left and right action buttons are hidden.
Note: This is only used for detached map windows.
Below that you can choose if you want the map scale, cursor position and frames per second displayed on the bottom of the map view or not.
Additionally you can disable the automatic re-center of the map and clear aircraft trace (if enabled) after the aircraft position has been changed from the flight simulator itself (after there was a crash, for example).
Compass Rose

Use these settings to define the maximum zoom level up to the compass rose (when this function is enabled) should be displayed and how wide its radius should be.
Map Other
These settings are related to the Moving Map module.
Refresh Rate

You can define here how often the map view gets updated.
By default that is set to once per second.
Custom Update Rate

If you uncheck the Default Update Rate checkbox you can define the update rate yourself.
The slider then ranges from very low (every 60 visual frames on flight simulator) to very high (every single visual frame).
Note: Please keep in mind that setting the data update rate to very high may lead to performance issues.
Print Options

For map printing you can define here which printer should be used.
Additionally, if you own a commercial license, you can also change the footer text or remove it completely.
Within the footer text you may use the placeholders {date} and {time} to insert the current date and time.
Online Networks
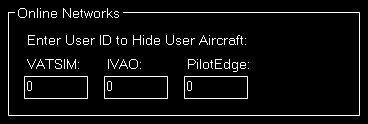
If you enter here your user ID of the available online networks your own user aircraft will not appear additionally as AI aircraft.
Reposition
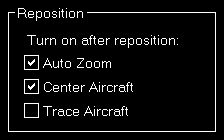
In this section you can define if certain map features are automatically turned on after the map reposition function was used.
Flight Plan
Plan your flights manually with several import and export options or even synchronize the flight plan with Project Magenta or Aerosoft Airbus products.
Current Flight Plan
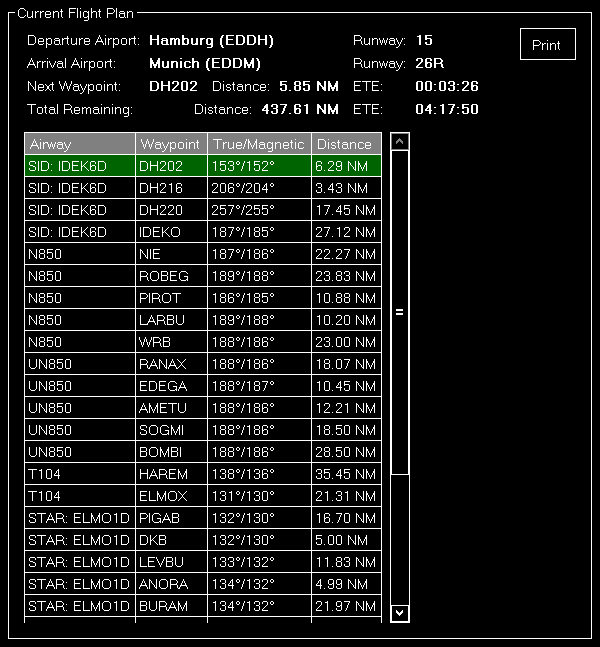
In this area the current loaded flight plan is displayed.
It starts with the departure and arrival airport as well as the next waypoint in the flight plan from the current aircraft position together with its distance and the total remaining distance.
Below that a list of all flight plan points is displayed together with the airway if one is used as well as the true and magnetic heading plus the distance to the next waypoint in the list.
Right-click on any waypoint to either delete it, move it up or down, center the map on this point or completely clear the plan again.
Note: Keep in mind that editing the flight plan is only possible when you are in the manual flight planning mode.
Manual Flight Planning

Select this mode to create and edit the flight plan manually.
Flight Plan Details

You can load, save or delete flight plans here.
To make it easier to find the right flight plan before loading it important details like departure and arrival airport together with the selected runway are displayed.
Additionally the title and the cruising altitude of the flight plan can be changed in this section.
Airway Usage

You can define here if and which kind of airways should be used for flight planning.
Additionally you can choose if also SIDs and STARs should be used.
Note: The airway options you choose here are also used for the visual flight planning with the flight plan mode on the Moving Map module.
Actions for Current Plan
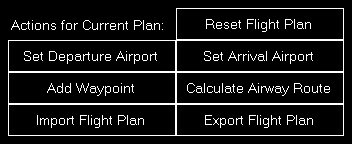
First you can set the departure and arrival airport here as well as reset the whole flight plan again.
Additionally FS-FlightControl can calculate an airway route between the departure and arrival airport for you and you can remove all waypoints from the current flight plan again.
Finally you can also open the import and export dialog here.
Note: Actions like adding a new waypoint to the flight plan as well as setting the departure and arrival airport can be done on the Moving Map module in the flight plan mode, too.
Synchronize Flight Plan
Beside creating a flight plan manually, you can also synchronize the flight plan with third party products.
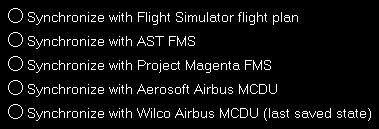
Currently following synchronization options are supported:
- Flight plan change in Flight Simulator itself
- ProSim FMS
- Project Magenta Airbus MCDU
- Aerosoft Airbus MCDU (both old “Extended” version and new one)
- Wilco/FeelThere Airbus MCDU
Note: Additional parameters need to be entered in the Third Party settings before synchronization can be enabled for these third party products.
Note: For synchronization with flight simulator itself FS-FlightControl cannot detect an already loaded flight plan, but only a flight plan change in flight simulator while FS-FlightControl is already running and connected.
Note: For Wilco/FeelThere synchronization you need to manually save the FMGC state in the MCDU via Data/SAVE FMGC. After saving the FMGC state the flight plan data is automatically synchronized to FS-FlightControl.
Import Flight Plan

This dialog provides you with various options to import flight plans from external applications.
Import from Prepar3D/FSX/FSW Flight Plan

Click on this button to import a flight plan from Prepar3D, FSX or FSW (format .pnl, FS2004/FS9 is supported as well).
In the file dialog popping up just select the flight plan file and open it.
Import from X-Plane Flight Plan

Click on this button to import a flight plan from X-Plane (formats .flp, .fml and .fms) .
In the file dialog popping up just select the flight plan file and open it.
Import from PMDG

You can also import flight plans from PMDG (formats .rte and .rt2) with this button.
In the file dialog popping up just select the flight plan file and open it.
Import from RouteFinder

There is also an option to directly import a flight route from RouteFinder.
Search for a Route
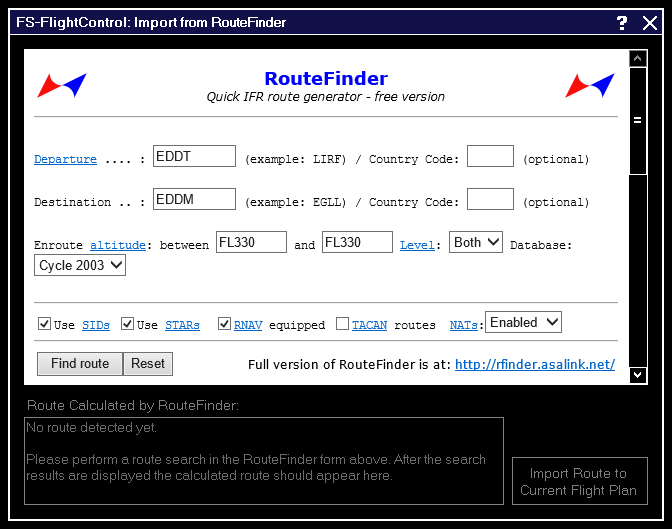
First you will see this dialog including the RouteFinder website.
All relevant fields like departure and destination as well as airway level selection and whether to use SIDs/STARs or not should be pre-filled already. This way you normally only need to click on the button Find route.
Search Results
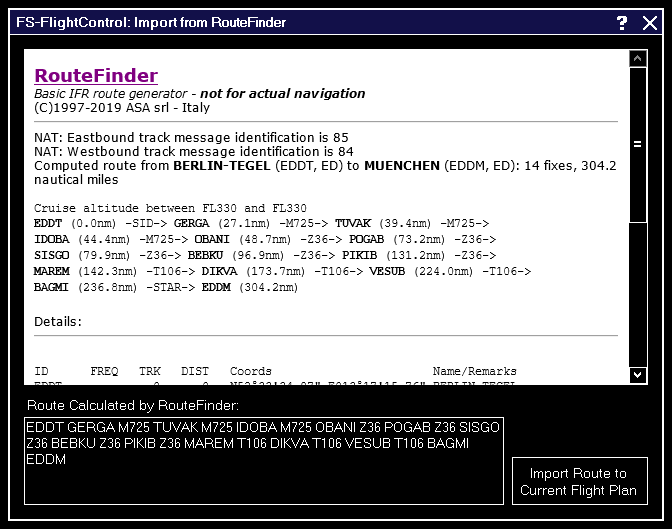
After the search has completed this page should be displayed.
If a route was found the extracted route will be automatically displayed in the text field below. Then just click on the button Import Route to Current Flight Plan to import it.
Note: It can happen that the RouteFinder website is overloaded and just displays something like Too many requests at once on the server. In this case just hit the [Back] link and search again till a route is returned.
Import from Waypoints Text
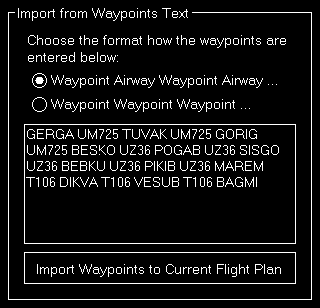
Use this section to easily import waypoints to your flight plan from websites like SkyVector.
First select if you want to import just a list of waypoints separated by a space (in this case FS-FlightControl will find out the airways itself) or the list includes the airways itself already alternating with the waypoints.
Then just copy & paste the waypoints list into the text field and click on the button Add Waypoints to Current Flight Plan.
Note: Additionally it is possible to write the ICAO code of the departure and arrival airport at the beginning and end of the waypoints list.
Import from PFPX Scheduled Flight
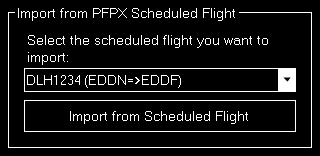
When you are also using PFPX you can import a scheduled flight as flight plan.
Just select the desired scheduled flight from the list and click on the button Import from Scheduled Flight.
Note: Only flights with a defined flight number and airline name are available for import.
Import from ProSim Company Route

If you have installed a ProSim product you can also import the ProSim company route as flight plan.
Just select the desired company route from the list and click on the button Import from Company Route.
You can even use the button Delete to clean-up your ProSim company routes from within FS-FlightControl.
Import from Aerosoft Airbus Company Route

If you have installed an Aerosoft Airbus product you can also import the Aerosoft Airbus company route as flight plan.
Just select the desired company route from the list and click on the button Import from Company Route.
Import from Wilco Airbus Company Route
If you have installed an Wilco/FeelThere Airbus product you can also import the Wilco Airbus company route as flight plan.
Just select the desired company route from the list and click on the button Import from Company Route.
Export Flight Plan
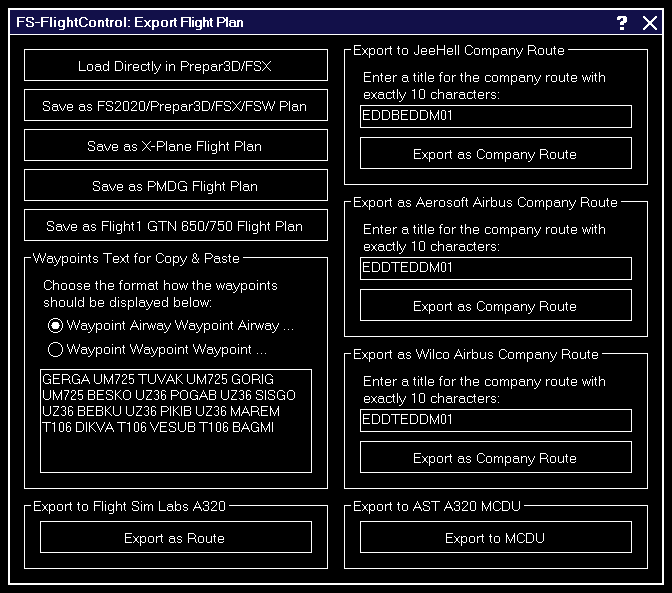
This dialog provides you with various options to export flight plans to external applications.
Export to Prepar3D/FSX/FSW Flight Plan

Click on the button Save as Prepar3D/FSX/FSW Flight Plan to export a flight plan to a file compatible with Prepar3D, FSX and FSW (format pln). In the file dialog popping up just select a file name and save it.
Alternatively you can also send the flight plan directly to Prepar3D, FSX or FSW with the Load Directly in Prepar3D/FSX/FSW button.
Note: Directly loading flight plans to Prepar3D, FSX or FSW requires that you have set the documents directory of the simulator first.
Export to X-Plane Flight Plan

Click on the button Save as X-Plane Flight Plan to export a flight plan to a file compatible with X-Plane (formats .flp and .fms). In the file dialog popping up just select a file name and save it.
Export to PMDG Flight Plan

You can also use the button Save as PMDG Flight Plan to export a flight plan to a file compatible with PMDG (formats .rte and .rt2). In the file dialog popping up just select a file name and save it.
Waypoints Text for Copy & Paste

Use this section to easily export waypoints to other applications via copy & paste.
First select if you want to export just a list of waypoints separated by a space or the list should include also airways alternating with the waypoints.
Then just copy & paste the waypoints list from the text field into any other application you wish.
Export to Flight Sim Labs A320 MCDU

If you have installed the Flight Sim Labs A320-X product you can also export a flight plan directly to the MCDU.
Just click on the button Export to MCDU to do so.
Note: This export will only work if the Flight Sim Labs AOC Service is running (check if a directory \FSLabs\AOCService\Uplink\ exists below the flight simulator installation directory). Additionally the A320 needs to be loaded in flight simulator and electrical power has been established.
Export to ProSim

If you have installed an ProSim product you can also export a flight plan to ProSim.
Either you use the button Directly Load Flight Plan in ProSim FMS or you enter a title for the company route with exactly 10 characters and click on the button Export as Company Route.
Note: Also after an export as ProSim company route you have the option to load it directly into the FMS.
Export as Aerosoft Airbus Company Route
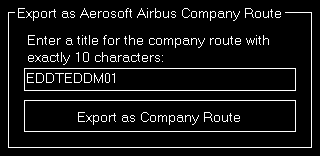
If you have installed an Aerosoft Airbus product you can also export a flight plan as Aerosoft Airbus company route.
Just enter a title for the company route with exactly 10 characters and click on the button Export as Company Route.
Export as Wilco Airbus Company Route
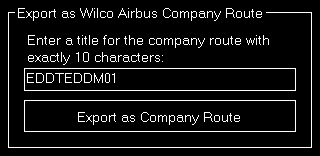
If you have installed an Wilco/FeelThere Airbus product you can also export a flight plan as Wilco Airbus company route.
Just enter a title for the company route with exactly 10 characters and click on the button Export as Company Route.
Note: As Wilco stores the company route data within a directory that requires administrator permission for writing, you need to start FS-FlightControl as administrator to be able to export a flight plan as Wilco Airbus company route.
Conditions
Define and save detailed custom weather conditions, enable real-time weather, set ILS visibility for all categories and set season, time and simulation rate.
Current Weather
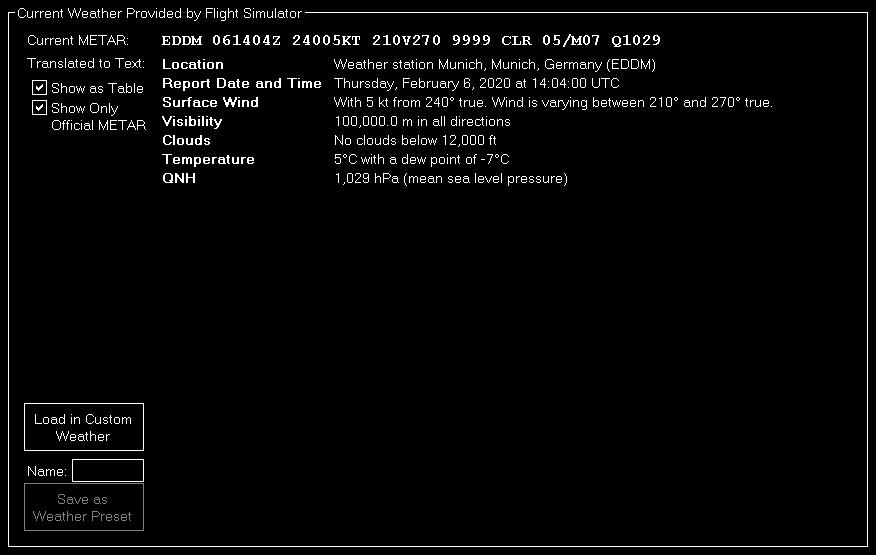
In this section the current weather is displayed as METAR code and translated text.
You can choose if the translated text it displayed as continuous text or structured table. Additionally you can decide if all or only official weather METAR data is displayed.
Note: The flight simulator uses the official METAR format, but extends is with additional extensions. FS-FlightControl can decode both, the official METAR data as well as the flight simulator extensions.
You can load the current weather into the custom weather section or save it as weather presets.
Weather Themes
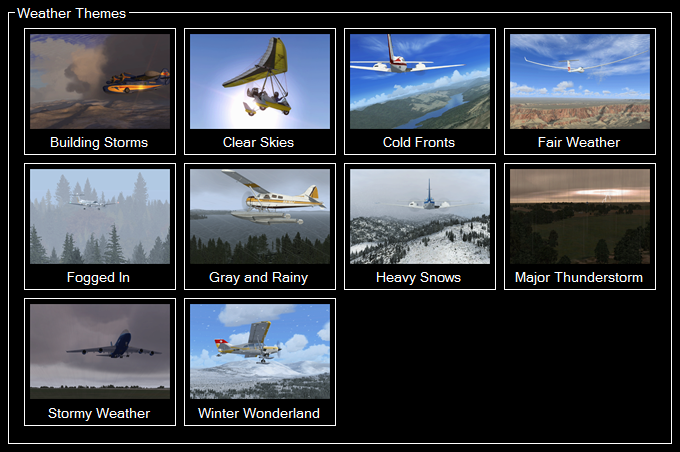
Here all themes that are available in the flight simulator are listed and can be activated with just one click.
Note: This section does not appear if Active Sky is enabled as weather engine in the Settings module.
Weather Mode for Active Sky Weather Engine
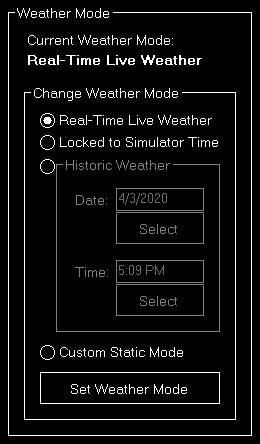
In this area you can see the current Active Sky weather mode and change it, too.
Note: This section only appears if Active Sky is enabled as weather engine in the Settings module.
Change Weather Mode
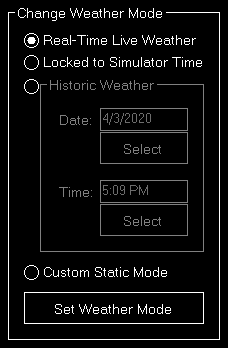
Select the desired weather mode here and set it with the button Set Weather Mode.
Historic Dynamic Weather
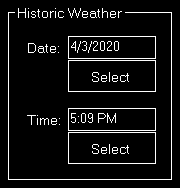
If you have chosen the hisotoric dynamic weather mode you can set the historic date and time here.
Real-Time Weather
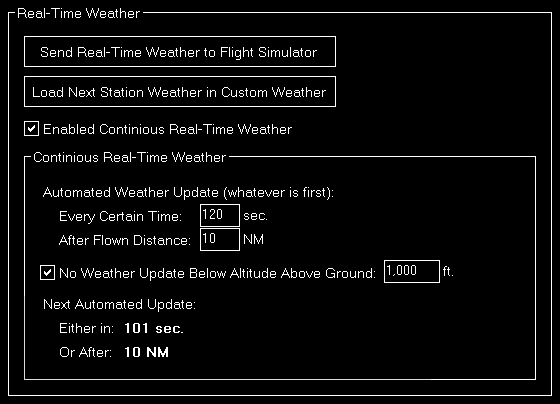
You have the option to enable real-time weather in this section.
Therefore you can either send the current real-time weather directly to flight simulator or load it into the custom weather section.
Note: You can change the used real-time weather source in the Settings module.
Note: This section does only appear if Prepar3D, FSX or FSW is selected as simulator type and Active Sky is not enabled as weather engine in the Settings module.
Real-Time Weather for X-Plane
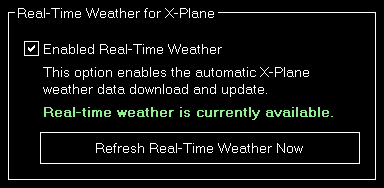
You have the option to enable real-time weather in this section.
Additionally you will see the current availability status of the real-time weather and you have the option to use the button Refresh Real-Time Weather Now to reload the weather at any time.
Note: This section does only appear if X-Plane is selected as simulator type.
Continous Real-Time Weather
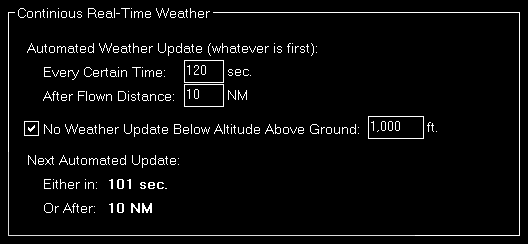
To enable continues real-time weather just activate the corresponding check box. This will enable automated real-time weather updates for all weather stations around the current aircraft location.
You can choose how often this weather update should be performed by entering a certain time interval or a flown distance (or both).
Additionally you can define that automated weather updates should not be performed when the aircraft is below a certain altitude above ground. This makes sure that the pilot is not disturbed while doing a final approach.
Below that some information is displayed to show when the next automated weather update will be performed.
Weather Effects for Active Sky Weather Engine
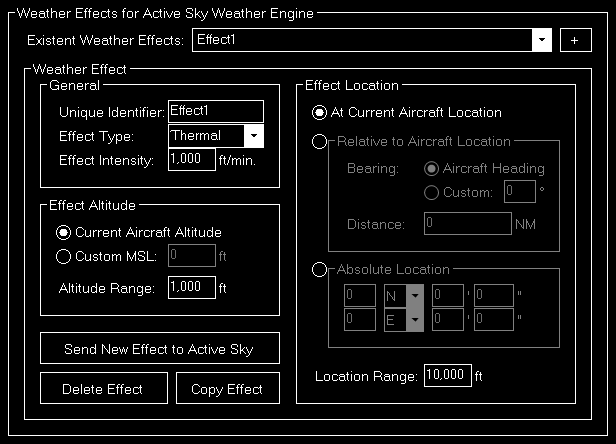
In this area you can create new and edit existent Active Sky weather effects.
Note: This section only appears if Active Sky is enabled as weather engine in the Settings module.
Weather Effect
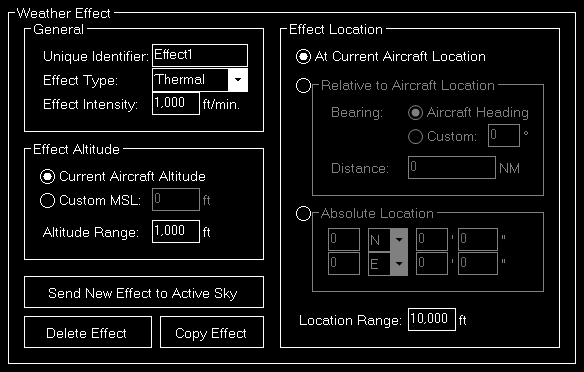
Here different options of the weather effect can be changed.
Use the button Send New Effect to Active Sky to active a new weather effect, the button Delete Effect to remove an existent one again and Copy Effect to create a duplicate of the current selected effect.
Note: An already sent weather effect cannot be changed anymore. Please just duplicate it and then remove the old one.
General
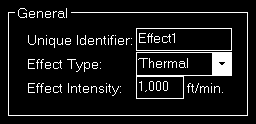
First you can enter a name for the weather effect here and set the effect type as of
- Thermal
- Downdraft
- Updraft
- Turbulence
- Windshear
Then the effect intensity can be defined as vertical speed for thermal, downdraft and updraft effect types and as an intensity between 1 and 5 for the turbulence and windshear effect types.
Effect Altitude
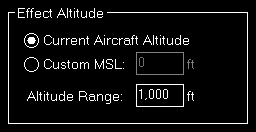
You can choose here if the current aircraft altitude should be used for the effect or you want to define an altitude (MSL) manually.
Additionally an altitude range can be set: So if you define, for example, an custom altitude of 10,000 ft and an altitude range of 1,000 ft the effect will be active between 9,500 and 10,500 ft.
Effect Location
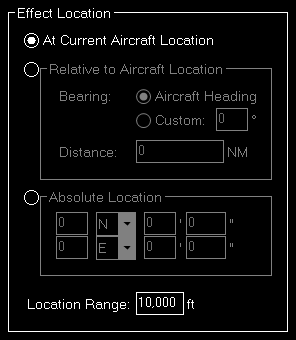
Select here if the effect should be placed at the current aircraft location, relative to the aircraft location or at a custom absolute location.
Additionally a location range can be set defining the radius around the location where the effect should be active.
Relative to Aircraft Location
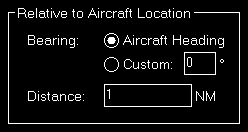
If the effect should be placed relative to the aircraft location, you first need to choose if it should be place in the direction of the current aircraft bearing or in a custom direction.
Then you need to define the distance the effect should be placed away from the aircraft.
Absolute Location
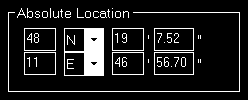
In case of an absolute position you can directly enter the latitude and longitude of the position where the weather effect should be located.
ILS Visibility
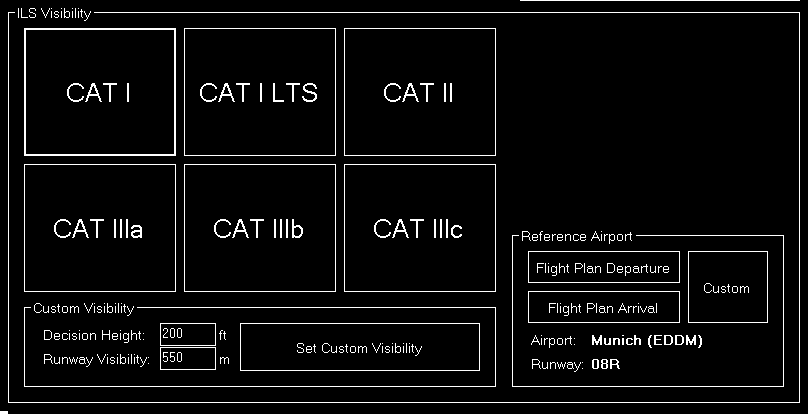
Use this section to set a pre-defined visibility condition for any of the ILS categories.
Following values are the default for decision height and runway visibility:
| Decision Height | Runway Visibility | |
|---|---|---|
| CAT I | 200 ft (60 m) | 1,800 ft (550 m) |
| CAT II | 100 ft (30 m) | 1,000 ft (300 m) |
| CAT IIIa | 50 ft (15 m) | 600 ft (180 m) |
| CAT IIIb | 30 ft (10 m) | 150 ft (46 m) |
| CAT IIIc | 0 ft (0 m) | 30 ft (10 m) |
Note: You can customize these values in the Settings module to your needs.
Custom Weather

In case you want to define a completely custom weather situation you can do so in this section.
Note: This version of the custom weather section appears if Prepar3D, FSX or FSW is selected as simulator type.
Load and Send Weather

If you have a METAR string as starting point for your custom weather enter it in the corresponding text field on top of the screen and click on the Load button. This will decode the weather situation defined in the METAR string into the custom weather sections below.
To send the weather define in these custom weather sections to the flight simulator, just click on the Send Weather button.
Add as Weather Preset

You may also save your custom weather situation as weather presets. Just enter a name and then click on the Add Preset button.
Wind Layers

You can define all wind layers - including the surface wind - in this section.
First you can define the direction where the wind is coming from. You have two additional options regarding the wind direction:
You can define it as Entirely Variable or even enter the from and to direction where the wind is coming from. If the wind should come only from a fixed direction, just keep the Entirely Variable Direction check box unchecked and the variation input fields as 0.
Next enter the speed and optional gust speed (keep it 0 if not needed) of the wind layer.
Next you can define if the current wind layer is a surface wind or an wind aloft. In case of a surface wind you have the additional option to define a depth/height of the wind and if it is a wind aloft you can define a maximum altitude (MSL) for it instead.
Note: You may add as many wind layers as you want, but there can be only one of them defined as surface wind.
Finally you can define turbulences in this wind layer as
- None
- Light
- Moderate
- Heavy
- Severe
and wind shears as:
- Gradual (none)
- Moderate
- Steep
- Instantaneous
Cloud Layers

Here you can define all cloud layers of the custom weather situation.
First enter a base altitude (MSL) for the cloud layer.
Then you can define several additional parameters for like cloud coverage as of
- Few Clouds
- Scattered Clouds
- Broken Clouds
- Overcast
- 1/8 Coverage
- 2/8 Coverage
- 3/8 Coverage
- 4/8 Coverage
- 5/8 Coverage
- 6/8 Coverage
- 7/8 Coverage
- 8/8 Coverage
cloud type as of
- Cirrus
- Stratus
- Cumulus
- Cumulo-nimbus
top of the cloud as of
- Flat
- Round
- Anvil
turbulences in the cloud layer as of
- None
- Light
- Moderate
- Heavy
- Severe
type of precipitation as of
- None
- Rain
- Freezing Rain
- Hail
- Snow
precipitation strength as of
- Very Light
- Light
- Moderate
- Heavy
- Dense
the base altitude of the precipitation as well as the icing rate as of
- None
- Trace
- Light
- Moderate
- Severe
Visibility Layers

The visibility layers of the custom weather situation can be defined in this section.
First enter the base and maximum (top) altitude (MSL) of the visibility layer.
Then you can define the visibility in this layer itself.
Finally you can decide in which direction this visibility should be effective as of
- All
- North-West
- North
- North-East
- East
- South-East
- South
- South-West
- West
Note: To set the same visibility for more than one direction, but not for all, just create another visibility layer with the same base and maximum altitude.
Temperature Layers

Also individual temperature layers can be defined for your custom weather situation.
First enter the maximum altitude (MSL) up to which this layer should be valid.
Then you can enter the temperature and dew point of this temperature layer.
Atmospheric Pressure

Here you can define the atmospheric pressure for your custom weather situation.
Custom Weather for X-Plane
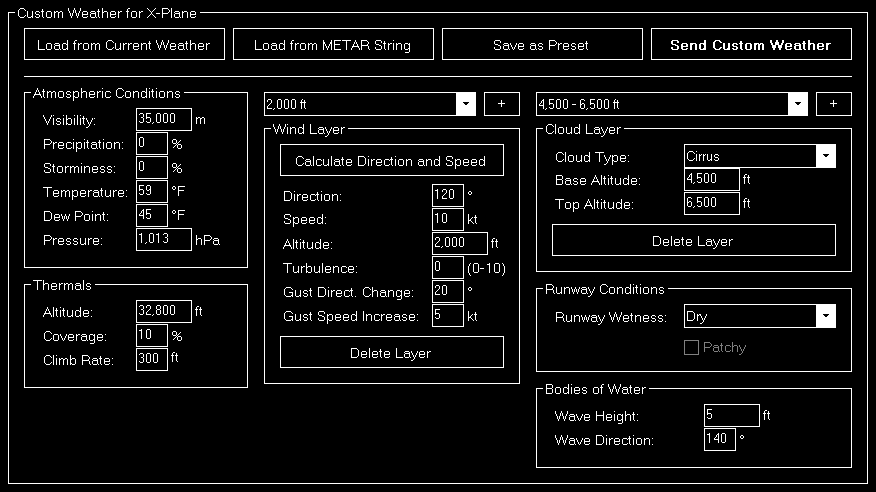
In case you want to define a completely custom weather situation you can do so in this section.
Note: This version of the custom weather section appears if X-Plane is selected as simulator type.
Atmospheric Conditions
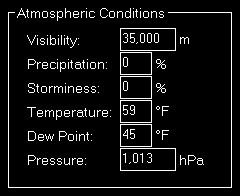
Here you can first define the visibility followed by the precipitation and storminess as percentage.
Additionally the temperature, dew point and atmospheric pressure can be set.
Thermals
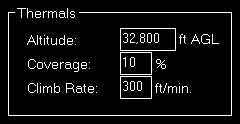
You can define thermal effects in this section.
First enter the altitude where the thermal effect should occur.
Then you can set its coverage as percentage as well as the climb rate.
Wind Layers
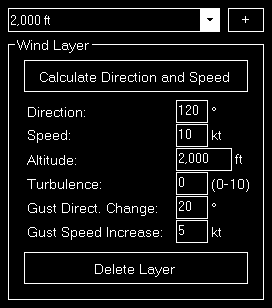
You can define all wind layers in this section.
First enter the direction, altitude and speed of the wind layer.
Next you can define the turbulence intensity between 0 and 10.
Finally the gust direction change and speed increase can be set.
Bodies of Water
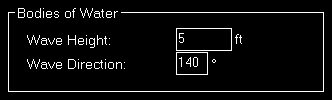
In this section the water wave height and direction can be defined.
Cloud Layers
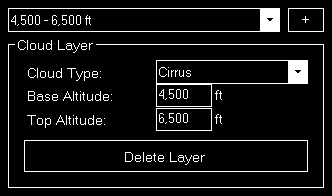
Here you can define all cloud layers of the custom weather situation.
First choose the cloud type as of
- Cirrus
- Few Cumulus
- Scattered Cumulus
- Broken Cumulus
- Overcast Cumulus
- Stratus
Then you can enter a base and top altitude (MSL) for the cloud layer.
Runway Conditions
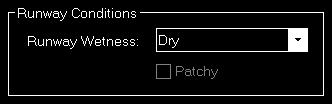
Here you can choose the runway conditions as of
- Dry
- Damp
- Wet
If you have chosen Damp or Wet you can additionally decide if the runway surface should be patchy or not.
Custom Weather for Active Sky Weather Engine
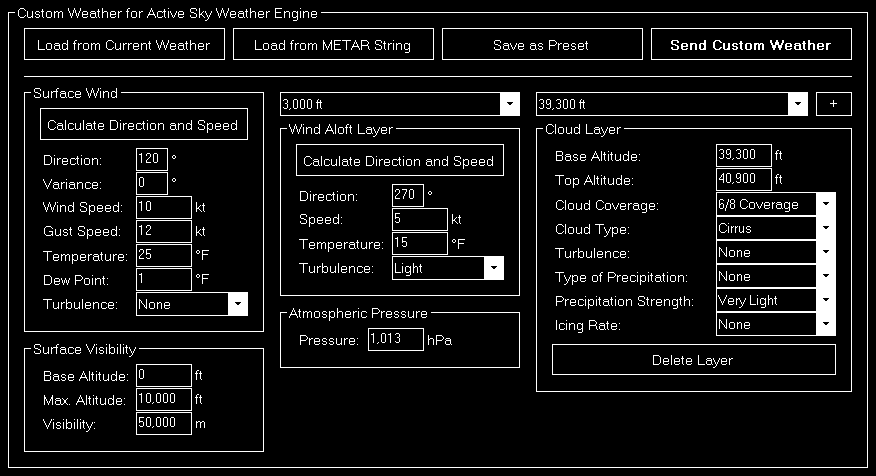
In case you want to define a completely custom weather situation you can do so in this section.
Note: This version of the custom weather section only appears if Active Sky is enabled as weather engine in the Settings module.
Surface Wind
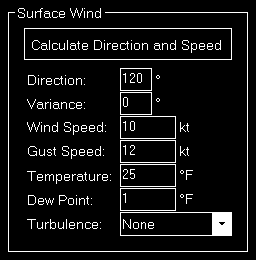
You can define the surface wind in this section.
First you can define the direction where the wind is coming from including a variance.
Next enter the speed and optional gust speed (keep it 0 if not needed) of the wind.
Also the temperature and the dew point on the surface can be defined here.
Finally you can define turbulences in the surface wind as:
- None
- Light
- Moderate
- Heavy
- Severe
Surface Visibility
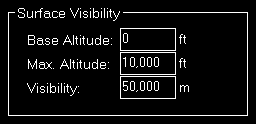
The surface visibility of the custom weather situation can be defined in this section.
First enter the base and maximum (top) altitude (MSL) of the visibility layer.
Then you can define the visibility itself.
Wind Aloft Layers

You can define all wind aloft layers in this section.
First enter the direction and speed of the wind layer.
Next you can define the temperature and finally the turbulences in this wind layer as:
- None
- Light
- Moderate
- Heavy
- Severe
Note: The altitudes of the individual wind layers cannot be changed for Active Sky.
Cloud Layers
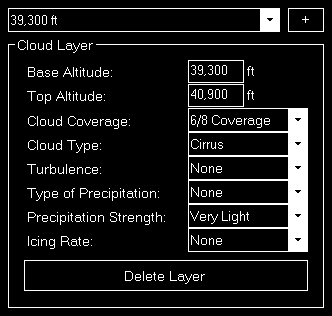
Here you can define all cloud layers of the custom weather situation.
First enter a base and top altitude (MSL) for the cloud layer.
Then you can define several additional parameters for like cloud coverage as of
- 1/8 Coverage
- 2/8 Coverage
- 3/8 Coverage
- 4/8 Coverage
- 5/8 Coverage
- 6/8 Coverage
- 7/8 Coverage
- 8/8 Coverage
cloud type as of
- Cirrus
- Stratus
- Cumulus
- Cumulo-nimbus
turbulences in the cloud layer as of
- None
- Light
- Moderate
- Heavy
- Severe
type of precipitation as of
- None
- Rain
- Freezing Rain
- Hail
- Snow
precipitation strength as of
- Very Light
- Light
- Moderate
- Heavy
- Dense
as well as the icing rate as of
- None
- Trace
- Light
- Moderate
- Severe
Atmospheric Pressure

Here you can define the atmospheric pressure for your custom weather situation.
Weather Presets
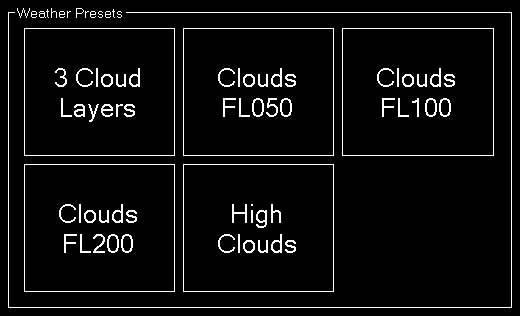
All your saved weather presets are listed here. There is no limit in the number of weather presets you can define.
Pop-Up Menu

If you right click (long “touch”) on a weather preset this pop-up menu will be shown enabling you to rename, delete or edit an existent weather preset again.
Rename Weather Preset
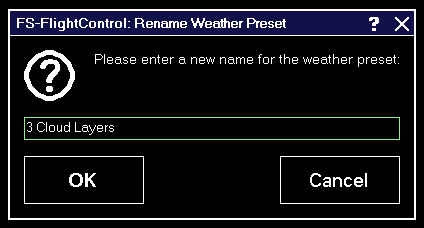
Here you can set a new name for an existent weather preset.
Season and Time

In this section you have a quick and easy control of the current season.
Just click on one of the pre-defined season buttons.
Set Custom Date and Time

Additionally you can define a completely custom date and time in this section.
Simulation Rate
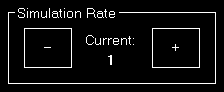
Beside a very detailed weather configuration system this module offers here also an easy way to change the current simulation rate of the simulator.
Only for X-Plane additionally the actual simulation rate is shown next to the currently requested one. For Prepar3D, FSX and FSW these two are always identical.
General Info
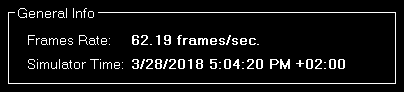
Additionally in the bottom right of the screen you always have an eye on the current frame rate and simulator time.
Pushback
Control aircraft pushback operations in any direction you want, stop it again at any time and always know the exact location of the aircraft on the airport.
Current Aircraft Location

On the top left of the screen the current airport name and ICAO code is displayed.
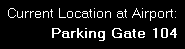
Additionally on the top right of the screen you can find the exact location of the aircraft on this airport: It will display the gate or parking position or event the runway the aircraft is currently standing on.
Pushback Operation
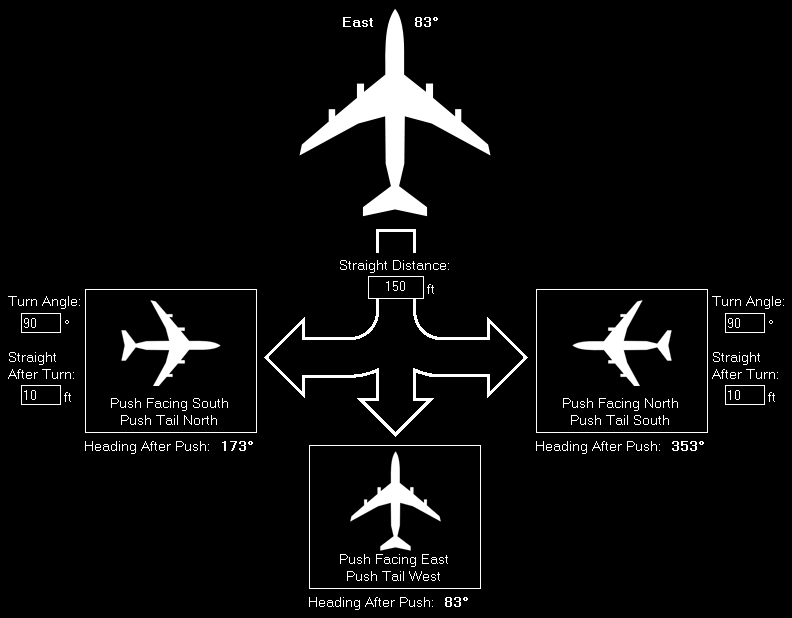
You can push the aircraft into all possible directions.
Start Pushback
Before starting the pushback operation you can define the distance the aircraft is pushed back.
If you push to the left or right you can even define the turn angel and an additional straight distance after the turn has been completed.
To start a pushback operation just click on one of the three buttons depending on the direction the aircraft should be pushed to. The program calculates for you the expected aircraft heading after the pushback below the buttons.
Note: The distances and turn angels are saved in the current aircraft profile or globally if aircraft profiles are disabled.
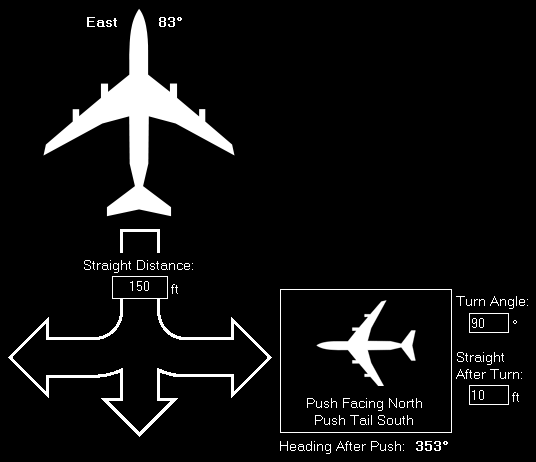
Stop Pushback
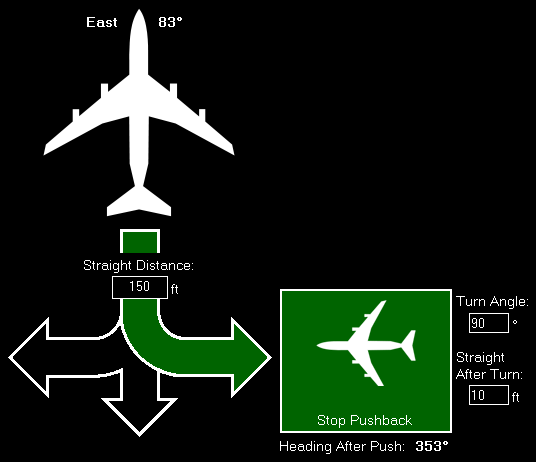
The pushback operation will stop automatically after the defined push distance and in case of pushback to left or right the turn including the additional straight distance after turn has been reached.
Of course, you can stop a pushback operation manually at any time by clicking on the button Stop Pushback.
Fuel/Load
Set the current aircraft fuel amount in all or individual tanks, change the payload of the aircraft and get an overview with automated weight calculation.
Fuel
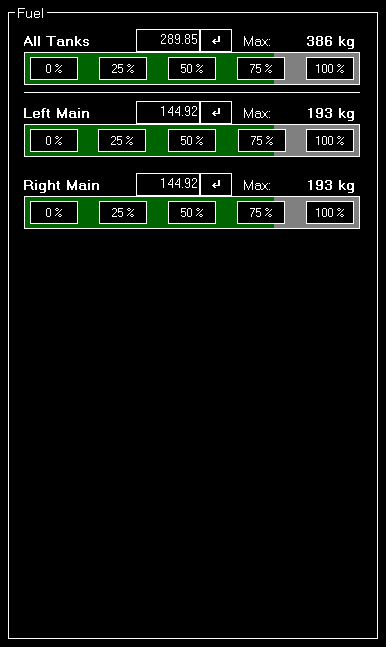
In first section you can see and adjust the current fuel amount of the aircraft.
On top of the list you can see All Tanks which shows the total fuel amount. Below that all individual tanks are listed.
You can change the current fuel amount either for all tanks - which leads to your change being equally spread around all tanks - or for one tank individually.
Either click on one of the five percent buttons to quickly set a common fuel amount or enter a specific value into the input field.
Payload
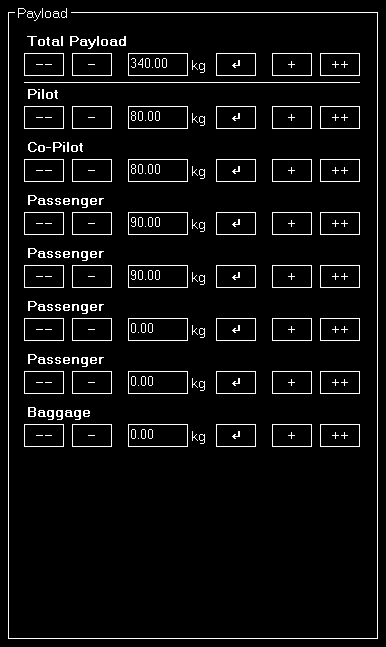
This payload section is designed similar to the fuel section: All payload stations are listed and the load of each payload station can be adjusted by clicking on the appropriate button or entering a specific value manually.
Weight Calculation

In the weight calculation section the current aircraft weight is calculated in real-time considering the aircraft empty weight, the current payload as well as the remaining fuel in all tanks.
Additionally the longitudinal and lateral center of gravity (CG) is displayed here.
Note: The lateral center of gravity is not available for X-Plane.
Freeze Fuel

Additionally there is an option to freeze the current fuel amount of the aircraft. Then it will not consume fuel anymore as long as this option is set.

To unfreeze the fuel again, just click a second time on the button.
View/Slew
Control the current camera view and zoom as well as use the aircraft slew mode to move your aircraft exactly to the position you need it.
Camera View
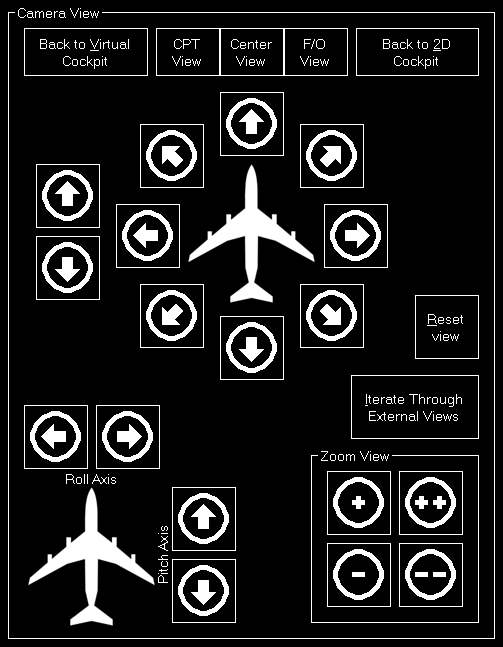
The left section in the screen controls the current camera view.
Back to Cockpit

First there is an easy way to go back to the cockpit view: You can either go back to the virtual cockpit (3D) or the 2D cockpit.
Note: The button Back to 2D Cockpit is only working if there is a 2D cockpit available for your current aircraft.
Horizontal View Change
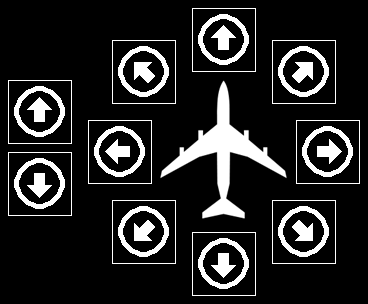
With the left two buttons you can move the view forward or backward.
The other buttons can be used to move the view to all directions.
Note: The arrows are displayed based on the virtual cockpit perspective.
Rotation
Use these buttons rotate the view left and right or up and down.
Note: This section is not available for X-Plane.
Zoom
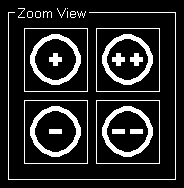
Here you can zoom the view in and out by using two different speed levels.
Reset and External Views

Additionally you can reset the current view to its defaults or iterate through all external views defined by the currently loaded aircraft.
Slew Mode
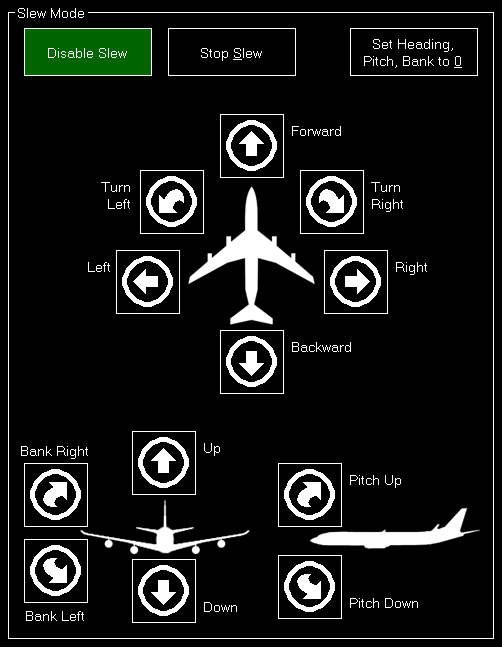
The right section in the screen controls the slew mode.
You can use this to move your aircraft exactly to the position where you need it.
Enable/Disable, Stop and Reset

First you need to enable the slew mode with the corresponding button. You can disable it by clicking the same button again.

There is also an option to stop slew (without disabling it) and setting heading, pitch and bank to zero with just one click.
Note: The button Set Heading, Pitch, Bank to 0 is not available for X-Plane.
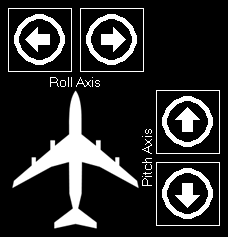
Horizontal Slew
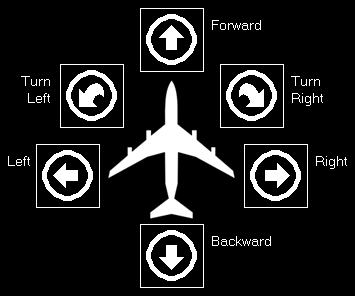
Here you can slew the aircraft forward and backward, left and right as well as turn it left and right.
Move Up/Down and Banking
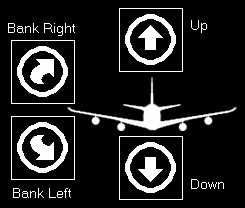
Next you can move the aircraft up and down as well as bank it left and right.
Pitching
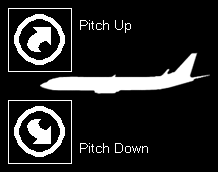
Finally you can pitch the aircraft up and down.
Failures
Fail any aircraft component with just one click manually or define detailed failure conditions like fail if aircraft is above a specific altitude or airspeed.
Note: By default the flight simulator standard failures are shown here, but FS-FlightControl does have support for extended aircraft failures of several third party products. You can choose the failure source in the Settings module.
Core System Failure
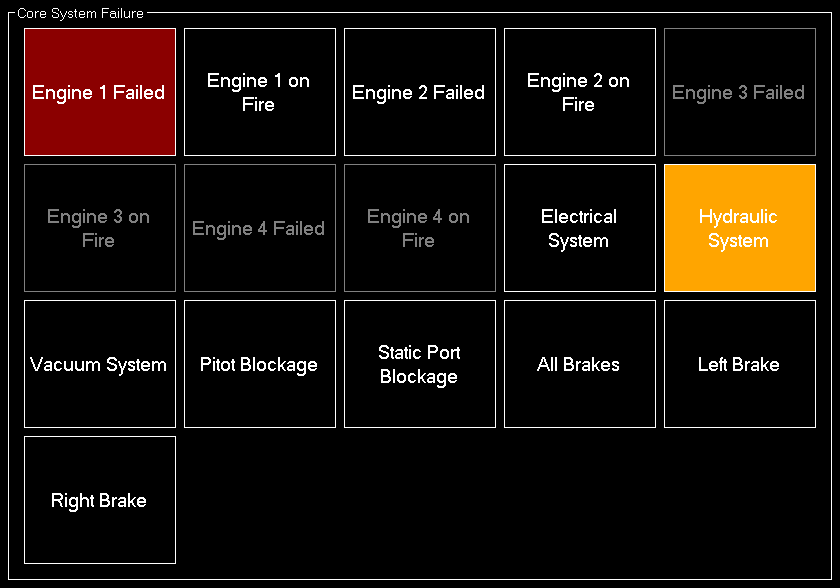
In this area you can fail all core aircraft systems like engines, electrical system or brakes.
Fuel Leak Failure
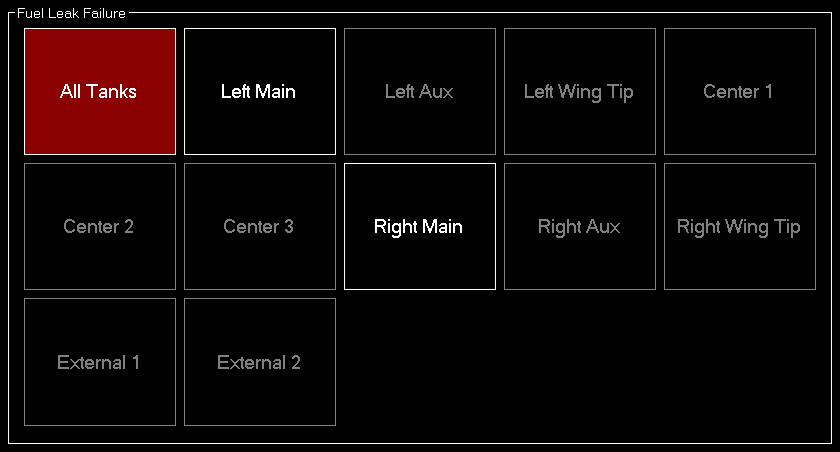
Produce fuel leaks in all or individual tanks with this section.
Gear & Flaps Failure
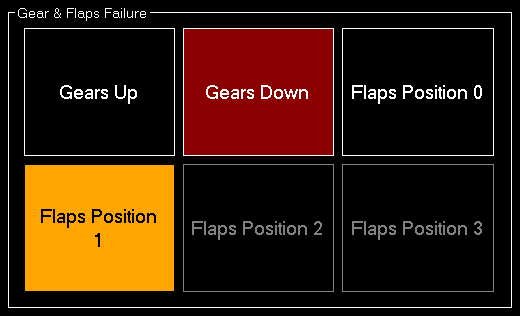
Here you can stuck the aircraft gear and flaps in a certain position.
Panel Failure

Fail one or more panels here to force the pilot to get along with the situation also without that specific panel systems.
Failure Conditions

After clicking on a failure button in one of the sections above, these failure condition options will be displayed. Enable the check box before a condition to enable it.
First you can define if the failure should be in effect immediately or delayed for a certain amount of minutes.
Then you can choose a minimum and maximum altitude (MSL). If you enable one or both of these conditions the failure will be only in effect within this altitude range.
Additionally you can make sure that the failure will only occur within a certain (indicated) airspeed range.
In case the failure is a fuel leak you will see another option where you need to enter the amount of fuel that is lost per minute.
To enable a failure click on the Enable button. If you click on an already active failure you can disable it here again with the Disable button, too.
Random Failures
Beside triggering specific failures directly there is also an option to let FS-FlightControl generate random failures.

Therefore click on the button Random Failures first.
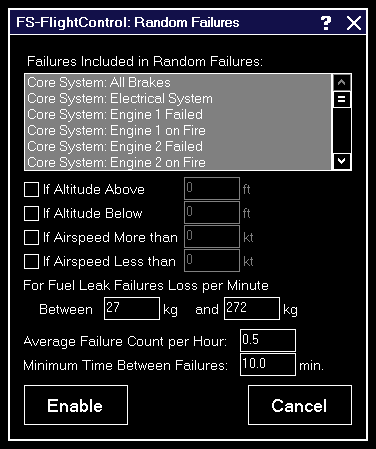
Then first select all failures that should be included in the random failures.
After that you can define the conditions when random failures may occur. The condition settings are the same as for the normal failure conditions above.
For fuel leaks you can additionally define a range of fuel loss per minute. The exact value then will again be chosen randomly within the defined range.
Finally you have to define the average number of failures that should occur per hour and the minimum time between two occurred random failure.
Note: Keep in mind that failures number per hour is just an average value - everything is still random. You can also use decimal number (smaller than one) to get even less failures.
Clear All
![]()
Use the button Clear All to reset all failures again.
Aircraft
Get an overview of all important aircraft data and control parts like engines, gear, flaps and spoilers, even auto pilot and radio control panel directly.
Note: Please keep in mind that all functionality in this module is highly aircraft dependent. These functions should work fine with all default aircrafts of Prepar3D and FSX, but we cannot guarantee that they will all work with other third party aircrafts. Read more about this.
Aircraft Status
This aircraft status page will get you an overview about all relevant aircraft parameters.
Airspeed

Here you can see the indicated and true airspeed of the aircraft.
Additionally the ground and mach speed is displayed as well.
Altitude
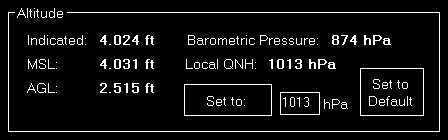
In the altitude section the current indicated altitude, the altitude above mean sea level (MSL) as well as the altitude above ground level (AGL) is displayed.
Additionally you can see the barometric pressure and the local QNH.
Attitude

Here the current aircraft pitch and bank angle, the G-force, vertical speed, heading and elevator trim is displayed. You can also trim the elevator back to zero with just one click on the button.
Drags and Brakes
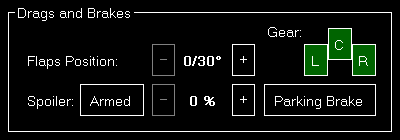
Use this section to see and change the current flaps, gear, spoiler and parking brake status.
Electrical System
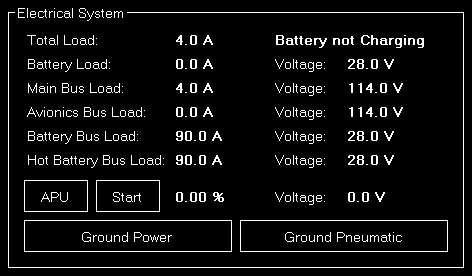
Here you get an overview of the whole electrical system of the aircraft.
You see the current load and voltage of all electrical bus system, see if the battery is currently charging or not and can trigger the APU or external/ground power if needed.
Note: Some options are only available if ProSim, AST or JeeHell is connected.
Pressurization System
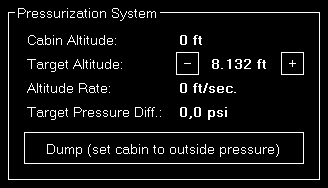
If the aircraft has a pressurization system available you can see its status here.
You can also adjust the target cabin altitude and enable the dump switch.
Exit Doors
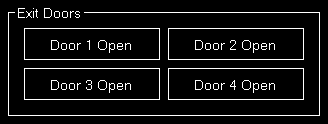
Here you can open and close again the exit doors of your aircraft.
Engines
In the engines area all engine specific information and functions are available.
Engine Status
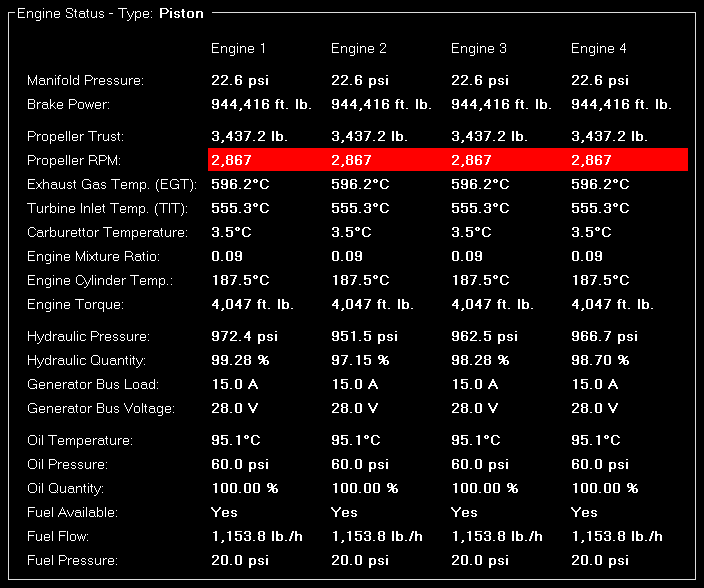
This section will show you very detailed information about the current status of all aircraft engines.
We will not explain the individual engine parameters in details here and they also will differ depending on the specific engine type (in the screenshot above it is a piston engine type for example).
Engine Control
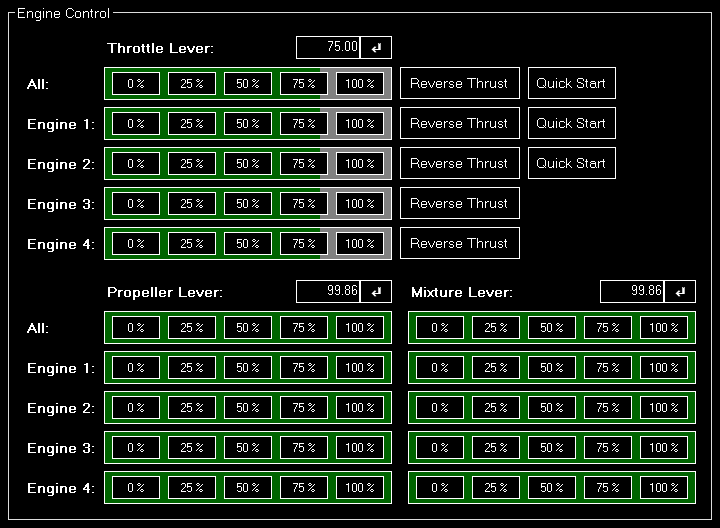
Not on that you can check the current status of the engines, you can also control them in this section.
You can control either all aircraft engine levers at once or separately.
There are quick access buttons for 0 %, 25 %, 75 % and 100 %, but you can also enter any specific percentage you want. Also reverse trust can be enabled for a specific or all engines by clicking on the button Reverse Trust if the engine supports that.
Note: The engine quick start options are only available if ProSim is connected.
Engine Switches
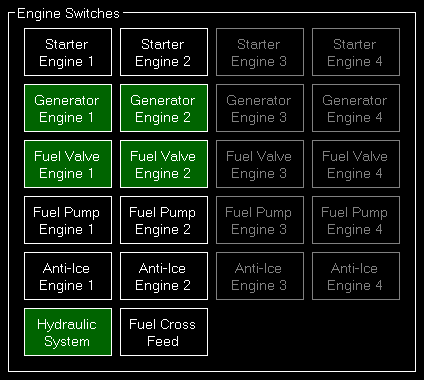
You can find in this section all relevant engine switches.
Radio, Navigation and Autopilot
This section let you control the aircraft radio and autopilot panels.
Radio and Navigation
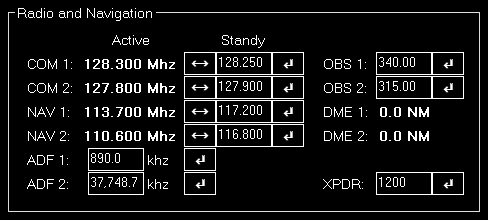
Here the complete radio and navigation panel can be controlled.
You can set all frequencies including OBS (CRS) and XPDR (Transponder).
Autopilot Control
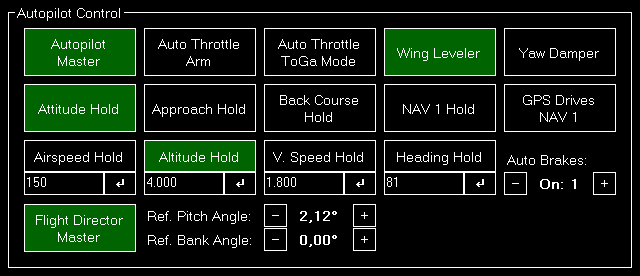
Use this area to control the autopilot of the aircraft.
You can toggle the different autopilot modes and also control airspeed, altitude, vertical speed as well as heading that the autopilot should hold.
Note: Please keep in mind that only autopilot functions that are implemented in your current aircraft autopilot will work. FS-FlightControl just “sends” the command to the aircraft autopilot - the same as you would press the corresponding button in the cockpit.
Lights and Switches
This section give you control over all aircraft lights and other switches.
Lights
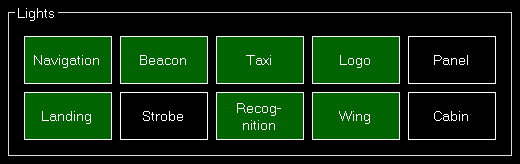
Use these buttons to control the aircraft lights.
Switches
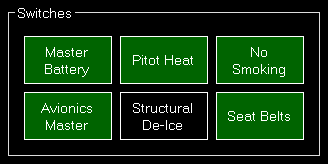
And use these buttons to control even more aircraft switches.
TCAS Alert

Here you can generate an aircraft that will trigger a TCAS alert.
First choose the aircraft type that should be generated. By default this is the aircraft you are currently flying.
Next you can define the location where the aircraft is being generated. You can either select one of the pre-defined location or enter a specific degree (in relation to the current aircraft heading).
Now enter the distance to the generated aircraft and the true airspeed it will be flying towards you.
You can also define a specific altitude (by default exactly the altitude your aircraft is currently at) and a vertical speed.
Finally trigger the aircraft generation with the button Generate TCAS Aircraft and remove all previously generated aircraft with the button Remove all TCAS Aircraft again.
ATC Control
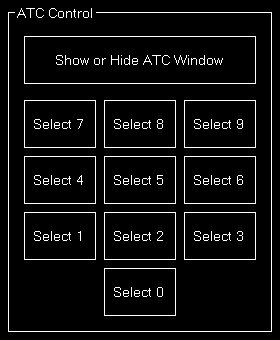
Use these buttons to show or hide the ATC window and choose from the shown menu options.
Note: If X-Plane is used you can only show or hide the ATC window here.
Network
Remote control your network computers by defining certain actions that are executed on every computer start and create a flight status page for web display.
Note: This here has nothing to do with accessing your flight simulator with FS-FlightControl over network. Therefore please use our SimConnect Network Wizard.
Network Computer Control
This section provides you with an easy way of configuring several startup actions for all your network computers that are involved in your flight simulator setup.
It also includes a full-screen waiting screen that is displayed on your network client computers till your flight simulator is fully started.

First build your network client by clicking on the button Build Client on the right side of the screen and start this client on all of your network computers that you want to control with FS-FlightControl.
Note: You can configure certain parameters of the network client in the Settings module.

Afterwards add all your network computers by clicking on the button Add New Computer.
Network Client Software
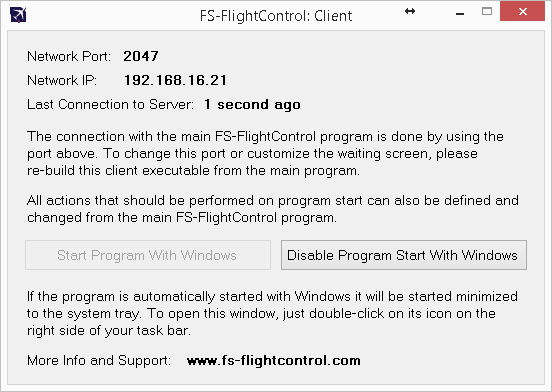
This network client needs to be copied and started to all of your network computers that you want to control with FS-FlightControl.
Full-Screen Waiting Screen

To make sure the pilots do not see anything from the background tasks needed to start your flight simulator, a full-screen waiting screen is displayed on all attached monitors (also panel monitors) till all tasked have completed and the simulator is ready to go.
You can fully customize this waiting screen to your needs in the Settings module and change the background image, logo and even text (for example also translate it to your language).
Note: Although you can use the waiting screen in all license editions, the customization is only possible with the commercial license.
Note: If you do not want this full-screen waiting screen to appear, just start the client with the command line parameter /nofullscreen.
Information
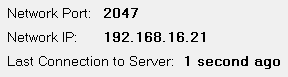
On the top of the client interface you can see some useful information.
First you can see the network port which is used to communicate with the FS-FlightControl program.
Note: This port can be changed in the Settings module. Please keep in mind that you need to rebuild the client (and copied to your network computers again) after the port is changed.
Beside the connection port also the IP address of the client computer is displayed. Please enter this IP address in the network dialog of FS-FlightControl when you add this computer as new computer there.
Note: You may find more than one IP address displayed here. Then this computer have more than one network interfaces active. If you don't know which one is the right one to use, you just need to test it.
Below that you can see the time of the last connection to the server.
Startup Option

You have the option to directly start this network client with Windows which is highly recommended as only with this setting the full screen waiting screen can be displayed.
Network Computer Selection
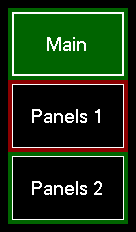
On the left side all configured network computers are listed and selectable with just one click.
If there is a problem connecting to one of your network computers this computer will be surrounded by a red square. As long everything is fine this square will be green. This way you have an easy overview of the status of all your network computers involved in your flight simulator setup.
Computer Configuration
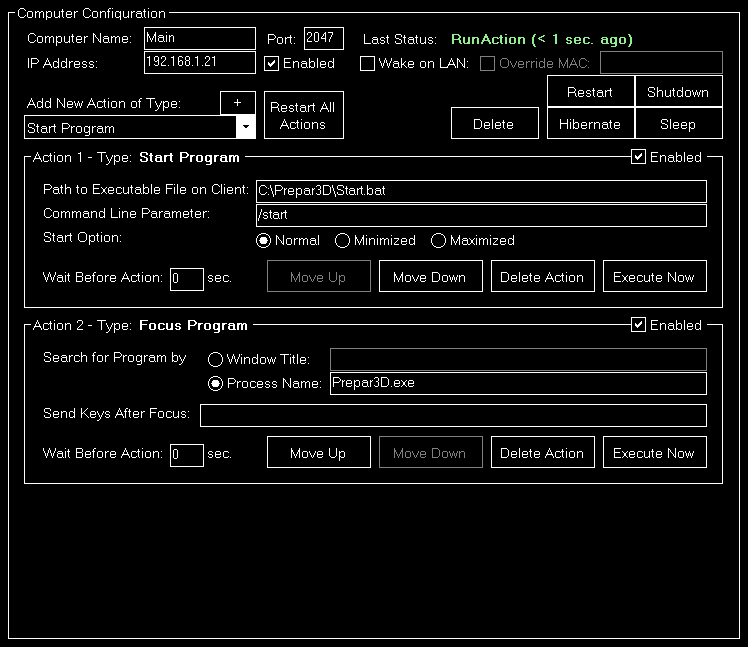
For each of your computers first enter a name which will be displayed on the button that correspondents to this computer.
Next you need to enter the IP address where the computer is reachable in your network. This IP address is displayed on the client software that you started on your network computer (see above).
The same is true for the following Port field: Please enter here the network port which is displayed on the client software, too.
We suggest to enable the check box “Enabled” not before you have completed the full computer configuration including the assignment of action. This ensures that you can finish everything before the network computer starts to react on your actions. With this check box you can enable or disable the network computer at any time.
If you want to delete this computer again, click on the Delete Computer button.
You can also trigger a direct action for this computer using the Restart, Shutdown, Hibernate or Sleep buttons.
Below you will find two information texts showing the Last Status sowie Last Connect time to the network computer.
Note: The Last Status text will be shown in red if there is no connection to the network computer and in green otherwise.
Network Actions
You can assign any number of startup actions to your network computers.
Beside running these actions one after the other on startup of the network computer to prepare the environment for flight simulator use - which is the main purpose this module -, you can also execute individual actions manually at any time to for example restart a specific application on this computer. This way the module can be used as very flexible remote control solution.
There are four types of actions that can be used. These are explained in more detailed in the following individually.
Common Action Settings

On the top right of each action section you can enable or disable the action for being executed on startup of the remote computer.
Note: You can still execute a disabled action manually, it will just not be used as startup action automatically.

Additionally for all actions you can define a wait time in seconds after the execution of the last action before the action is executed at the startup of the computer, for example:
First action has wait time of 10 seconds and second action has wait time of 20 seconds. Then the first action is started 10 seconds after the computer has started and the second action 30 seconds after the computer has started.
Start Program Action
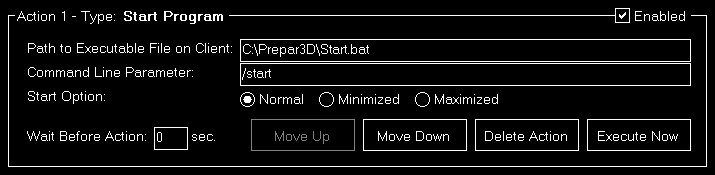
This action starts a program on your remote network computer.
Therefore please enter first the path to the program file that should be executed on your remote computer.
Note: This path needs to be the exact path on your remote computer and normally ends on .exe, but it could also end on .bat if you want to run a batch file.
Next you can enter optional command line parameters for the program to start. Leave the field empty if it does not need any.
Finally you can define if the program should be started in normal, minimized or maximized mode.
Note: Not all programs support all three modes. So it is possible that a started program just ignores this settings.
Terminate Program Action
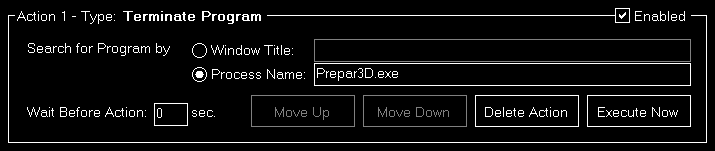
Use this action to terminate (kill) a running program on your remote network computer.
To find the right program, first decide if you want to search for it by window title or process name and enter the search text into the corresponding field.
Note: The window title search text can be only a part of the full window title of the program, too, but the process name has to be the exact full name of the process you are searching for (as shown in Task Manager, but without .exe). Both are not case-sensitive.
Focus Program Action
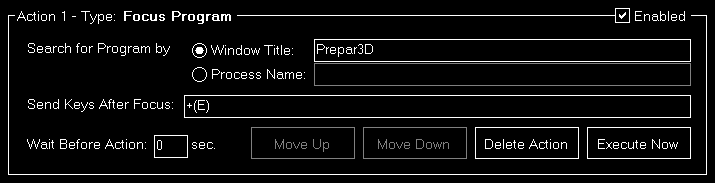
If you want to set the focus on a certain program (bring it to front), this action type is the right one for you.
To find the right program, first decide if you want to search for it by window title or process name and enter the search text into the corresponding field.
Note: The window title search text can be only a part of the full window title of the program, but the process name has to be the exact full name of the process you are searching for (as shown in Task Manager, but without .exe). Both are not case-sensitive.
Additionally you may send some custom key strokes to the program after it got focus. The exact syntax for sending keys is explained in this appendix.
Restart or Shutdown Action

With this action you can restart, shutdown, hibernate or sleep your remote computer. Therefore just select the desired option.
Note: Not all computers are configured to support hibernate or sleep mode. So it is possible that these two mode do not work on all of your computers.
Quick Action Buttons
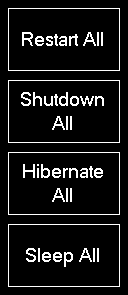
On the right side of the screen you can find quick action buttons for restart, shutdown, hibernate and sleep of all your connected computers.
This way you can for example shutdown or restart your whole flight simulator environment with just one click.
Status Page for Web Display
If you want to share your current flight information you can enable a status page for web display.
This can also be used for display the current flight status on a public screen outside of the flight simulator or on an internet page, for example.
Note: In the Settings module you can define where the generated web page should be placed: It can be directly outputted as web server, saved to your local file system or uploaded to a certain FTP server.
To enable or disable the status page for web display again click on the corresponding check box after you clicked on the “Status Page Web” button in the bottom right of the screen.
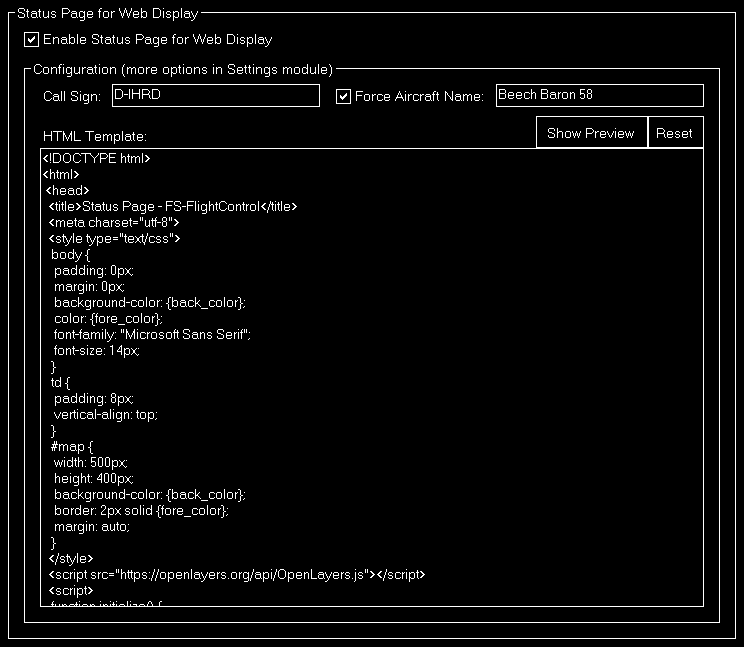
Configuration
After the status page for web display is enabled you can configure how it should look like.
Variable Definitions

First you can define certain variables which then can be used as placeholders inside the HTML template of the web page. Start with entering your call sign.
By default the system displays the aircraft name provided by the flight simulator. As this is not always “nicely” formatted you have the option to force (overwrite) this name by any name you want.
HTML Template
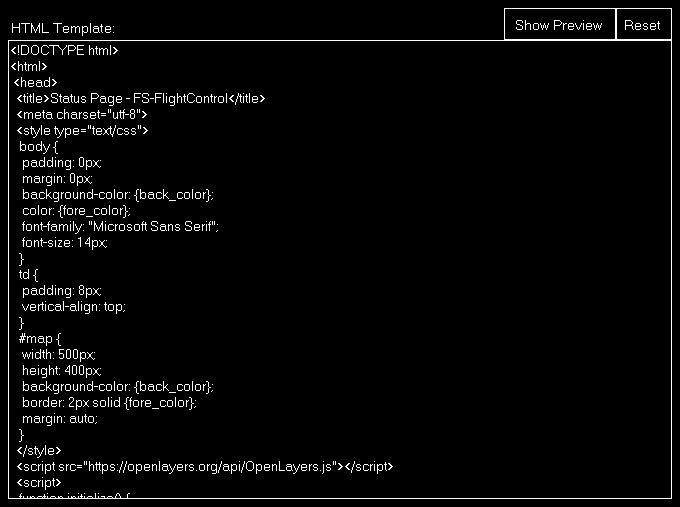
Now you can create a custom HTML template that should be used to generate the status page.
The possible placeholders in the HTML template are explained in this appendix.
There is a default HTML template provided which shows how to use these placeholders and even how to show the current aircraft location on Google Maps. A status page generated by the default template looks like this:
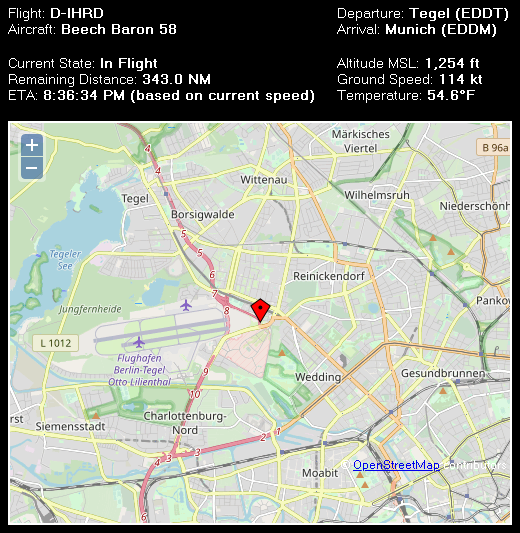
Based on that you can customize the status page to your needs.
A click on the Show Preview button opens a status page example in your default browser.
Appendix: Syntax for Send Keys
Each key is represented by one or more characters. To specify a single keyboard character, use the character itself. For example, to represent the letter A, just enter the text A. To represent more than one character, append each additional character to the one preceding it. To represent the letters A, B, and C, specify the parameter as ABC.
The plus sign +, caret ^, percent sign %, tilde ~ and parentheses () have special meanings. To specify one of these characters, enclose it within braces {}. For example, to specify the plus sign, use {+}. To specify brace characters, use {{} and {}}. Brackets have no special meaning, but you have to enclose them in braces, too, like {[} and {]}.
To specify characters that are not displayed when you press a key, such as ENTER or TAB and keys that represent actions rather than characters, use the codes in the following table:
| Key | Code |
|---|---|
BACKSPACE | {BACKSPACE}, {BS} or {BKSP} |
BREAK | {BREAK} |
CAPS LOCK | {CAPSLOCK} |
CURSOR DOWN | {DOWN} |
CURSOR UP | {UP} |
CURSOR LEFT | {LEFT} |
CURSOR RIGHT | {RIGHT} |
DEL or DELETE | {DEL} or {DELETE} |
END | {END} |
ENTER | {ENTER} |
ESC | {ESC} |
HELP | {HELP} |
HOME | {HOME} |
INS or INSERT | {INS} or {INSERT} |
NUM LOCK | {NUMLOCK} |
PAGE DOWN | {PGDN} |
PAGE UP | {PGUP} |
PRINT SCREEN | {PRTSC} |
SCROLL LOCK | {SCROLLLOCK} |
TAB | {TAB} |
F1 | {F1} |
F2 | {F2} |
F3 | {F3} |
F4 | {F4} |
F5 | {F5} |
F6 | {F6} |
F7 | {F7} |
F8 | {F8} |
F9 | {F9} |
F10 | {F10} |
F11 | {F11} |
F12 | {F12} |
F13 | {F13} |
F14 | {F14} |
F15 | {F15} |
F16 | {F16} |
Keypad + | {ADD} |
Keypad - | {SUBTRACT} |
Keypad * | {MULTIPLY} |
Keypad / | {DIVIDE} |
To specify keys combined with any combination of the SHIFT, CTRL and ALT keys, precede the key code with one or more of the following codes:
| Key | Code |
|---|---|
SHIFT | + |
CTRL | ^ |
ALT | % |
To specify that any combination of SHIFT, CTRL and ALT should be held down while several other keys are pressed, enclose the code for those keys in parentheses. For example, to specify to hold down SHIFT while E and C are pressed, use +(EC). To specify to hold down SHIFT while E is pressed, followed by C without SHIFT, use +EC.
To specify repeating keys, use the form {key count}. You must put a space between key and count. For example, {LEFT 42} means press the CURSOR LEFT key 42 times; {H 10} means press H 10 times.
Appendix: Possible Placeholders in HTML template
Following placeholders can be used inside the HTML template:
| Placeholder | Description |
|---|---|
| {airport_departure} | Departure airport as specified. |
| {airport_arrival} | Arrival airport as specified. |
| {call_sign} | Call sign as specified. |
| {aircraft} | Aircraft name as provided by flight simulator or as specified. |
| {latitude} | Aircraft latitude. |
| {longitude} | Aircraft longitude. |
| {current_state} | Current aircraft state: This can be either Parking, Taxi or In Flight. |
| {remaining_distance} | Remaining distance to arrival airport. |
| {ete} | Estimated time enroute (ETE) to arrival airport. |
| {eta} | Estimated time of arrival (ETA) on arrival airport. |
| {altitude_indicated} | Indicated altitude. |
| {altitude_msl} | Aircraft altitude above mean sea level (MSL). |
| {altitude_agl} | Aircraft altitude above ground level (AGL). |
| {heading_true} | True aircraft heading. |
| {heading_magnetic} | Magnetic aircraft heading. |
| {airspeed_indicated} | Aircraft indicated speed (IAS). |
| {airspeed_true} | Aircraft true speed (TAS). |
| {ground_speed} | Aircraft ground speed. |
| {outside_temperature} | Outside air temperature. |
Motion
Operate and monitor motion as well as control loading devices by Brunner Elektronik.
This way you remote control the software CLS2Sim provided by Brunner Elektronik that all everyday tasks can directly be monitored and controlled from within FS-FlightControl.
Only for in-depth profile changes you still need to use CLS2Sim directly.
Profile

First the currently active profile is displayed.
Additionally you have the option here to select a different profile and active it.
Hardware Status

The hardware status shows if CLS2Sim is currently connected to the motion and control loading devices.
If that is the case you can use the buttons Initialize, Stop and in case of current problems also Fault Reset to trigger corresponding actions regarding the devices.
Simulator Status

The simulator status shows if CLS2Sim is currently connected to a flight simulator. This also includes the name of the flight simulator.
You can use the button showing Connect or Disconnect accordingly.
Motion Device Status Pilot

Here you see the current status of all motion devices related to the pilot position.
Motion Device Status Copilot

Here you see the current status of all motion devices related to the copilot position.
Motion Device Status General

Here you see the current status of the remaining motion devices not related to a pilot position.
Legend

Finally the color legend of the status color is shown here.
Settings
Customize this program to your needs with detailed, even aircraft-specific settings. Change map colors, SimConnect settings and many more options available.
But although a lot of very detailed customization options are available in this modules, FS-FlightControl is designed in a way that you do not have to touch anything here to just use the program.
It is perfectly usable with the default settings and only if you need something special then this is the right place to look at.
Simulator Related Settings
All settings in this area will be saved together with the corresponding simulator.
Simulator

At the very first program start one simulator is automatically created, but you can add more simulators and then switch between them at any time.
Select Simulator Type
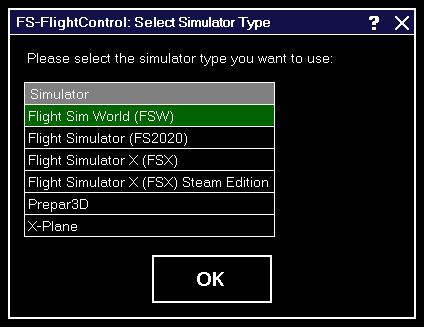
After you have clicked on the button Create New Simulator this dialog will appear asking you which type of simulator you want to create.
Simulator Settings for Prepar3D/FSX/FSW
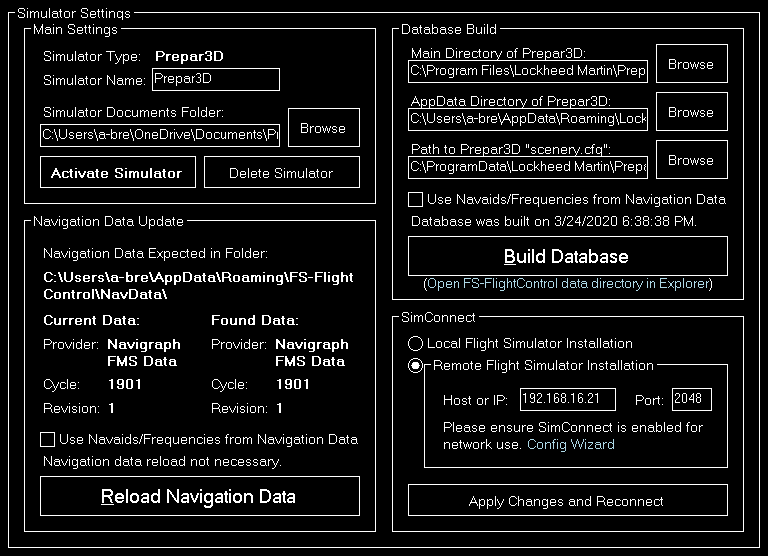
If a simulator of type Prepar3D, FSX or FSW is selected these settings will be available.
Main
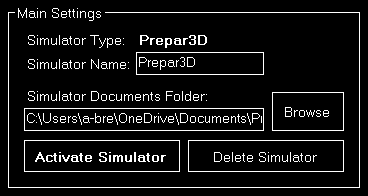
Below the not changable simulator type you can define a custom name for this simulator.
Additionally you can choose the simulator documents folder which is automatically detected if the simulator is installed locally.
If the selected simulator is currently not active, you can use the buttons Activate Simulator to activate it or Delete Simulator to delete it again.
Note: You can change the active simulator also by clicking on the connection status in the Title Bar.
Database Build
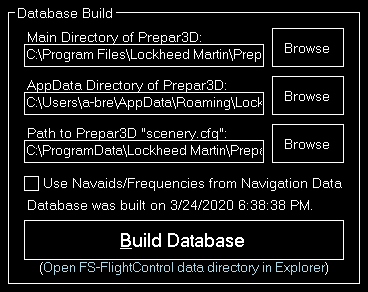
The database build is explained in the Database Build installation section.
Navigation Data Update
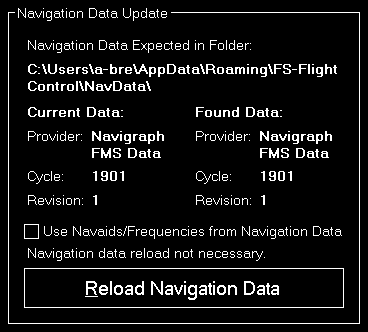
This area is explained in the Navigation Data Update dialog section.
SimConnect
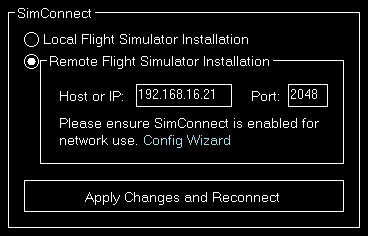
You can choose here if FS-FlightControl should connect to a local or remote flight simulator installation.
Remote Flight Simulator Installation

If you want FS-FlightControl to access a flight simulator installation that is not located on the same computer as FS-FlightControl itself, these SimConnect Network Access parameters need to be defined.
Note: To make this configuration as easy as possible you can use the SimConnect Network Wizard.
Simulator Settings for X-Plane
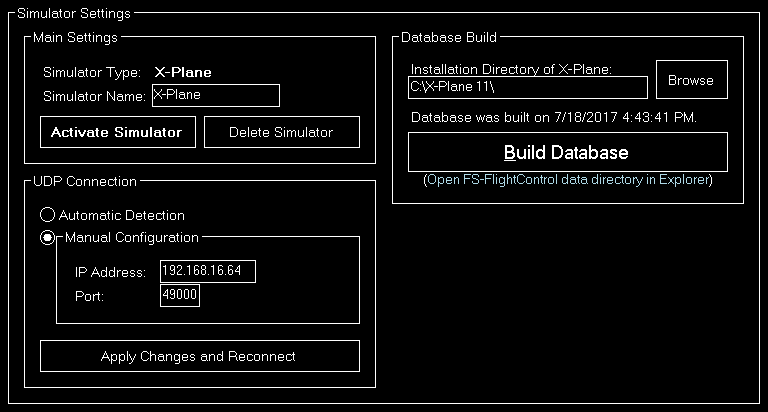
If a simulator of type X-Plane is selected these settings will be available.
Main
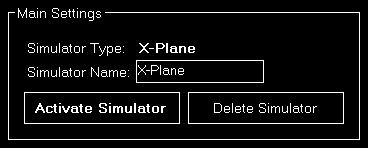
Below the not changable simulator type you can define a custom name for this simulator.
If the selected simulator is currently not active, you can use the buttons Activate Simulator to activate it or Delete Simulator to delete it again.
Database Build
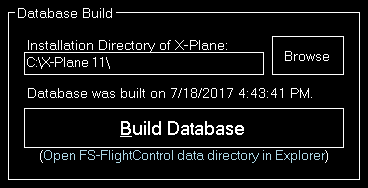
The database build is explained in the Database Build installation section.
UDP Connection
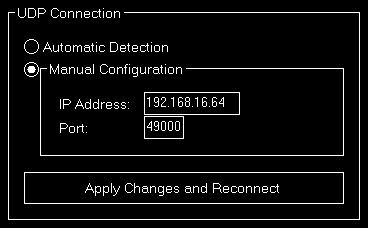
You can choose here if the connection parameters should be detected automatically or you want to set them manually.
In most cases all connection parameters can be automatically detected even if X-Plane does not run on the same computer as FS-FlightControl.
Manual Configuration
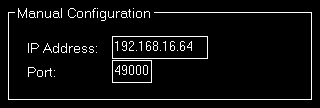
But if the automatic detection does not work for any reason, you can configure the connection manually here.
Position
These settings are related to the Approach Training module.
General
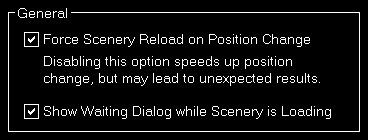
You can choose here if the scenery should be reloaded after a position is changed.
Note: The forced scenery reload is enabled by default as disabling it may lead to unexpected results (like aircraft crash) especially if the new location is far away from the old one.
Conditions
These settings are related to the Conditions module.
Weather Engine

Let FS-FlightControl know here which software is used as weather engine to ensure all features of the Conditions module work properly.
Note: For Active Sky additional parameters need to be entered in the Third Party settings first.
Third Party
Here you can define necessary parameters to connect to third party products supported by FS-FlightControl.
ProSim

The host or IP as well as the port that should be used to connect to ProSim can be entered here. The ProSim connection then can be used in the Flight Plan and Failures modules.
AST
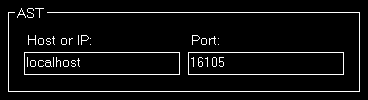
The host or IP as well as the port that should be used to connect to AST (Aircraft Simulation Technology) can be entered here. The AST connection then can be used in the Failures module.
Project Magenta
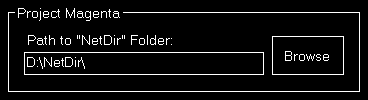
The path to the NetDir of Project Magenta can be entered here. The Project Magenta connection then can be used in the Flight Plan module; the Failures module uses FSUIPC to connect to Project Magenta.
Flight Sim Labs
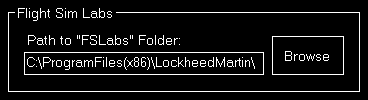
The path to the FSLabs directory of Flight Sim Labs below the flight simulator directory can be entered here. The direct Flight Sim Labs connection then can be used in the Flight Plan module.
Brunner Elektronik

The host or IP as well as the TCP port that should be used to connect to the CLS2Sim software by Brunner Elektronik can be entered here. The Brunner Elektronik connection then can be used in the Motion module.
Note: CLS2Sim version v3.20.0 or newer is required.
Note: Please make sure that Remote control is enabled in the CLS2Sim settings and the TCP port is set accordingly (only TCP is needed for FS-FlightControl connection).
Active Sky
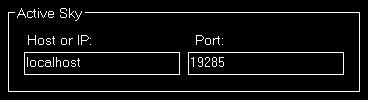
The host or IP as well as the port that should be used to connect to Active Sky 16 (SP1 required) can be entered here. The Active Sky connection then can be used in the Conditions module.
PFPX

You can enter the path to the PFPX documents directory here. The PFPX connection then can be used in the Flight Plan module.
Aerosoft Airbus
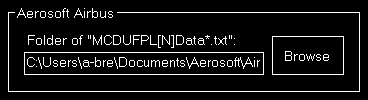
Now you can enter the path to the Aerosoft Airbus documents directory (also the older Extended Version is supported) here. The Aerosoft Airbus connection then can be used in the Flight Plan module.
Wilco Airbus
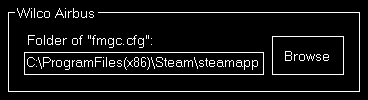
You can enter the path to the Wilco/FeelThere Airbus directory here. The Wilco Airbus connection then can be used in the Flight Plan module.
Mindstar
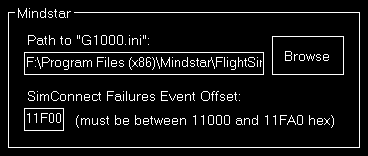
You can enter the path to the Mindstar G1000.ini file here. The Mindstar connection then can be used in the Failures module.
Additionally the offset for the SimConnect event IDs need to be specified as hex value. Starting from this ID the SimConnect events will be assigned to the Mindstar G1000 failures.
Flight1
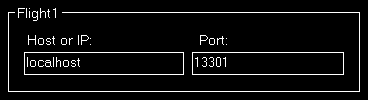
The host or IP as well as the port that should be used to connect to Flight1 VISPRO flight simulator plug-in can be entered here. The Flight1 connection then can be used in the Failures module.
Note: To be able to trigger the Flight1 G1000 failures from FS-FlightControl not only the Flight1 G1000 plug-in needs to be installed in flight simulator, but also the Flight1 VISPRO plug-in.
General

Additional you can define the time interval for third party synchronization here.
Aircraft Related Settings
All settings in this area will be saved together with the corresponding aircraft profile if aircraft related settings are enabled.
Aircraft Profile

By default aircraft related settings are disabled as this is not needed for many users, especially also if you only use FS-FlightControl with one specific aircraft type.
But if you want to use FS-FlightControl together with very different aircraft types it makes sense to enable aircraft related settings here.
Profile Settings
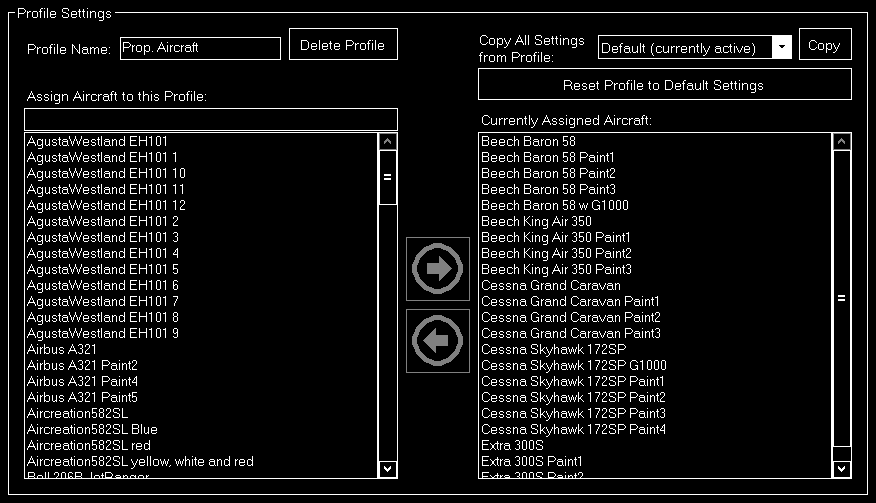
If aircraft related settings are enabled the profile settings section gets enabled as well.
You can edit or create new aircraft profiles here and change the flight simulator aircrafts that are assigned to the current aircraft profile.
Additionally you can copy all settings from another profile or revert all settings to default.
Position
These settings are related to the Approach Training module.
Final Position
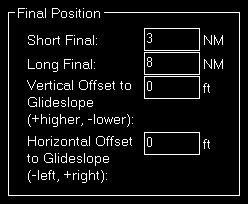
Here you can define the distance of the short and long final approach as well as a vertical and horizontal offset to the glideslope if you want.
Vectors Position
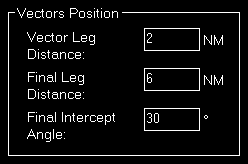
The distances for the vector positions can be changed here as well as the final intercept angle.
Base Position

Define here the distances for the base positions.
Downwind Position
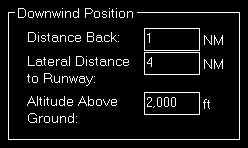
Here you can define the lateral distance to the runway for the downwind positions.
In contrast to the other positions where the altitude is calculated based on the runway glideslope automatically, the altitude for the downwind positions can be customized here.
Airworks
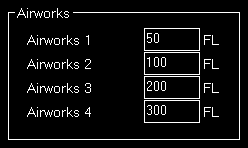
You can define the flight levels of the four airworks buttons here.
Options on Position Change
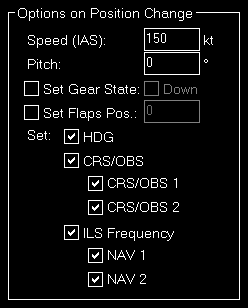
Depending on the aircraft capabilities you can change the parameters that are used when the aircraft is positioned.
This includes whether the heading, course (CRS) respectively omni bearing selector (OBS) or ILS frequency (if the runway is ILS enabled) should be set automatically with the aircraft position change to a certain approach.
Map Colors
These settings are related to the Moving Map module.
Colors and Text Settings
In this area you can highly customize the appearance of the map.
We decided to put this into the aircraft related settings. Although this seems not to be aircraft related at first sight, but this enables you to emphasis certain map parts based on the currently loaded aircraft: For example when using a small aircraft you might want to highlight more the small gates and do not care a lot about ILS, but when using a big jet the large gates are much more interesting. Same goes for other parts on the map which might be more interesting for certain aircraft types than others.
All colors and text sizes can be defined per map type.
Therefore please first select the map type.
Colors and Text Sizes for Map Type
Here all currently defined colors and text sizes are displayed for the selected map type.
The Structure Color is always the color of the item itself, like the runway surface of the runway, whereas Text Color the color of the corresponding text is, like the runway idents of the runway.
The Min. Zoom next to the Structure Color defines the minimum map zoom level needed that this structure (like the runway surface) is shown. Accordingly the second Min. Zoom next to the Text Color defines the minimum map zoom level needed that the corresponding text (like the runway idents) is shown.
Font Size, the last column, enables you to define the size of the displayed text.
Parking
This area lets you define colors and text sizes for the different parking types like gates and ramps depending on their sizes.
Additionally you can define text prefixes to be used for a certain type like fuel, cargo or military.
Tooltip
When hovering over certain map elements like an airport a tooltip is displayed shown the full name of the airport.
In this section you can define the appearance of this tooltip as well as the maximum map zoom level until that the tooltip should be displayed.
Map Other
These settings are related to the Moving Map module.
Auto Zoom
The Moving Map module also features an auto zoom function which will zoom the map in and out according to the current aircraft altitude.
You can configure this feature here by first entering the maximum zoom level (fully zoomed in) that should be reached if the aircraft is below the entered altitude above ground.
Then, for the upper end, you define the minimum zoom level (fully zoomed out) that should be reached above the entered altitude.
Between these two altitudes the zoom will be equally divided automatically.
Aircraft Display
Here you can choose from certain options related to the display of the aircraft on the map.
First you can define if the user and/or AI aircraft are only shown as squares instead of an aircraft image. In this case you can also enter a size for the squares.
Furthermore you can enable or disable a distance vector being displayed in front of each user and/or AI aircraft. In this case you can enter the length of the vector in minutes.
Additionally so called afterglows - dots behind the aircraft - can be enabled or disabled for user and/or AI aircraft. In this case you can enter an interval as well as the number of dots that should be displayed.
Compass Rose
Use these settings to define the maximum zoom level up to the compass rose (when this function is enabled) should be displayed and how wide its radius should be.
Other
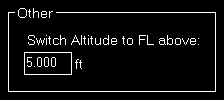
Here you can define at which altitude the display should switch from precise altitude display to flight level.
Note: Above this altitude it will also switch from show MSL altitude to indicated altitude.
Pushback
These settings are related to the Pushback module.
Speed Options
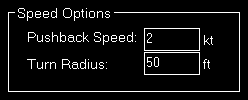
Here you can define the pushback speed as well as the turn radius.
Failures
These settings are related to the Failures module.
Failures Source

Here you can choose the source of the failures that are displayed in the Failures module.
Note: For some options additional parameters need to be entered in the Third Party settings first.
Aircraft
These settings are related to the Aircraft module.
Aircraft Warnings
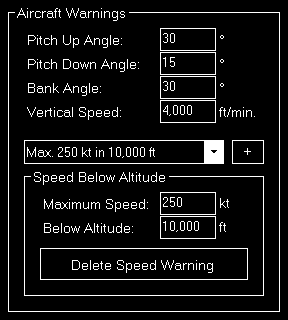
Here you can set limits for some parameters like pitch or bank angle for the aircraft.
Speed Below Altitude
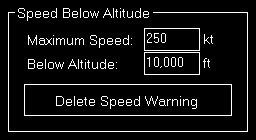
Additionally you can define maximum speeds below certain altitudes above mean sea level (MSL).
These settings are used to change the color of the corresponding value to red on the Aircraft module and also to shown warning indicators when exporting graph data to Google Earth on the Flight Recorder module.
Aircraft-Specific Options

For some third-party add-ons there are some additional options available. You can enable this support here.
Note: Some third-party add-ons require additional parameters to be entered in the Third Party settings first.
Other

Here you can define if flap positions should be shown as degree number.
Statistics
These settings are related to the Flight Recorder module.
Google Earth Export
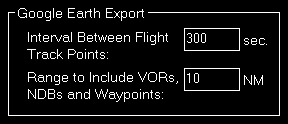
Define all Google Earth export related settings in this area.
Every certain time interval a flight track point is shown in Google Earth with detailed flight information. You can set this time interval here.
Additionally you can define the range for including VORs, NDBs and waypoints if their export is enabled.
Other Settings
All settings in this area are not simulator and not aircraft related and will be saved globabally.
Position
These settings are related to the Approach Training module.
General

You can enable or disable some automatizations after an aircraft position is changed.
First choose if position freeze or pause should be enabled after aircraft move.
Additionally you can define if the program should automatically switch to the Moving Map module after a position change respectively to the Flight Recorder module when an approach is started.
Flight Situation Presets

You can choose here to not automatically save the flight plan together with a flight situation preset.
Map
These settings are related to the Moving Map module.
Data Update Rate
You can define here how often the map view gets updated.
By default that is set to once per second.
Custom Update Rate
If you uncheck the Default Update Rate checkbox you can define the update rate yourself.
The slider then ranges from very low (every 60 visual frames on flight simulator) to very high (every single visual frame).
Note: Please keep in mind that setting the data update rate to very high may lead to performance issues.
Grid and Minimum Sector Altitude (MSA) Display
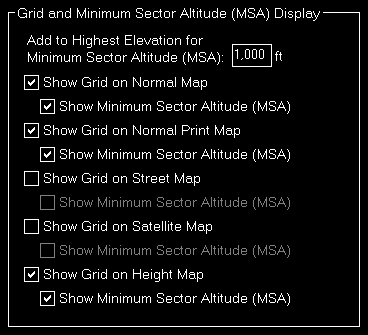
First you can define here the altitude that is added to the highest elevation in each sector when calculating the Minimum Sector Altitude (MSA).
Additionally you can choose when the map grid including the Minimum Sector Altitude (MSA) is displayed in the first place.
Print Options
For map printing you can define here which printer should be used.
Additionally, if you own a commercial license, you can also change the footer text or remove it completely.
Within the footer text you may use the placeholders {date} and {time} to insert the current date and time.
Display Options
You can define several display options here.
First you can set a window width below that the left and right action buttons are hidden.
Note: This is only used for detached map windows.
Below that you can choose if you want the map scale, cursor position and frames per second displayed on the bottom of the map view or not.
Additionally you can disable the automatic re-center of the map and clear aircraft trace (if enabled) after the aircraft position has been changed from the flight simulator itself (after there was a crash, for example).
Online Networks
If you enter here your user ID of the available online networks your own user aircraft will not appear additionally as AI aircraft.
Flight Plan
These settings are related to the Flight Plan module.
Flight Plan Folder
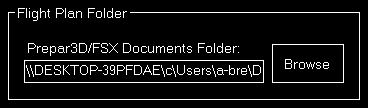
Here you can change the path to the saved flight plans of flight simulator.
Conditions
These settings are related to the Conditions module.
Real-Time Weather Source
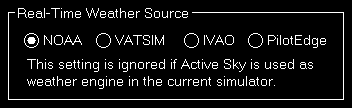
Define here the real-time weather source that should be used for receiving weather METAR data if this is not provided by flight simulator directly.
In this connection you can choose from NOAA (National Oceanic and Atmospheric Administration), VATSIM (Virtual Air Traffic Simulation) and IVAO (International Virtual Aviation Organization).
ILS Visibility
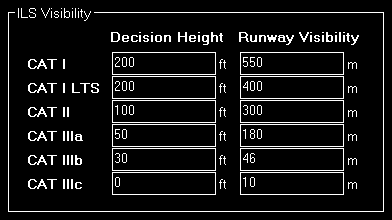
In this section the ILS Visibility presets can be customized.
You can define the decision height as well as the runway visibility for each ILS category.
Failures
These settings are related to the Failures module.
Color Settings
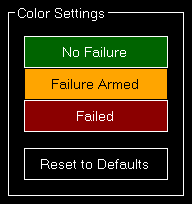
Use this area to change the colors.
You can also use the button Reset to Defaults to revert all your color changes.
Other

Choose here if random failures should be automatically re-enabled on program start if they were enabled before.
Statistics
These settings are related to the Flight Recorder module.
Color Settings
In this area you can customize all colors used to draw the statistics graphs.

All colors can be defined per display type.
Therefore please first select if you want to change the colors for the normal in program display or for printout.
Revert to Defaults

You can easily revert all colors to their defaults by using the Revert to Defaults button.
Colors for Display Type
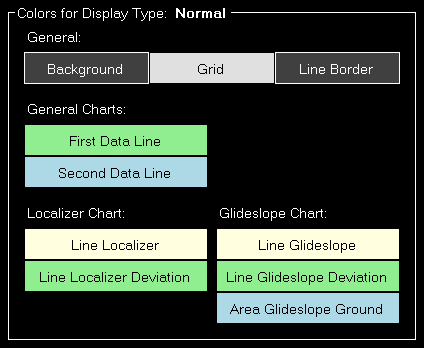
Here all currently defined colors are displayed for the selected display type.
Click on any of the button to select a different color.
Print Options

For statistics printing you can define here which printer should be used.
Additionally, if you own a commercial license, you can also change the footer text or remove it completely.
Within the footer text you may use the placeholders {date} and {time} to insert the current date and time.
Network
These settings are related to the Network module.
FS-FlightControl Client
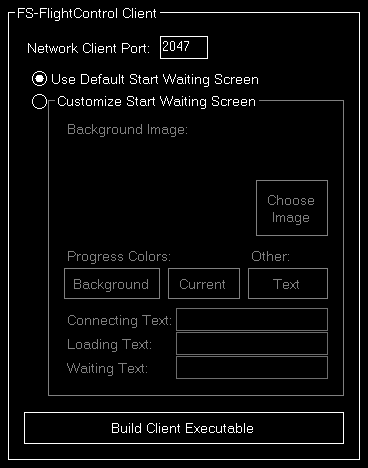
First you can change the network client port here that defaults to 2047, but can be changed to any other port number if needed.
Note: If you change the port you need to re-build the network client executable.
Customize Start Waiting Screen
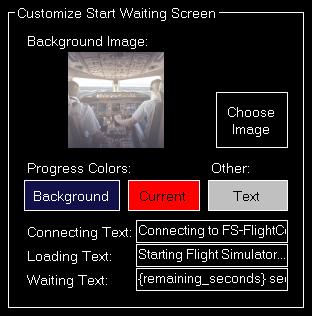
If you own a commercial license you can completely customize the start waiting screen that is shown on the network client computers.
You can select a background image as well as customize the colors and the shown texts.
In the Remaining Text input field you can use the placeholder {remaining_seconds} to insert the remaining seconds.
Program Close Options

You can define here if a shutdown, hibernate or sleep action should be sent to all connected network computers when the FS-FligthControl software is closed.
Additionally you can decide if the same action should be executed on the computer running the instructor station itself.
Status Page for Web Display
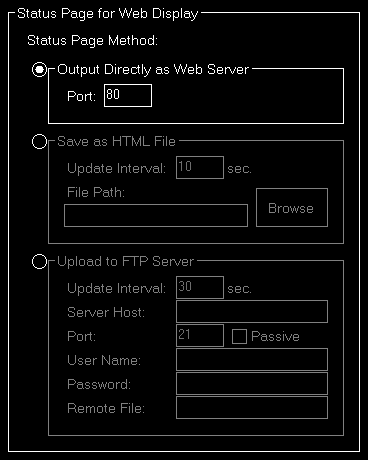
In this area you can define the method that should be used for the status page output.
Output Directly as Web Server
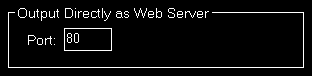
If this method is selected FS-FlightControl will listen on the defined port for HTTP web requests and will reply with the status page accordingly.
Save as HTML File
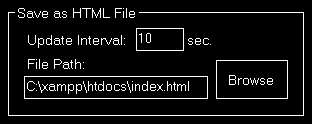
This method will save the status page as HTML file to a certain directory location in the defined time interval.
Upload to FTP Server
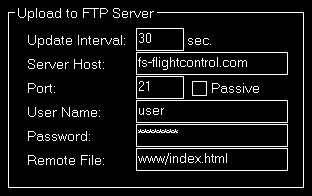
You can also enable this method to automatically upload the status page to a FTP server.
Then you need to define again the update interval as well as all parameters that are needed for FTP server access.
Mobile Devices
This section is related to the mobile devices support.
Android and iOS Client
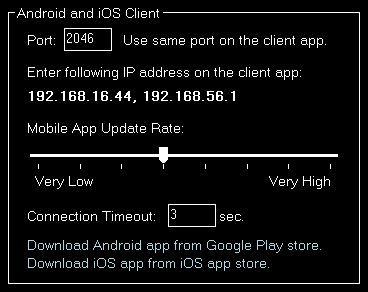
There is an Android client app that makes it possible to use FS-FlightControl also with your Android Tablet device.
You can define the port here that should be used for the connection. It defaults to 2046.
In the following you can see the IP address that you need to enter in the Android app once for connection.
Note: It rares cases it is possible that there is more than one IP address displayed here. In this case you just need to try which one works.
If you should see a Windows Firewall message popping up - normally on program start - asking you to give FS-FlightControl access please confirm that. Only with this approval you will be able to connect with your mobile device.
You can directly download the Android app from the Google Play storeas well as the iOS-App from the iOS App Store.
Units
Here all units for input as well as output used across the whole program can be defined.
Altitude Unit
Choose if feet (ft) or meters (m) should be used for altitude values.
Temperature Unit
Choose if Fahrenheit (°F) or Celcius (°C) should be used for temperature values.
Atmospheric Pressure

Choose if Hektopascals (hPa) or Inches of Mercury (inHg) should be used for atmospheric pressure values.
Short Distance Unit

Choose if feet (ft) or meters (m) should be used for short distance values.
Far Distance Unit

Choose if nautical miles (NM) or kilometers (km) should be used for far distance values.
Weight Unit

Choose if kilograms (kg) or pounds (lbs) should be used for weight values.
Speed Unit
Choose if knots (kt), miles per hour (mph) or kilometers per hour (km/h) should be used for speed values.
Liquid/Fuel Unit
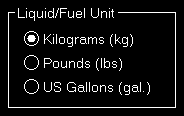
Choose if kilograms (kg), pounds (lbs) or US gallons (gal.) should be used for liquid and fuel values.
Visibility Unit
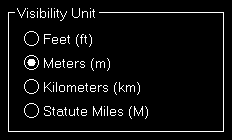
Choose if feet (ft), meters (m), kilometers (km) or statute miles (M) should be used for visibility values.
Other
In this section all other settings are located that do not fit into another category.
Input and Help
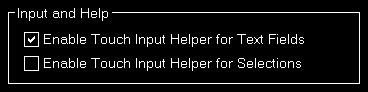
Here you can define if a touch input helper should be used for text and selection input fields.
Note: While the Android or iOS app is connected both touch input helpers are activated automatically.
Additionally you can choose if the small help icons should be displayed in the top right corner of all sections.
Furthermore you can make the FS-FlightControl window to stay always on top of all other applications.
Program Startup Options
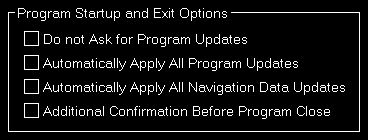
To allow a program start without user interaction you can define here that program updates as well as navigation data updates should always be applied without confirmation by the user.
Alternatively you can also disable the question regarding an update completely (which we do not recommend).
Furthermore you have the option here to activate an additional confirmation message before the program is really closed - in case of accidental clicks on the Exit button.
Online Network Status URLs

Here you can change the URLs where FS-FlightControl gets the status updates for VATSIM, IVAO and PilotEdge from.
This might be useful if you operate your own multi-player server. If you use, for example, the VATSIM format for providing online client information, you can inject this information into FS-FlightControl by pointing the VATSIM URL here to your own server.
You can also reset these URLs to their defaults.
Color Settings

Use this area to change colors used all over the software.
You can also use the button Reset to Defaults to revert all your color changes.
Unpause Delay
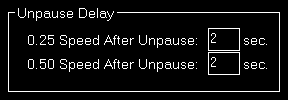
You can configure the unpause delay to your needs here.
This will be used to slowly accelerate your aircraft after the simulator was unpaused through FS-FlightControl.
Note: This option has no effect if you are connected to X-Plane.
Info
Directly send us a message also include log files in case of program issues.
You can also deactivate your license here if you want to use it on another computer.
Contact Form
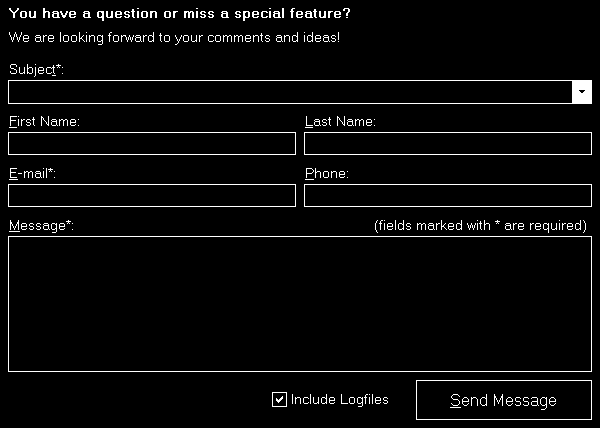
If you have any questions regarding the program or even a new idea, please do not hesitate to contact us!
You can directly use this contact form integrated into FS-FlightControl itself.
In case you should have found an issue you want to report please make sure to keep the checkbox Include Logfiles checked. This way we receive your log data together with your message and can better analyze a possible problem.
License Information

Below the contact form some information about your license is displayed.
You can use the button Deactivate License on this Computer to move your license to another computer. In this case please deactivate your license on the old computer first before activating it on the new one again.
Note: We also recommend to deactivate the license in advance if you plan to completely reinstall Windows on the same computer.
Copyright Notes

At the bottom some copyright notes are displayed.
In the bottom right you will additionally find the link Show Change Log that shows the program change log.
Change Log
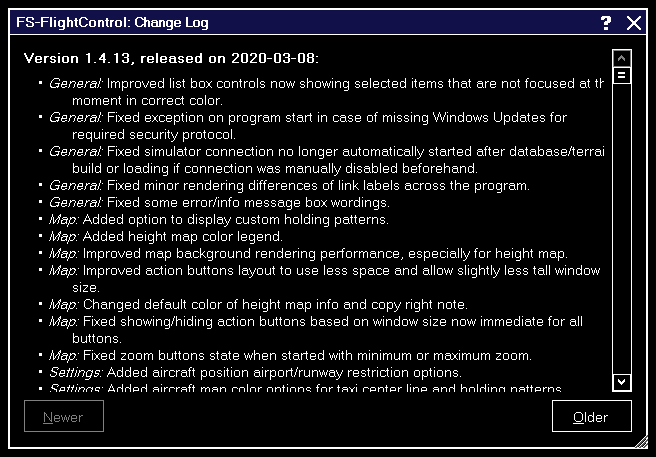
Here the change log of FS-FlightControl is displayed.
This way you can have a look on the change log at any time also after you have applied an update.
Hardware Key
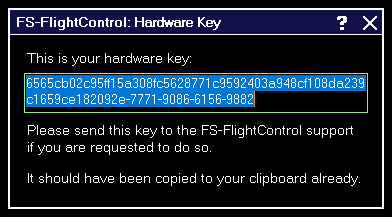
Please send this key to the FS-FlightControl support if you are requested to do so.
Dialogs
This manual section explains all dialogs that are used within FS-FlightControl and do not depend on a certain module:
License
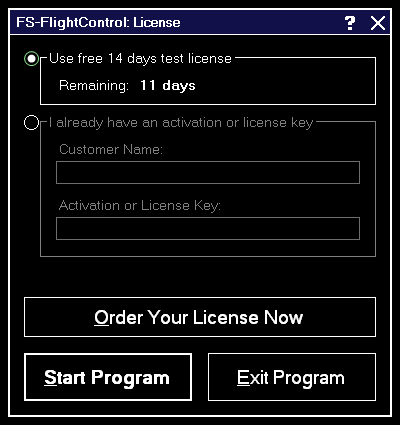
Use this dialog to enter your FS-FlightControl license information and activate the product or check how long your test license is still valid.
Test License

Here you can see how long your test license is still valid.
Note: You can even still start the program after the test license has expired, but then it will close automatically after 5 minutes.
License Data
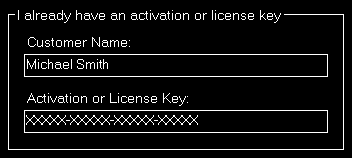
After your purchased your license, you can enter your activation data into this section.
Note: If you want to switch your license from one computer to another, just deactivate your license on the old computer in the Info module first.
Update Available
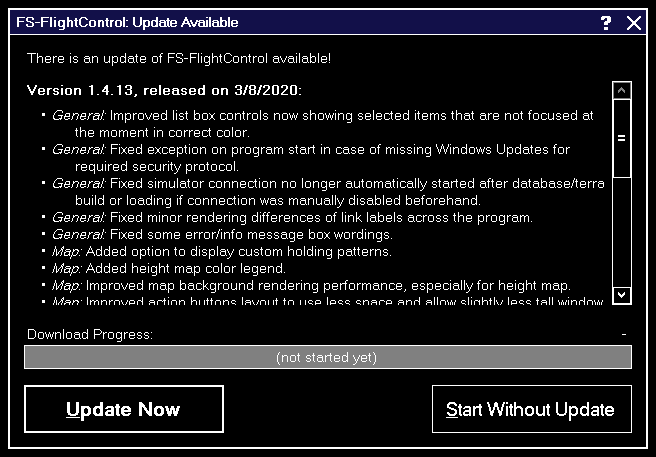
FS-FlightControl checks for program updates on every start automatically.
If there is an update available this dialog is shown with the list of changes.
It is recommended to always apply program update to benefit from new program features and corrections.
Navigation Data Update
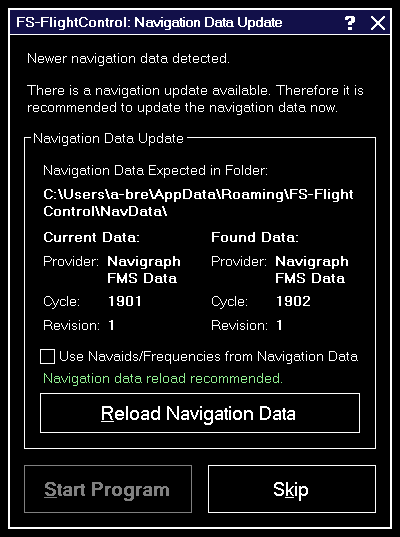
The navigation data update dialog informs you about a new AIRAC data cycle that you can import to FS-FlightControl to have up-to-date waypoints and airways.
Both Aerosoft with NavDataPro as well as Navigraph with FMS Data provide AIRAC data updates for FS-FlightControl.
Note: This separate navigation data update is only required for Prepar3D, FSX and FSW. For X-Plane please just start a new database build after you have updated the X-Plane internal navigation database.
Update Information

This section shows the current and new data provider as well as some information about the data cycles involved.
It is recommended that you reload the navigation data whenever an update is available to always work with the latest waypoints and airways in FS-FlightControl.
AIRAC Data Usage
In this section we want to provide you with some information about which part of the AIRAC data is currently imported and used by FS-FlightControl.
Currently only waypoints, airways as well as SID and STAR procedures are imported from the AIRAC data, but no airports and navaids. Also frequencies are not updated based on the AIRAC data.
The reason for this is that it just makes no sense if you see for example a new runway of an airport in FS-FlightControl, because this is imported from the AIRAC data, but this new runway just is not present in flight simulator itself.
Same goes for the frequencies: An ILS frequency will only work correctly if flight simulator knows about exactly this frequency. Therefore it is important that you see in FS-FlightControl the same frequency that also flight simulator uses - also if this might be outdated.
We recommend to keep the flight simulator data itself as up-to-date as possible. You can do so by getting new sceneries for airports and regions you are mainly flying. But there are also free tools to update frequencies in flight simulator, for example on this website.
Note: Please keep in mind that you always need to start a database rebuild in FS-FlightControl after you did changes to your flight simulator data.
Maximum Activation Count

This dialog is displayed when you tried to activate FS-FlightControl on more computers than you have purchased licenses for.
If you should try to move FS-FlightControl to a new computer, please deactivate the license on the old computer first: You can easily do so in the Info module.
After deactivation of the license on the old computer you can activate it again on a new one. If the deactivation on the old computer should not be possible for some reasons, please contact us.
In case you need more licenses, you can purchase them for a considerably reduced price. Just click on the button Buy Additional PC License in this dialog.
Choose Simulator
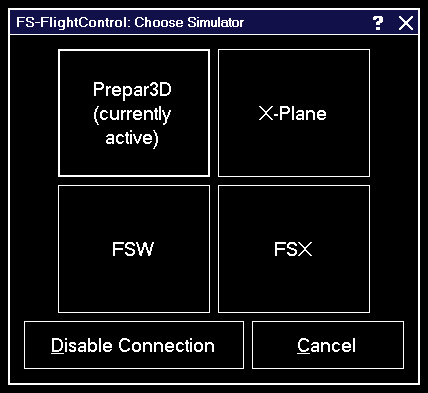
This dialog gives you the option to easily switch between the simulators that have been created in the Settings module.
You can also completely disable the simulator connection.
Touch Input Helper
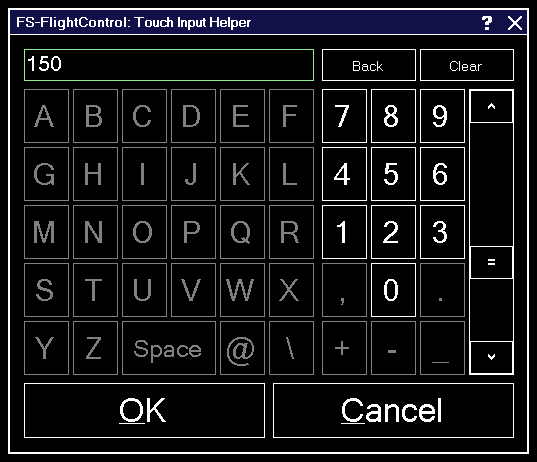
The touch input helper dialog enables you to easily work with FS-FlightControl also with a touch-enabled monitor or tablet device without any keyboard or mouse involved.
By default the touch input helper is enabled and will pop-up whenever you click or touch in an input field.
If you should not like or need this, you can easily disable it in the Settings module.
Note: While the Android or iOS app is connected the touch input helper gets activated automatically independent of your settings.
Touch Input Helper for Selection
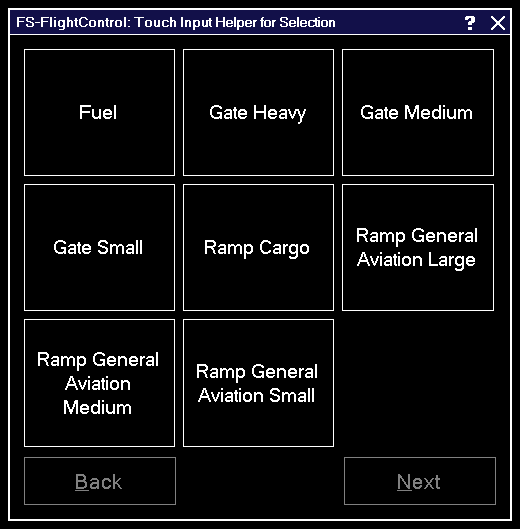
The touch input helper dialog for selection enables you to easily work with FS-FlightControl also with a touch-enabled monitor or tablet device without any keyboard or mouse involved.
If you would like to enable it, you can do so in the Settings module.
Note: While the Android or iOS app is connected the touch input helper for selection gets activated automatically independent of your settings.
Select Aircraft Profile
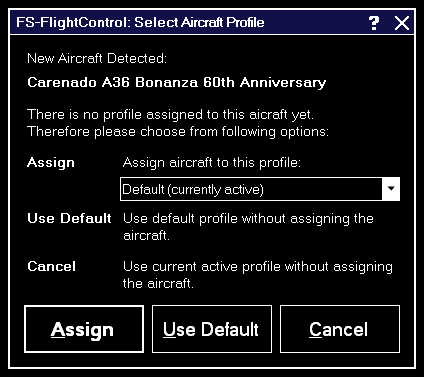
Assign an aircraft to an aircraft profile with this dialog after the current aircraft was changed in your flight simulator.
You can also choose to use the default or the current profile without assigning the aircraft.
Note: This dialog will only appear if you have enabled aircraft profiles in the Settings module.
Select Airport
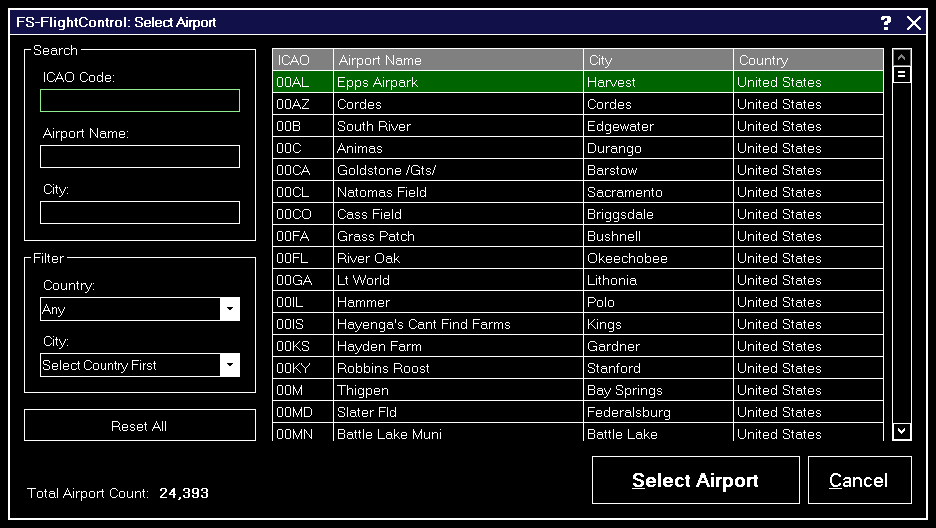
You can search for an airport by entering the ICAO code, airport name or city.
Alternatively you can also filter the list by selecting a country or city.
For your information the total count of all airports is displayed at the bottom.
Select Runway
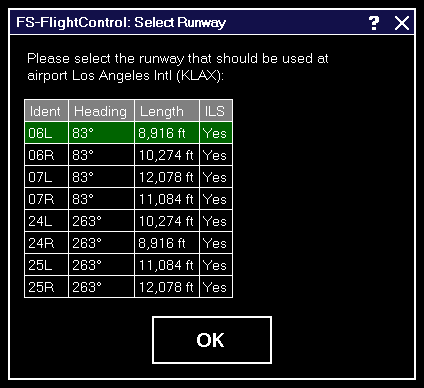
With this dialog you can select the runway that should be used.
Select Airway

If between two flight plan waypoints there is more than one airway this select airway dialog will be displayed giving you the option to choose one.
Select Procedure
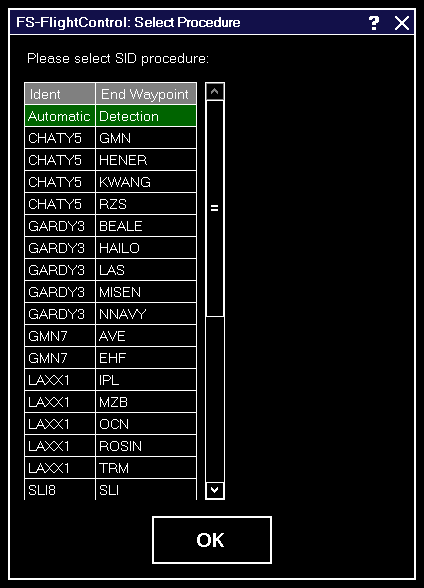
When an airway route using SIDs and STARs is calculated this dialog gives you the option to choose a specific SID or STAR.
Alternatively you can just leave it as Automatic Detection which will use the SID/STAR resulting in the shortest overall route distance.
Find Object
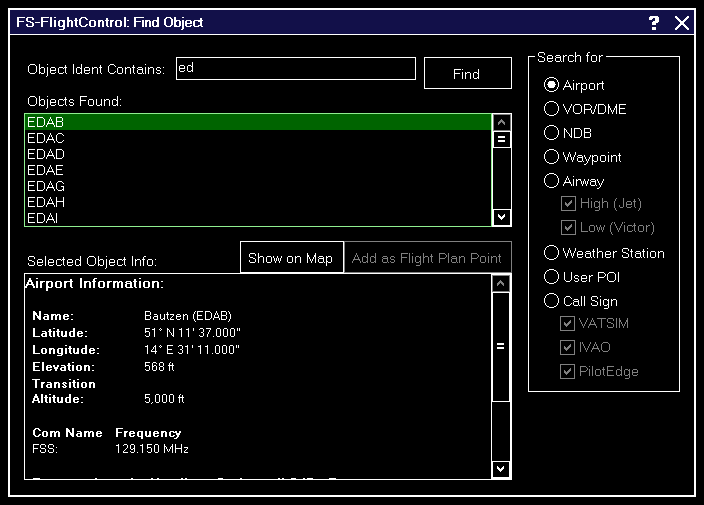
In this dialog you can search for a wide range of different objects on the map.
Just type in the first characters of the ident of the object you want to find and select what type of object you are searching for.
After clicking on the Find button a list of found objects matching your search criteria will be displayed.
When you click on one of them information about this object is displayed similar to the Map Information pop-up.
Then you can click on Show on Map to center the currently selected object on the map. You can even use the button Add as Flight Plan Point to directly add the selected object to your flight plan if this is possible for the object type.
Note: Generally all objects are found here also if the corresponding map layer is currently disabled. But this is not the case for the call sign search of the online networks: These can only be found if the corresponding layer is activated.
Real-Time Weather Information
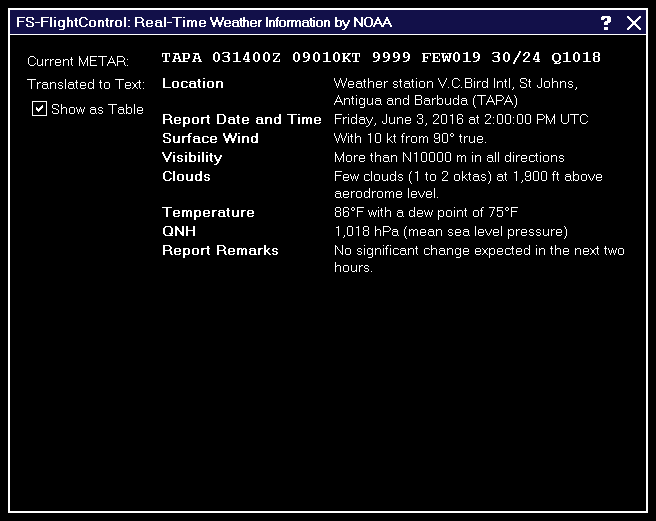
In this dialog the real-time METAR data of the selected airport or weather station is displayed.
Additionally the METAR data is decoded into readable text in which you can decide if it should be displayed as table or as continuous text.
Note: You can change the used real-time weather source in the Settings module.
Please wait
Whenever there is a process executed you need to wait for this dialog is displayed.
Note: A progress and also the option to cancel the process is not always available.
Other
In this section everything that does not fit anywhere else is located:
Title Bar
In the title bar of FS-FlightControl much information is displayed that is explained in the following.
Additionally some actions can be triggered from the title bar as well.
Product Name and Version

First the product name and the current product version is displayed.
License Status

Next on the left side you see your license status.
Loaded Aircraft

At first on the right side the name of the currently in flight simulator loaded aircraft is displayed.
Connection Status

Beside that the current connection status to the flight simulator is shown.
This can be either Connected in green, Connecting… in yellow or Disconnected in red.
If you click on the connection status the connection to flight simulator will be disabled resulting in the text Disabled being displayed in blue. Clicking on it once again will enable the connection again.
In case you have more than one simulator defined the Choose Simulator dialog will appear instead.
Window Action Icons
![]()
On the top right you can find several window action icons.
Their functionality is in the display order like this:
- Minimizes the FS-FlightControl window to the task bar.
- Maximizes the FS-FlightControl window. If it was already maximized clicking again on this icon will revert it to normal window state. Double-clicking on the title bar has the same effect than clicking on this icon.
- Detaches the currently loaded FS-FlightControl module to a separate window.
- Opens this online manual.
- Closes the FS-FlightControl program.
Main Menu Buttons

On the bottom of the FS-FlightControl window the main menu buttons are displayed.
All buttons in the first row and the buttons up to Settings in the second row as well as the About button will show the corresponding FS-FlightControl module.
The Freeze button will trigger an aircraft position freeze in flight simulator. This means that you can still control the aircraft (flight simulator is not paused), change parameters like pitch and bank angle as well as airspeed, but the aircraft will not leave its current position. This can be used, for example, after the aircraft was positioned on an approach to give the pilot a chance to get all aircraft parameters like airspeed under control before the real approach starts. If the aircraft position is currently frozen this button will be displayed in red.
In contrast the Pause button will completely pause the flight simulator. If the flight simulator is currently paused this button will be displayed in red.
Finally the Exit button will close the FS-FlightControl application.
Right down at the bottom right there are some small diagonal lines displayed. Click and hold in this area to resize the FS-FlightControl window to your needs.
Keyboard Shortcuts
All main menu buttons can also be access by keyboard shortcuts.
Just keep the keys CTRL and SHIFT pressed and then add one of the following keys for the corresponding module or action button:
| Key | Module or Action |
|---|---|
P | Position |
M | Map |
F | Flight Plan |
C | Conditions |
B | Pushback |
L | Fuel/Load |
V | View/Slew |
I | Failures |
A | Aircraft |
S | Statistics |
N | Network |
O | Motion |
T | Settings |
H | Info |
U | Pause |
E | Exit |
Aircraft Support
You may notice a sentence like this in some areas of FS-FlightControl:
All functions in this module are highly aircraft dependent.
They may work well with third party aircraft, too, but we can only guarantee that they work with all default aircraft of flight simulator.
This restriction arises due to the fact that several third party aircraft vendors do not stick to the default flight simulator access functions, but use their own proprietary techniques.
Obviously we therefore cannot make sure that every button in the program areas where this info is displayed work with all third party aircraft.
Note: This applies only to few areas of the program and does not mean they do not work with third party aircraft, we just cannot guarantee it.
Command Line Parameters
You can use these command line parameters to enable or also to disable certain functions of FS-FlightControl.
Currently there is only one command line parameter available:
/doNotSaveSettings: If used settings can be changed by the user, but changes will be discarded on program close.
Note: All command line parameters are case insensitive.