Table of Contents
Conditions
Define and save detailed custom weather conditions, enable real-time weather, set ILS visibility for all categories and set season, time and simulation rate.
Current Weather
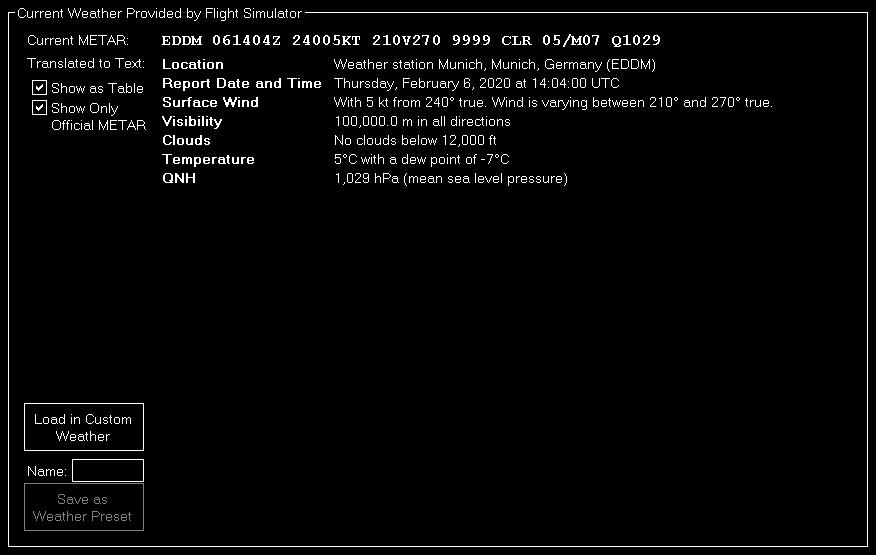
In this section the current weather is displayed as METAR code and translated text.
You can choose if the translated text it displayed as continuous text or structured table. Additionally you can decide if all or only official weather METAR data is displayed.
 Note: The flight simulator uses the official METAR format, but extends is with additional extensions. FS-FlightControl can decode both, the official METAR data as well as the flight simulator extensions.
You can load the current weather into the custom weather section or save it as weather presets.
 Note: The option to
 Load in Custom Weather is only available if you do not have the Simplified Weather Control option enabled in the Settings module.
Weather Themes
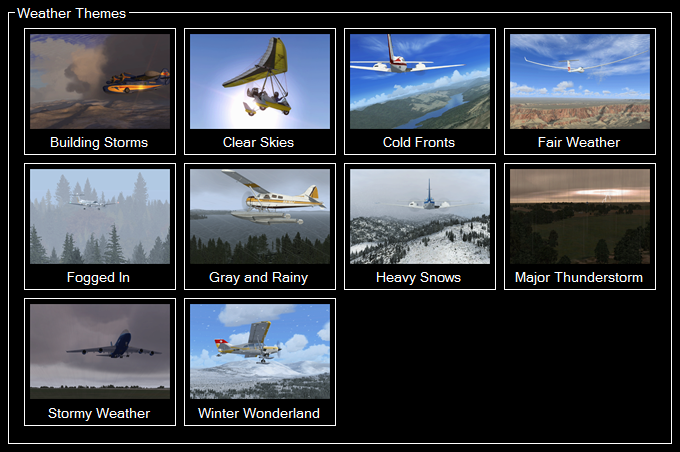
Here all themes that are available in the flight simulator are listed and can be activated with just one click.
 Note: This section does not appear if Active Sky is enabled as weather engine in the Settings module.
Real-Time Weather
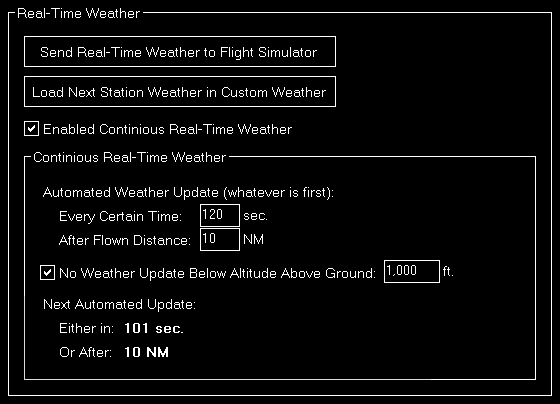
You have the option to enable real-time weather in this section.
Therefore you can either send the current real-time weather directly to flight simulator or load it into the custom weather section.
 Note: You can change the used real-time weather source in the Settings module.
 Note: This section does only appear if Prepar3D, FSX or FSW is selected as simulator type and Active Sky is not enabled as weather engine in the Settings module.
 Note: Real-time weather in Prepar3D, FSX or FSW is limited to existent ground weather stations with upper level winds being interpolated.
Continuous Real-Time Weather
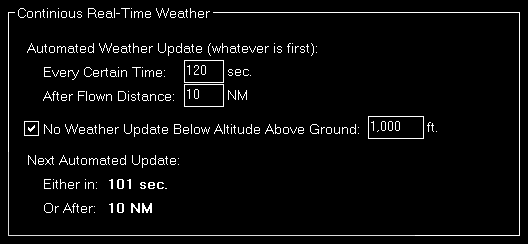
To enable continues real-time weather just activate the corresponding check box. This will enable automated real-time weather updates for all weather stations around the current aircraft location.
You can choose how often this weather update should be performed by entering a certain time interval or a flown distance (or both).
Additionally you can define that automated weather updates should not be performed when the aircraft is below a certain altitude above ground. This makes sure that the pilot is not disturbed while doing a final approach.
Below that some information is displayed to show when the next automated weather update will be performed.
Real-Time Weather for X-Plane
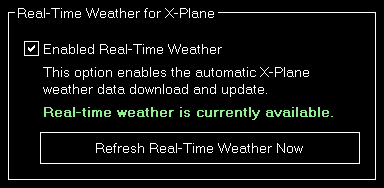
You have the option to enable real-time weather in this section.
Additionally you will see the current availability status of the real-time weather and you have the option to use the button Refresh Real-Time Weather Now to reload the weather at any time.
 Note: This section does only appear if X-Plane is selected as simulator type.
Weather Mode for Active Sky Weather Engine
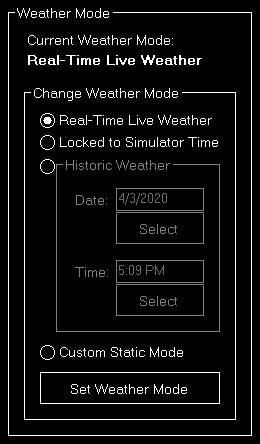
In this area you can see the current Active Sky weather mode and change it, too.
 Note: This section only appears if Active Sky is enabled as weather engine in the Settings module.
Change Weather Mode
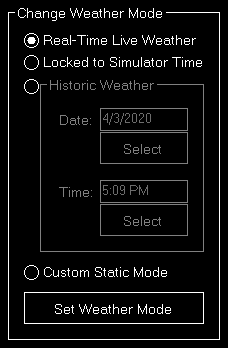
Select the desired weather mode here and set it with the button Set Weather Mode.
Historic Dynamic Weather
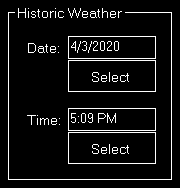
If you have chosen the hisotoric dynamic weather mode you can set the historic date and time here.
Use the corresponding Select button to open the Select Date or Select Time dialog.
Weather Effects for Active Sky Weather Engine
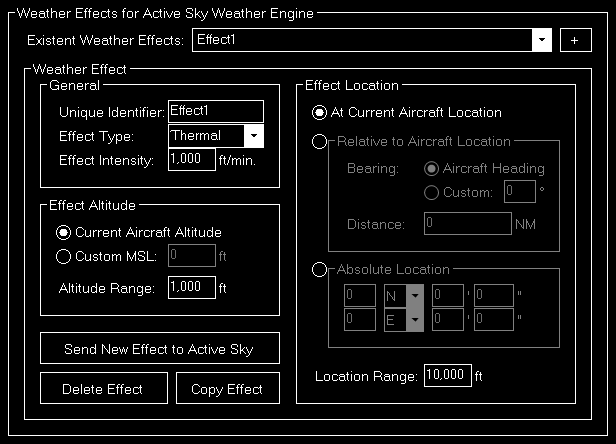
In this area you can create new and edit existent Active Sky weather effects.
 Note: This section only appears if Active Sky is enabled as weather engine in the Settings module.
Weather Effect
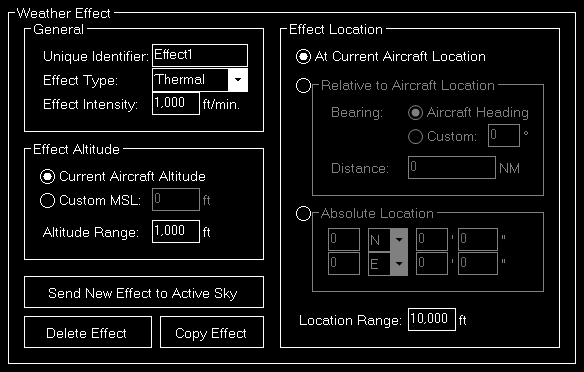
Here different options of the weather effect can be changed.
Use the button Send New Effect to Active Sky to active a new weather effect, the button Delete Effect to remove an existent one again and Copy Effect to create a duplicate of the current selected effect.
 Note: An already sent weather effect cannot be changed anymore. Please just duplicate it and then remove the old one.
General
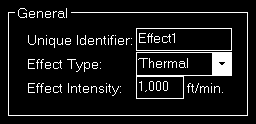
First you can enter a name for the weather effect here and set the effect type as of
- Thermal
- Downdraft
- Updraft
- Turbulence
- Windshear
Then the effect intensity can be defined as vertical speed for thermal, downdraft and updraft effect types and as an intensity between 1 and 5 for the turbulence and windshear effect types.
Effect Altitude
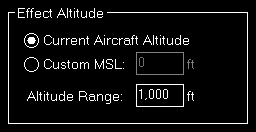
You can choose here if the current aircraft altitude should be used for the effect or you want to define an altitude (MSL) manually.
Additionally an altitude range can be set: So if you define, for example, an custom altitude of 10,000 ft and an altitude range of 1,000 ft the effect will be active between 9,500 and 10,500 ft.
Effect Location
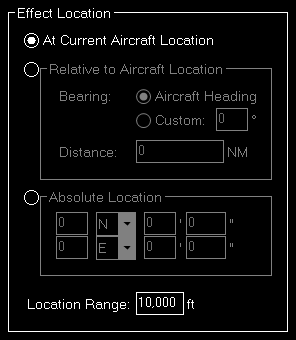
Select here if the effect should be placed at the current aircraft location, relative to the aircraft location or at a custom absolute location.
Additionally a location range can be set defining the radius around the location where the effect should be active.
Relative to Aircraft Location
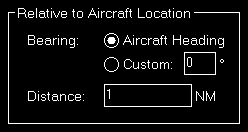
If the effect should be placed relative to the aircraft location, you first need to choose if it should be place in the direction of the current aircraft bearing or in a custom direction.
Then you need to define the distance the effect should be placed away from the aircraft.
Absolute Location
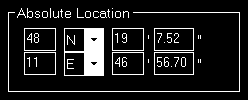
In case of an absolute position you can directly enter the latitude and longitude of the position where the weather effect should be located.
ILS Visibility
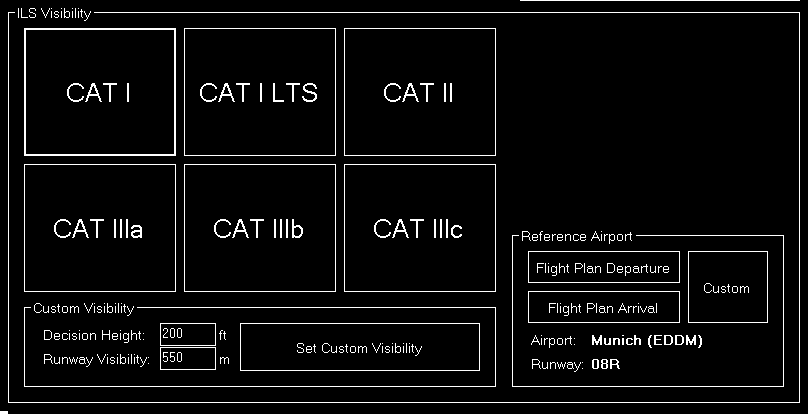
Use this section to set a pre-defined visibility condition for any of the ILS categories.
Following values are the default for decision height and runway visibility:
| Decision Height | Runway Visibility | |
|---|---|---|
| CAT I | 200 ft (60 m) | 1,800 ft (550 m) |
| CAT I LTS | 200 ft (60 m) | 1,300 ft (400 m) |
| CAT II | 100 ft (30 m) | 1,000 ft (300 m) |
| CAT IIIa | 50 ft (15 m) | 600 ft (180 m) |
| CAT IIIb | 30 ft (10 m) | 150 ft (46 m) |
| CAT IIIc | 0 ft (0 m) | 30 ft (10 m) |
 Note: You can customize these presets in the Settings module to your needs.
Custom Visibility

Additionally you can also set directly a custom visibility using a specified decision height and runway visibility as well.
Reference Airport
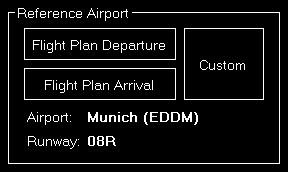
The ILS visibility needs to be defined in relation to a reference airport and runway which you can specify here.
By default it uses the airport of the last approach in the Position module, but you can also take over your flight plan departure or arrival airport or defining any custom one.
 Note: If no airport is specified here it will use the ground elevation below the current aircraft position for calculations which might lead to wrong visibility results.
Custom Weather
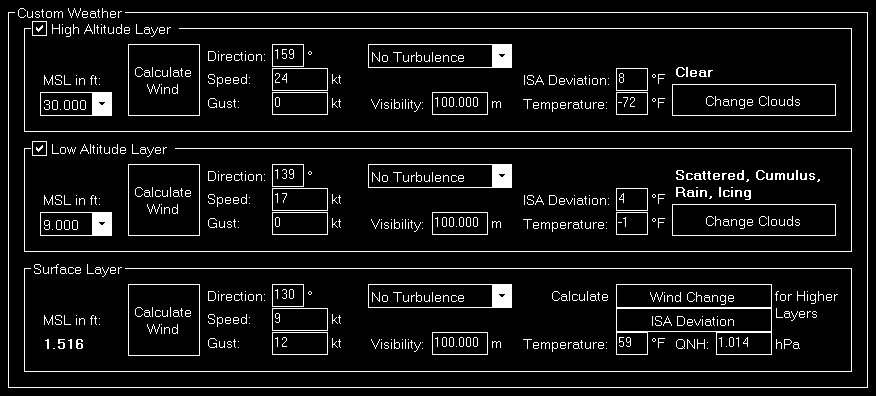
In case you want to define a completely custom weather situation you can do so in this section.
 Note: This version of the custom weather section appears
 Enable Simplified Weather is selected in the Settings module.
Activate
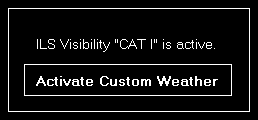
In case you have a different weather control option (like ILS visibility or real-time weather) enabled you will have to activate the customer weather control first before you can start using it.
High Altitude Layer

This section creates a high altitude layer.
If you have enabled this layer can first selected the altitude level where this layer will be applied to.
Next the wind for this layer can be defined either manually by entering the wind direction, speed and gust values or by using the Calculate Wind dialog.
There is also the option to set the intensity of turbulence in this layer as well as the visibility.
By default the temperature is automatically calculated based on the ISA atmosphere, but values can be adjusted here as needed either by specifying the deviation from the ISA atmosphere or a temperature directly.
Additionally you can see which clouds and precipitation is present in this layer. Both can be configured using the Change Clouds button.
Low Altitude Layer

The options of the low altitude layer are exactly the same as for the high altitude layer.
 Note: Wind and temperature values between the layers are automatically interpolated to ensure a smooth transition between them.
Surface Layer

The options for the surface layer are also very similar to the layers above.
You can define a local QNH here and also calculate the winds for the higher layers: This will apply a standard model of geostrophic winds turning with increasing altitude to the right in the Northern and left in the Southern Hemisphere.
Also applying the same ISA temperature deviation (based on the surface elevation) to the higher layers is possible.
Calculate Wind
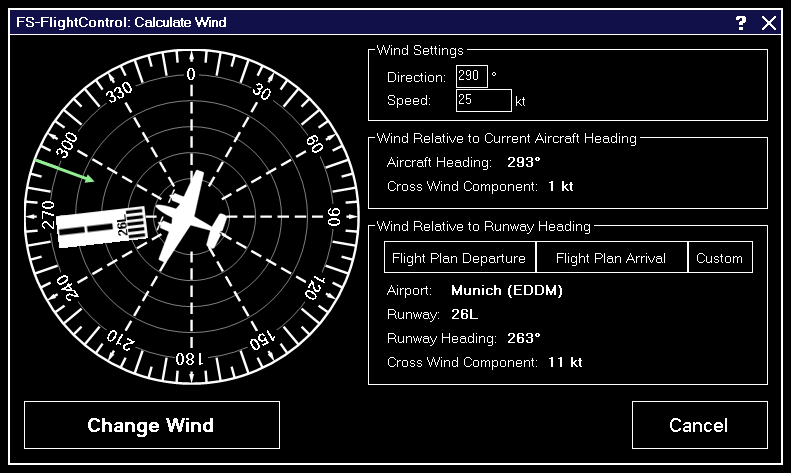
This dialog allows you to visually change the wind direction and speed.
Just click in the compass rose from where the wind should come from. The length of the arrow defines the wind speed.
You can also see the current aircraft heading as well as the runway if an airport and runway is selected.
Wind Settings

Alternatively you can also set the wind direction and speed manually here.
Wind Relative to Current Aircraft Heading

This section shows your current aircraft heading and calculates the cross wind component relative to that.
Wind Relative to Runway Heading
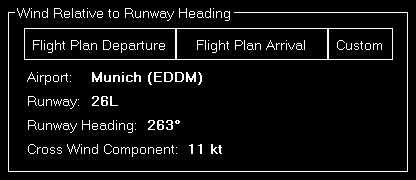
First you can select here the airport and runway either by taking over your flight plan departure or arrival airport or defining any custom one.
Then it will calculate the cross wind component accordingly.
Change Clouds

This dialog makes it simpler to change the cloud layer as well as set a certain precipitation.
 Note: The available options will vary based on the simulator and weather engine type.
Coverage
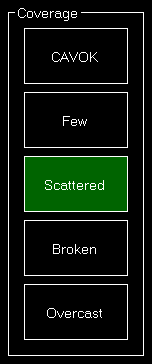
First you can select the coverage of the cloud layer.
Type
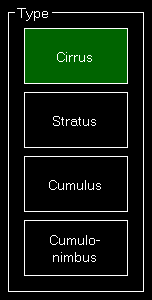
Next the cloud type can be selected.
Precipitation
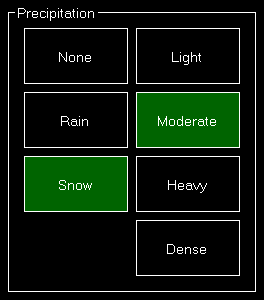
Now the precipitation type as well as its intensity can be defined.
Icing
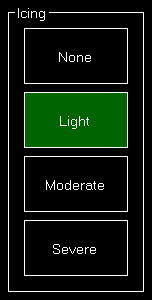
You also have the option to select the amount of icing in this cloud layer
Height

Finally you can define the height of the cloud above the ground (independent of the current layer altitude) and set the upper limit of the cloud.
 Note: The upper cloud limit can only be set when Active Sky weather engine is used.
Custom Weather for Prepar3D, FSX and FSW
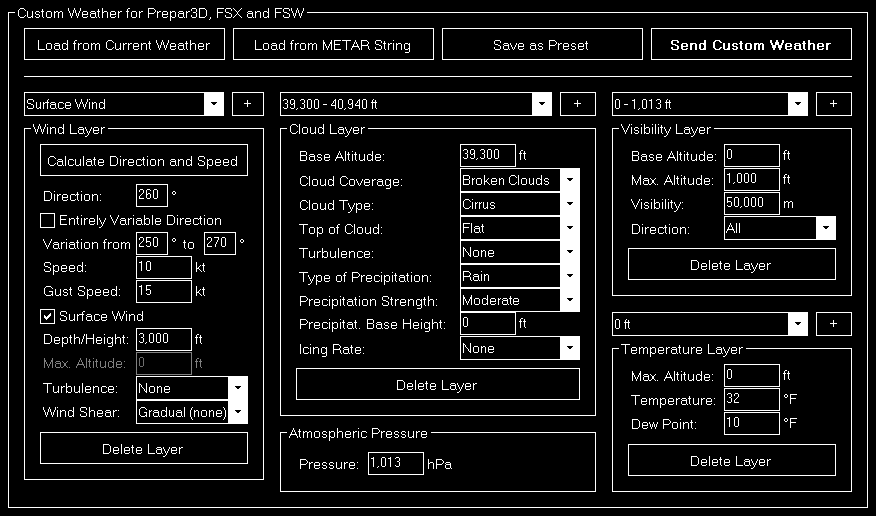
In case you want to define a completely custom weather situation you can do so in this section.
 Note: This version of the custom weather section appears if Prepar3D, FSX or FSW is selected as simulator type.
Load and Send Weather

You can load into the custom weather from the current weather or from a METAR string here.
Also saving the custom weather as a new weather presets is possible using the Save as Preset button.
To send the weather defined in these custom weather sections to the flight simulator, just click on the Send Custom Weather button.
Load METAR String
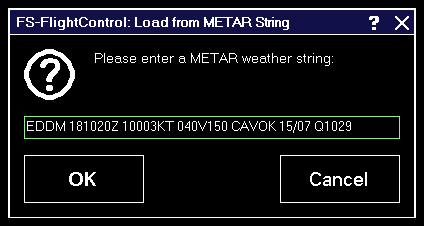
If you have a METAR string as starting point for your custom weather enter it here. This will decode the weather situation defined in the METAR string into the custom weather sections.
Wind Layers
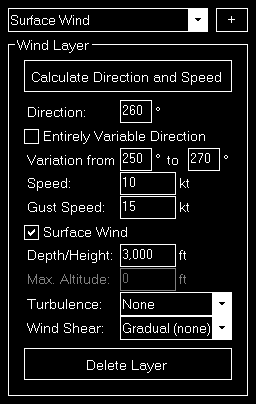
You can define all wind layers - including the surface wind - in this section.
First you can define the direction where the wind is coming from. You have two additional options regarding the wind direction:
You can define it as Entirely Variable or even enter the from and to direction where the wind is coming from. If the wind should come only from a fixed direction, just keep the Entirely Variable Direction check box unchecked and the variation input fields as 0.
Next enter the speed and optional gust speed (keep it 0 if not needed) of the wind layer.
There is also a Calculate Wind dialog that allows you to set the wind direction and speed visually.
Next you can define if the current wind layer is a surface wind or an wind aloft. In case of a surface wind you have the additional option to define a depth/height of the wind and if it is a wind aloft you can define a maximum altitude (MSL) for it instead.
 Note: You may add as many wind layers as you want, but there can be only one of them defined as surface wind.
Finally you can define turbulences in this wind layer as
- None
- Light
- Moderate
- Heavy
- Severe
and wind shears as:
- Gradual (none)
- Moderate
- Steep
- Instantaneous
Cloud Layers
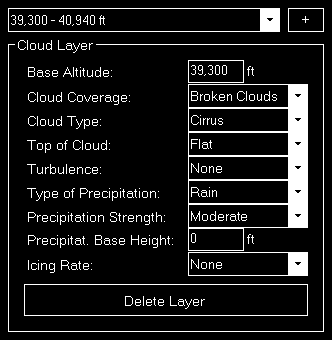
Here you can define all cloud layers of the custom weather situation.
First enter a base altitude (MSL) for the cloud layer.
Then you can define several additional parameters for like cloud coverage as of
- Few Clouds
- Scattered Clouds
- Broken Clouds
- Overcast
- 1/8 Coverage
- 2/8 Coverage
- 3/8 Coverage
- 4/8 Coverage
- 5/8 Coverage
- 6/8 Coverage
- 7/8 Coverage
- 8/8 Coverage
cloud type as of
- Cirrus
- Stratus
- Cumulus
- Cumulo-nimbus
top of the cloud as of
- Flat
- Round
- Anvil
turbulences in the cloud layer as of
- None
- Light
- Moderate
- Heavy
- Severe
type of precipitation as of
- None
- Rain
- Freezing Rain
- Hail
- Snow
precipitation strength as of
- Very Light
- Light
- Moderate
- Heavy
- Dense
the base altitude of the precipitation as well as the icing rate as of
- None
- Trace
- Light
- Moderate
- Severe
Visibility Layers
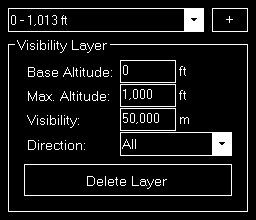
The visibility layers of the custom weather situation can be defined in this section.
First enter the base and maximum (top) altitude (MSL) of the visibility layer.
Then you can define the visibility in this layer itself.
Finally you can decide in which direction this visibility should be effective as of
- All
- North-West
- North
- North-East
- East
- South-East
- South
- South-West
- West
 Note: To set the same visibility for more than one direction, but not for all, just create another visibility layer with the same base and maximum altitude.
Temperature Layers
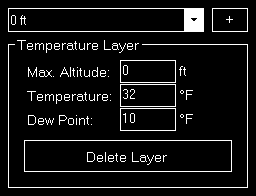
Also individual temperature layers can be defined for your custom weather situation.
First enter the maximum altitude (MSL) up to which this layer should be valid.
Then you can enter the temperature and dew point of this temperature layer.
Atmospheric Pressure

Here you can define the atmospheric pressure for your custom weather situation.
Custom Weather for X-Plane
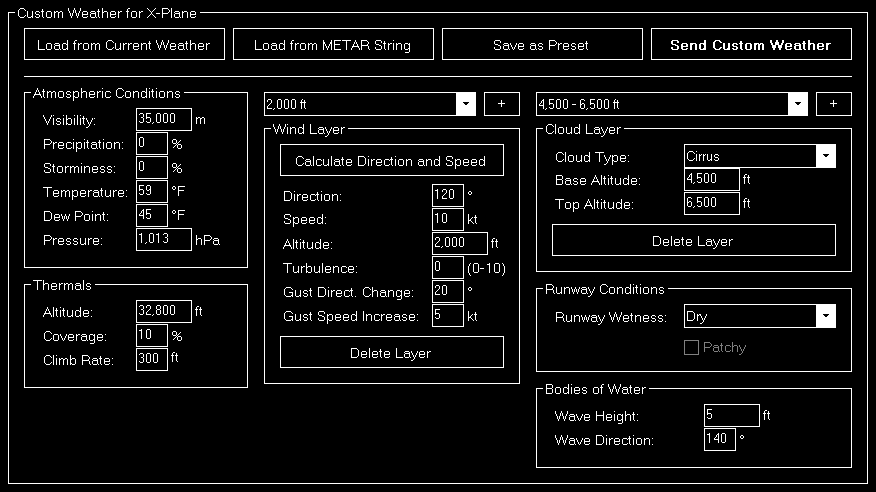
In case you want to define a completely custom weather situation you can do so in this section.
You can also load and send weather from here.
 Note: This version of the custom weather section appears if X-Plane is selected as simulator type.
Atmospheric Conditions
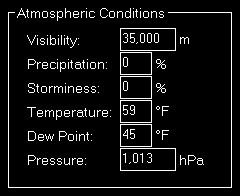
Here you can first define the visibility followed by the precipitation and storminess as percentage.
Additionally the temperature, dew point and atmospheric pressure can be set.
Thermals
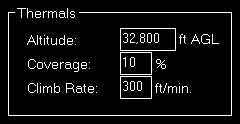
You can define thermal effects in this section.
First enter the altitude where the thermal effect should occur.
Then you can set its coverage as percentage as well as the climb rate.
Wind Layers
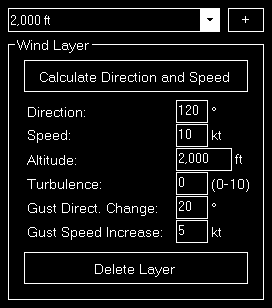
You can define all wind layers in this section.
First enter the direction, altitude and speed of the wind layer.
There is also a Calculate Wind dialog that allows you to set the wind direction and speed visually.
Next you can define the turbulence intensity between 0 and 10.
Finally the gust direction change and speed increase can be set.
Bodies of Water

In this section the water wave height and direction can be defined.
Cloud Layers
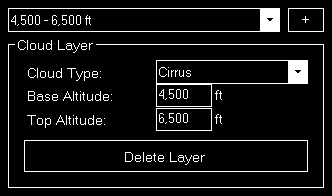
Here you can define all cloud layers of the custom weather situation.
First choose the cloud type as of
- Cirrus
- Few Cumulus
- Scattered Cumulus
- Broken Cumulus
- Overcast Cumulus
- Stratus
Then you can enter a base and top altitude (MSL) for the cloud layer.
Runway Conditions

Here you can choose the runway conditions as of
- Dry
- Damp
- Wet
If you have chosen Damp or Wet you can additionally decide if the runway surface should be patchy or not.
Custom Weather for Active Sky Weather Engine
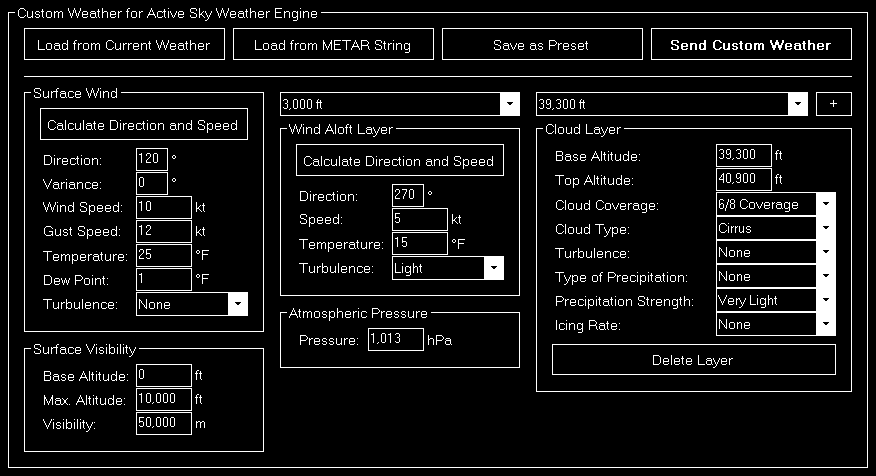
In case you want to define a completely custom weather situation you can do so in this section.
You can also load and send weather from here.
 Note: This version of the custom weather section only appears if Active Sky is enabled as weather engine in the Settings module.
Surface Wind
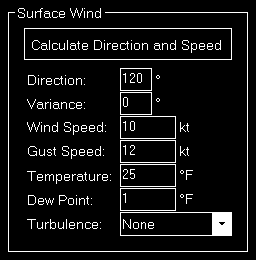
You can define the surface wind in this section.
First you can define the direction where the wind is coming from including a variance.
Next enter the speed and optional gust speed (keep it 0 if not needed) of the wind.
Also the temperature and the dew point on the surface can be defined here.
Finally you can define turbulences in the surface wind as:
- None
- Light
- Moderate
- Heavy
- Severe
Surface Visibility
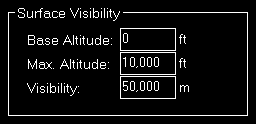
The surface visibility of the custom weather situation can be defined in this section.
First enter the base and maximum (top) altitude (MSL) of the visibility layer.
Then you can define the visibility itself.
Wind Aloft Layers
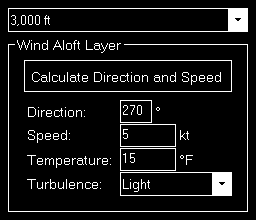
You can define all wind aloft layers in this section.
First enter the direction and speed of the wind layer.
There is also a Calculate Wind dialog that allows you to set the wind direction and speed visually.
Next you can define the temperature and finally the turbulences in this wind layer as:
- None
- Light
- Moderate
- Heavy
- Severe
 Note: The altitudes of the individual wind layers cannot be changed for Active Sky.
Cloud Layers
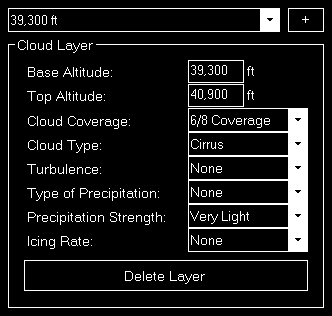
Here you can define all cloud layers of the custom weather situation.
First enter a base and top altitude (MSL) for the cloud layer.
Then you can define several additional parameters for like cloud coverage as of
- 1/8 Coverage
- 2/8 Coverage
- 3/8 Coverage
- 4/8 Coverage
- 5/8 Coverage
- 6/8 Coverage
- 7/8 Coverage
- 8/8 Coverage
cloud type as of
- Cirrus
- Stratus
- Cumulus
- Cumulo-nimbus
turbulences in the cloud layer as of
- None
- Light
- Moderate
- Heavy
- Severe
type of precipitation as of
- None
- Rain
- Freezing Rain
- Hail
- Snow
precipitation strength as of
- Very Light
- Light
- Moderate
- Heavy
- Dense
as well as the icing rate as of
- None
- Trace
- Light
- Moderate
- Severe
Atmospheric Pressure

Here you can define the atmospheric pressure for your custom weather situation.
Weather Presets
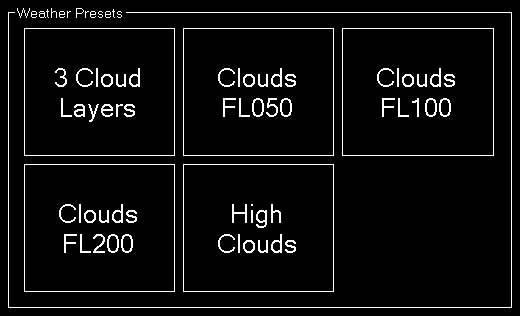
All your saved weather presets are listed here. There is no limit in the number of weather presets you can define.
Pop-Up Menu

If you right click (long “touch”) on a weather preset this pop-up menu will be shown enabling you to rename, delete or edit an existent weather preset again.
Rename Weather Preset
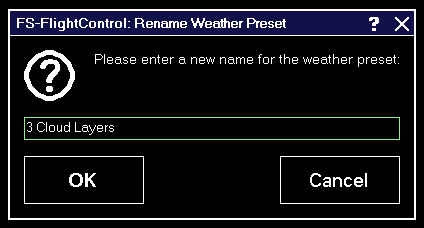
Here you can set a new name for an existent weather preset.
Season and Time
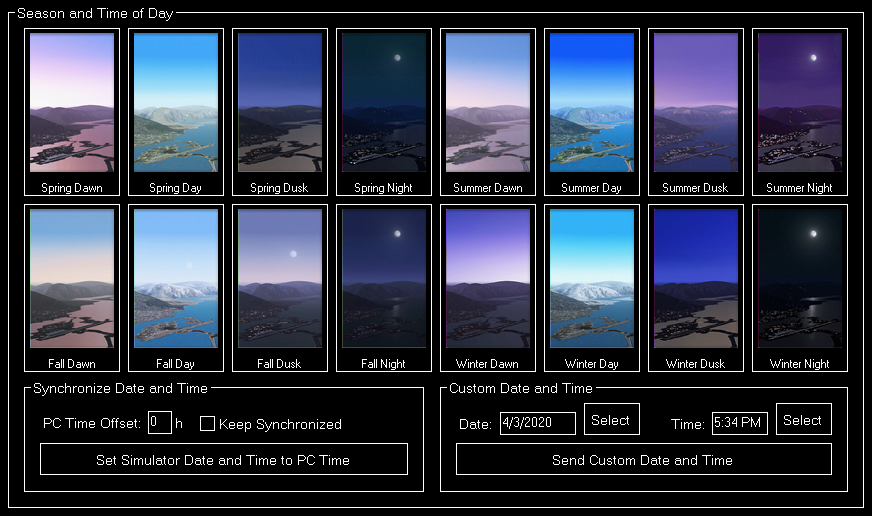
In this section you have a quick and easy control of the current season.
Just click on one of the pre-defined season buttons.
Synchronize Date and Time

There is also the option to synchronize the simulator date and time with the one of the computer, optionally with a certain time offset.
You can either do a one-time synchronization manually or keep it synchronized automatically.
Custom Date and Time

Additionally you can define a completely custom date and time in this section.
Use the corresponding Select button to open the Select Date or Select Time dialog.
Simulation Rate

Beside a very detailed weather configuration system this module offers here also an easy way to change the current simulation rate of the simulator.
Only for X-Plane additionally the actual simulation rate is shown next to the currently requested one. For Prepar3D, FSX and FSW these two are always identical.
Sound

It is possible to mute and un-mute the simulator sound from here.
General Info

Additionally in the bottom right of the screen you always have an eye on the current frame rate and simulator time.